How to create and activate a new account in AWS ?:
In this blog, you will see the required steps for creating and activating your new AWS account. Once have the activated account, you can start your other lab practices as I discuss in the class timely.
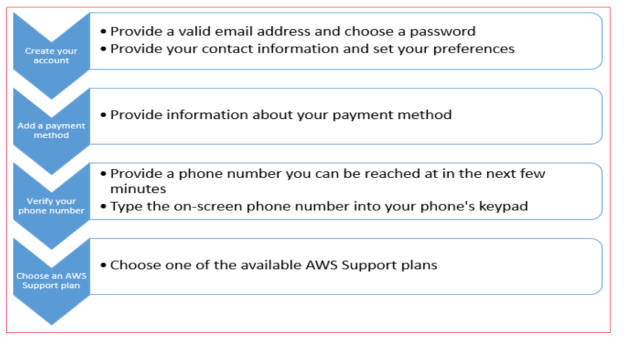
The following are the main 4 steps process we need to follow:
STEP1: Creating your account. It consists of 2 steps: a) Providing a valid e-mail address and choosing a password. b) Providing your contact information and setting your preferences.
STEP2: Add a payment method Please note; you need to have a valid CC to give its details. Amazon verifies its transaction also with a tiny charge and with a credit back. If by mistaken given wrong data please note; your account registration process will not be activated. You will be intimated by mail. This way Amazon is authenticating/authorizing us for AWS usage.
STEP3: Verify your phone number. You need to Provide a phone number where you can be reached in next few minutes, while creating your account.
STEP4: Choose the AWS Support plans. Time to time the AWS plans will be published. You need to choose the plan from the currently available plans for your needs. The relevant URL is given in the detailed steps section in this blog.
As a consolidated process, we can understand from the below flow chart. Which is from the collection of AWS process charts.
Note:
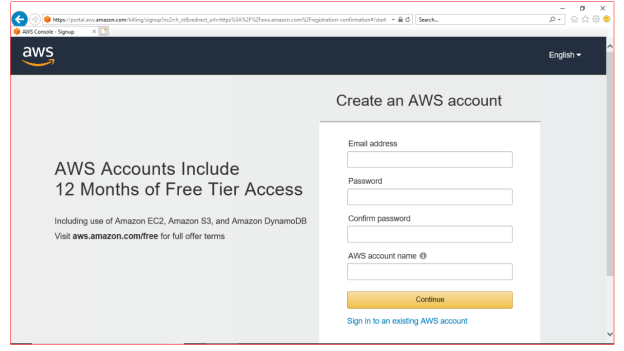
I am not copying the screens due to privacy.
Detailed steps
STEP1: Detailed steps for Creating your account.
a). You need to go to Amazon Web Services home page URL: https://aws.amazon.com/
b). Now, Choose Sign Up. Click on Create an AWS account. You can see new page with Create an AWS account. You need to enter the required details. E-mail id, Pwd, AWS Account name [you can give any name for this]. And choose continue to go to next page. Please note; The above steps are valid for the new users of AWS. If you enter your email address entered incorrectly, you might not be able to access your account or change your password in the future. So you need to be careful on your data entry part. Let us assume; if you’ve signed in to AWS recently, it might say Sign In to the Console. So you need to login into your existing Account.
c). Now in the current page, choose Professional or personal. These two areas will give equal services. Depends on your need You can choose one of the options.
d). From the above options choosed, type the requested company or personal information entries. Note; At this point, You need to go through the AWS Customer Agreement to know their policies and procedures to follow while operating.
e). Finally, you choose Create Account and Continue options in the bottom.
f). Please note; at this point you will receive an e-mail to confirm that your account is created. Now, you can sign in to your new account using the valid email address and valid password you have supplied earlier.
Please note; we have done the Step1 only, the activation process is not yet completed to use the AWS services. Still we need to follow 3 more steps.
STEP2: Add a payment method- Detailed steps:
At this point; On the Payment Information page,
a) Choose the payment method as per the payment gateway standards which is displayed.
b) Type the requested information associated with your payment method. Please make sure the address for your payment method is the same as the address you provided for your account. Note; If your billing address is different; then choose Use a new address, type the billing address for your payment method.
c) Now, choose Secure Submit.
STEP3: Verify your phone number.
Please keep a valid and handy phone number at this point.
a) On this Phone Verification page, type a phone number where can use to accept incoming phone calls.
b) Enter the code displayed in the captcha. When you’re ready to receive a call, choose Call me now option.
c) In a few moments, an automated system will call you to your given phone number. Even it might have SMS feature also, if you are outside North America region.
d) Type the provided PIN on your phone’s keypad of the AWS screen. e) After the process is complete, choose Continue.
STEP4: Choose the AWS Support plans.
a) At this point please visit the below URL: https://aws.amazon.com/premiumsupport/features/
You can select the AWS support plans from the given list.
b) After your selection of a Support plan, a confirmation page denotes that your account is being activated.
c) Please note; Accounts are usually activated within a few minutes, but the process might take up to 24 hours. This process includes the validation of Bank/CC account given there.
d) Hence keep looking for a mail on this subject from Amazon to start your AWS services usage.
Assuming everything went well, and your AWS account is activated now. Congratulations!
We can look into next lab with reference to the class session.
2. AWS: WordPress[WP] infrastructure creation using a free tier account
https://wordpress.com/post/vskumar.blog/2884
If you are interested to learn Virtualization with Vagrant visit:
1. Vagrant/Virtual Box:How to create Virtual Machine[VM] on Windows 10?:
Note:
If you are not a student of my class, and looking for it please contact me by mail with your LinkedIn identity. And send a connection request with a message on your need. You can use the below contacts. Please note; I teach globally.