Category Archives: Jenkins 2.9

AWS DevOps Course for Freshers with Project level tasks:

This course is designed for the Freshers by a three Decades globally experienced IT professional after studying many consulting projects and the skill gap issues of different project teams.
They can show these course project tasks, done by them during the course, in their profile.
The participant will be able to attend the interview for an AWS-DevOps fresher position, along with the live screen test without a Proxy interview. Interview preparation coaching will be given.
During the job; they will be honored for their skills learnt from this course and self demonstration in the team to complete the project task before the schedule. This can add value for the candidate’s future appraisals and for their IT ladder growth.
Its Purely, A job oriented course for Freshers with Live similar project activities through IT experienced professional. You will be enforced to do the tasks in the session. The Coacher/trainer will not touch the screen for lab demo.
Note: All the tasks the student will do as a demo in the session. Before coming to the demo he/she need to practice through material given to them. This makes the participant highly self motivated with confidence on technical learning. It motivates them for the job activities also, during their job.

For the course details, watch the below video:

If somebody want to attend the Basic AWS Course, before understanding the AWS-DevOps course they can see the below video and come for a call to know the details on it.

NOTE: This play list contains the videos made on the list of AWS courses made for freshers. The freshers when they are in project, they need to understand the infrastructure requirements and their tasks. During the course they coached on these areas well. And also they will be enforced to do some project activities with a requirement. And they need to present it in a team. This can give very high confidence to them not only to perform well in the interviews and also on the live project activity comparatively with many proxy interviews managed freshers.

https://www.facebook.com/watch/347538165828643/309818167129036/

For some more details on the course, visit:

https://vskumar.blog/2020/10/08/cloud-cum-devops-coaching-your-investigation-and-actions/

You can see some of the learners sessions:

For freshers/OPTs: For Agile/DevOps/AWS training contact for schedules

For course:

  1. This is for OPTs and the Indian colleges fresh graduates who came/passed out in 2019.

  2. who are self driven and try for jobs with the given skills learning without getting into somebody shoes, come and get trained. You wouldn’t see the labs as demos. You will be practicing the labs as per the coacher guidelines with his watching. So that you will gain the technical competency with self confidence.

  3. A new batch is planned in a cost effective way. Contact in the given FB links from the blog. Good luck in your job search and in IT profession.

  4. Also, visit the below blogs for  AWS Basic course and the AWS-DevOps: https://vskumar.blog/2019/05/04/for-freshers-opts-for-agile-devops-aws-training-contact-for-schedules/
  5. https://vskumar.blog/2020/08/21/aws-devops-course-for-freshers-with-project-level-tasks/
  6. If you are keen in doing a fast track course to attack the job market instead of learning by self for months together and  getting struck to move forward, you can opt for #4 and #5.  Read the videos descriptions also. The contact details are given on this web page logo.

For specimen sessions you can watch the below videos:

  1. Agile: What are Agile manifesto Principles & How they can be used for SW ?
    https://www.facebook.com/328906801086961/videos/617149372179077/
  2. Agile: What are the phases of Agile Project ?
    https://www.facebook.com/328906801086961/videos/183496779674097/
  3. Agile: What is Disciplined Agile Delivery[DAD] ?
    https://www.facebook.com/328906801086961/videos/184822556096397/
  4. Agile: What is Model Storming ?
    https://www.facebook.com/328906801086961/videos/493982721500147/
  5. Agile: What is Scrum Framework and its roles ?
    https://www.facebook.com/328906801086961/videos/878197645967794/

Free-orientation-for Freshers-2019

Join in the below group to follow the above guidelines:

https://www.facebook.com/groups/817762795246646/

This group is meant only for freshers/OPTs coaching on the topics mentioned in the group Logo. You can forward to your circles who all came out from college for latest passed out year. They need to provide evidences as they are from latest batch only. The FB ID need to have photo with profile details. With these specs only they are allowed in this group.

For course: This is for OPTs and the Indian college graduate who came/passed out in 2019. who are self driven and try for jobs with the given skills learning without getting into somebody shoes, come and get trained. A new batch is planned in a cost effective way. Contact in the given FB links from the blog. Good luck in your job search and in IT profession.

https://www.linkedin.com/jobs/aws-jobs/

You can also see the Basic AWS and DevOps course details from the below blog/videos:

https://vskumar.blog/2020/08/21/aws-devops-course-for-freshers-with-project-level-tasks/

1. AWS:How to create and activate a new account in AWS ?

AWS Account-creation scrn

How to create and activate a new account in AWS ?:

In this blog, you will see the required steps for creating and activating your new AWS account. Once have the activated account, you can start your other lab practices as I discuss in the class timely.

The following are the main 4 steps process we need to follow:

STEP1: Creating your account. It consists of 2 steps: a) Providing a valid e-mail address and choosing a password. b) Providing your contact information and setting your preferences.

STEP2: Add a payment method Please note; you need to have a valid CC to give its details. Amazon verifies its transaction also with a tiny charge and with a credit back. If by mistaken given wrong data please note; your account registration process will not be activated. You will be intimated by mail. This way Amazon is authenticating/authorizing us for AWS usage.

STEP3: Verify your phone number. You need to Provide a phone number where you can be reached in next few minutes, while creating your account.

STEP4: Choose the AWS Support plans. Time to time the AWS plans will be published. You need to choose the plan from the currently available plans for your needs. The relevant URL is given in the detailed steps section in this blog.

As a consolidated process, we can understand from the below flow chart. Which is from the collection of AWS process charts.

AWS Account-creation flowchart

Note:

I am not copying the screens due to privacy.

Detailed steps

STEP1: Detailed steps for Creating your account.

a). You need to go to Amazon Web Services home page URL: https://aws.amazon.com/

b). Now, Choose Sign Up. Click on Create an AWS account. You can see new page with Create an AWS account. You need to enter the required details. E-mail id, Pwd, AWS Account name [you can give any name for this]. And choose continue to go to next page. Please note; The above steps are valid for the new users of AWS. If you enter your email address entered incorrectly, you might not be able to access your account or change your password in the future. So you need to be careful on your data entry part. Let us assume; if you’ve signed in to AWS recently, it might say Sign In to the Console. So you need to login into your existing Account.

c). Now in the current page, choose Professional or personal. These two areas will give equal services. Depends on your need You can choose one of the options.

d). From the above options choosed, type the requested company or personal information entries. Note; At this point, You need to go through the AWS Customer Agreement to know their policies and procedures to follow while operating.

e). Finally, you choose Create Account and Continue options in the bottom.

f). Please note; at this point you will receive an e-mail to confirm that your account is created. Now, you can sign in to your new account using the valid email address and valid password you have supplied earlier.

Please note; we have done the Step1 only, the activation process is not yet completed to use the AWS services. Still we need to follow 3 more steps.

STEP2: Add a payment method- Detailed steps:

At this point; On the Payment Information page,

a) Choose the payment method as per the payment gateway standards which is displayed.

b) Type the requested information associated with your payment method. Please make sure the address for your payment method is the same as the address you provided for your account. Note; If your billing address is different; then choose Use a new address, type the billing address for your payment method.

c) Now, choose Secure Submit.

STEP3: Verify your phone number.

Please keep a valid and handy phone number at this point.

a) On this Phone Verification page, type a phone number where can use to accept incoming phone calls.

b) Enter the code displayed in the captcha. When you’re ready to receive a call, choose Call me now option.

c) In a few moments, an automated system will call you to your given phone number. Even it might have SMS feature also, if you are outside North America region.

d) Type the provided PIN on your phone’s keypad of the AWS screen. e) After the process is complete, choose Continue.

STEP4: Choose the AWS Support plans.

a) At this point please visit the below URL: https://aws.amazon.com/premiumsupport/features/

You can select the AWS support plans from the given list.

b) After your selection of a Support plan, a confirmation page denotes that your account is being activated.

c) Please note; Accounts are usually activated within a few minutes, but the process might take up to 24 hours. This process includes the validation of Bank/CC account given there.

d) Hence keep looking for a mail on this subject from Amazon to start your AWS services usage.

Assuming everything went well, and your AWS account is activated now.  Congratulations!

We can look into next lab with reference to the class session.

2. AWS: WordPress[WP] infrastructure creation using a free tier account

https://wordpress.com/post/vskumar.blog/2884


If you are interested to learn Virtualization with Vagrant visit:

1. Vagrant/Virtual Box:How to create Virtual Machine[VM] on Windows 10?:


Note:

If you are not a student of my class, and looking for it please contact me by mail with your LinkedIn identity. And send a connection request with a message on your need. You can use the below contacts. Please note; I teach globally.


Vcard-Shanthi Kumar V-v3

31. DevOps: Jenkins-How to use Backup/Restore using thinbackup plugin ?

\]jenkins

Through this video I have demonstrated the below steps using Jenkins and its thinkbackup plugin process/usage.

=== Steps used in video ====>

How to take jenkins backup ?
1. You need to configure the thinbackup plugin.
2. Search for that plugin in
Manage Jenkins option.
3. Click on Available tab. It shows the locally
available plugins.
4. Then goto filter and type the plugin name as
thinbackup.
5. Now let us check it. You can see the icon,
it is installed.
6. Once you have this, you can explore it.
7. Please note you also need to configure
Restore.
8. Now, let us configure the backup.
After that we can use backupnow option to
take a backup. It stores on the given path.
So, we should use settings.
9. Now, let us test one backup …
10. Let us check the backup file…
11. Observe the created jobs are there…
12. Now, let me run a build..
13.Created 8th Build.
14. Now let me take the new backup…
15. Now, let me use restore to restore
the past build.
16.See the current build history …
17. I am picking up the 1st it was
made in the beginning…
18. Now, let us verify the jenkins
system jobs/builds.
19. It is overwritten on the existing jobs..
20. Let us delete some jobs and restore
the 8thbuild backup.
21. Let me try to restore the latest backup
which has the 8thbuild …
22. Let us restart the server to use the
latest restore …. Let me pause you …
23. It is ready to login … let us test it..
24. Please Note;
When restored it unzipped and kept the files.
When we restarted the jenkins server
it pickedup those files only.
We can see the 8th build is there.
25. From this exercise and trouble shoot,
we can conclude:
i) We need to use thinbackup plugin to
setup backup/restore process.
ii. Initially we use backup plugin and
later we can setup restore setup after
configuring the backup options.

iii. And when we restore a particular build
we need to restart the jenkins server.
That is all for this exercise..

============================>


Advt-course3rd page

30. DevOps: Jenkins 2.9-How to remove and re-Install Jenkins 2.9 for Windows 10 with trial job test ?

jenkins


Through this video I have demonstrated the following steps:
1. Removing Jenkins from the Laptop/Desktop of Windows10 OS.
2. Installed it as fresh setup on the same machine of Windows10 OS.
3. Played around with 2 jobs creation through Build now.

Also visit:

https://vskumar.blog/2018/02/26/15-devops-how-to-setup-jenkins-2-9-on-ubuntu-16-04-with-jdk8/

https://vskumar.blog/2018/03/03/17-devops-working-with-git-on-ubuntu-16-04-vm/


29. DevOps: How to access internet through Vmware VM Bridge setup ?


Through this video I showed on “How to access internet through Virtual Machine of Vmware”. The required steps for setup is demonstrated along with the played options.


15. DevOps: How to setup jenkins 2.9 on Ubuntu-16.04 with jdk8 with a trouble shoot video guidance

jenkins

In continuation of blog related to Jenkins installation on Win10 url :https://vskumar.blog/2017/11/25/1-devops-jenkins2-9-installation-with-java-9-on-windows-10/

In this blog I would like to demonstrate on Jenkins 2.9 installation using Ubuntu 16.04 OS with JDK8. I used Ubuntu 16.04 VM.  You can use your standalone Ubuntu machine also.

At the end  a video link is given for this entire exercise…. with a job run…

[Note: If you are a student and in need of  Ubuntu 16.04 VM copy, I can share it. You need to send a request through linkedin with your identity please. At the bottom of this blog you can get my details.]

If you want to install Jenkins you need to have JDK in the Ubuntu machine.

You need to install JDK8 as 1st instance for Jenkins setup:

How to install JDK8?:

Step 1:-
Download JDK 8 tar.gz file from official website

Step 2:-
Extract contents using tar command

$tar -xzvf filename.tar.gz

Step 3 :-
Move Extracted file to /usr/local/java Directory
=====CLI Screen output ===>
vskumar@ubuntu:~$ pwd
/home/vskumar
vskumar@ubuntu:~$ cd /usr/local
vskumar@ubuntu:/usr/local$ ls
bin etc games include lib man sbin share src
vskumar@ubuntu:/usr/local$ mkdir java
mkdir: cannot create directory ‘java’: Permission denied
vskumar@ubuntu:/usr/local$ sudo mkdir java
[sudo] password for vskumar:
vskumar@ubuntu:/usr/local$ ls
bin etc games include java lib man sbin share src
vskumar@ubuntu:/usr/local$
vskumar@ubuntu:/usr/local$ cd java
vskumar@ubuntu:/usr/local/java$

vskumar@ubuntu:~$
vskumar@ubuntu:~$ ls
data-volume1 Downloads jdk-9.0.4_linux-x64_bin.tar.gz Public
Desktop examples.desktop Music Templates
Documents flask-test Pictures Videos
vskumar@ubuntu:~$ pwd
/home/vskumar
vskumar@ubuntu:~$

vskumar@ubuntu:~/Downloads$ ls
firefox-57.0.tar.bz2 jdk1.8.0_161 jdk-8u161-linux-x64.tar.gz

vskumar@ubuntu:~/Downloads$ sudo mv jdk1.8.0_161 /usr/local/java
[sudo] password for vskumar:
vskumar@ubuntu:~/Downloads$ ls
firefox-57.0.tar.bz2 jdk-8u161-linux-x64.tar.gz
vskumar@ubuntu:~/Downloads$
vskumar@ubuntu:/usr/local/java$ pwd
/usr/local/java
vskumar@ubuntu:/usr/local/java$ ls -l
total 4
drwxr-xr-x 8 vskumar vskumar 4096 Dec 19 16:24 jdk1.8.0_161
vskumar@ubuntu:/usr/local/java$

==jdk8 unzipped files are moved into /usr/local/java ===>

Step 4: – Now,
Update Alternatives

$sudo update-alternatives –install “/usr/bin/java” “java” “/usr/local/java/jdk1.8.0_161/bin/java” 1

$sudo update-alternatives –install “/usr/bin/javac” “javac” “/usr/local/java/jdk1.8.0_161/bin/javac” 1

$sudo update-alternatives –install “/usr/bin/javaws” “javaws” “/usr/local/java/jdk1.8.0_161/bin/javaws” 1

=== Output===>

vskumar@ubuntu:/usr/local/java/jdk1.8.0_161$
vskumar@ubuntu:/usr/local/java/jdk1.8.0_161$ pwd
/usr/local/java/jdk1.8.0_161
vskumar@ubuntu:/usr/local/java/jdk1.8.0_161$ sudo update-alternatives –install “/usr/bin/java” “java” “/usr/local/java/jdk1.8.0_161/bin/java” 1
vskumar@ubuntu:/usr/local/java/jdk1.8.0_161$ sudo update-alternatives –install “/usr/bin/javac” “javac” “/usr/local/java/jdk1.8.0_161/bin/javac” 1
update-alternatives: using /usr/local/java/jdk1.8.0_161/bin/javac to provide /usr/bin/javac (javac) in auto mode
vskumar@ubuntu:/usr/local/java/jdk1.8.0_161$ sudo update-alternatives –install “/usr/bin/javaws” “javaws” “/usr/local/java/jdk1.8.0_161/bin/javaws” 1
update-alternatives: using /usr/local/java/jdk1.8.0_161/bin/javaws to provide /usr/bin/javaws (javaws) in auto mode
vskumar@ubuntu:/usr/local/java/jdk1.8.0_161$
==============>

Step 5 :-
Check Java version
$ java -version

======>
vskumar@ubuntu:/usr/local/java/jdk1.8.0_161$ java -version
java version “1.8.0_161”
Java(TM) SE Runtime Environment (build 1.8.0_161-b12)
Java HotSpot(TM) 64-Bit Server VM (build 25.161-b12, mixed mode)
vskumar@ubuntu:/usr/local/java/jdk1.8.0_161$
====We have done JDKsetup ===>

Now, You can see “How to install Jenkins on Ubuntu 16.04?”:

For details Visit: https://wiki.jenkins.io/display/JENKINS/Installing+Jenkins+on+Ubuntu

Step1:
First, we need to add the jenkins repository key to the ubuntu system.

$ sudo wget -q -O – https://pkg.jenkins.io/debian/jenkins-ci.org.key | sudo apt-key add –

When the key is added, the system will return ‘OK’

Step2:
Now, we need to append the Debian package repository
address to the server’s sources.list:

$echo deb https://pkg.jenkins.io/debian-stable binary/ | sudo tee /etc/apt/sources.list

The screen ouput for the above steps:
=== Screen output of Step1 and Step2====>
vskumar@ubuntu:~$ sudo wget -q -O – https://pkg.jenkins.io/debian/jenkins-ci.org.key | sudo apt-key add –
OK
vskumar@ubuntu:~$ echo deb https://pkg.jenkins.io/debian-stable binary/ | sudo tee /etc/apt/sources.list
deb https://pkg.jenkins.io/debian-stable binary/
vskumar@ubuntu:~$ sudo apt-get update
===============>

When both of the above steps are executed, we’ll run update so that apt-get will use
the new repository:

Step3:
$sudo apt-get update

==== You will see the below screen output ===>
vskumar@ubuntu:~$ echo deb https://pkg.jenkins.io/debian-stable binary/ | sudo tee /etc/apt/sources.list
deb https://pkg.jenkins.io/debian-stable binary/
vskumar@ubuntu:~$ sudo apt-get update
Hit:1 https://download.docker.com/linux/ubuntu xenial InRelease
Ign:2 https://pkg.jenkins.io/debian-stable binary/ InRelease
Hit:3 https://pkg.jenkins.io/debian-stable binary/ Release
Reading package lists… Done
vskumar@ubuntu:~$
========================>

========>
vskumar@ubuntu:~$ sudo find . / jenkins | grep ‘jenkins’
find: ‘/run/user/1000/gvfs’: Permission denied
/var/lib/apt/lists/pkg.jenkins.io_debian-stable_binary_Packages
/var/lib/apt/lists/pkg.jenkins.io_debian-stable_binary_Release.gpg
/var/lib/apt/lists/pkg.jenkins.io_debian-stable_binary_Release
find: ‘jenkins’: No such file or directory
vskumar@ubuntu:~$
==============>

Step4:
Include JAVA_HOME = /usr/local/java/jdk1.8.0_161
in .shrc file.

Now, we will install Jenkins and its dependencies:

$sudo apt-get install jenkins
Whenyou run this command your might get the below error:
=== Dependecy issues ======>
vskumar@ubuntu:~$ sudo apt-get install jenkins
Reading package lists… Done
Building dependency tree
Reading state information… Done
Some packages could not be installed. This may mean that you have
requested an impossible situation or if you are using the unstable
distribution that some required packages have not yet been created
or been moved out of Incoming.
The following information may help to resolve the situation:

The following packages have unmet dependencies:
jenkins : Depends: daemon but it is not installable
Depends: default-jre-headless (>= 2:1.8) or
java8-runtime-headless
E: Unable to correct problems, you have held broken packages.
vskumar@ubuntu:~$
======================>

To resolve this issued, Under Ubuntu Software tab, enable all the repositories.
The system updates all the packages/libs.

Visit for details:
https://askubuntu.com/questions/140246/how-do-i-resolve-unmet-dependencies-after-adding-a-ppa

After doing the repositories updates as mentioned above, I have re-executed the install command:

==== Screen Output of Jenkins installation ====
vskumar@ubuntu:~$ sudo apt-get install jenkins
Reading package lists… Done
Building dependency tree
Reading state information… Done
The following additional packages will be installed:
ca-certificates-java daemon default-jre-headless java-common
openjdk-8-jre-headless
Suggested packages:
default-jre openjdk-8-jre-jamvm fonts-dejavu-extra fonts-ipafont-gothic
fonts-ipafont-mincho ttf-wqy-microhei | ttf-wqy-zenhei fonts-indic
The following NEW packages will be installed:
ca-certificates-java daemon default-jre-headless java-common jenkins
openjdk-8-jre-headless
0 upgraded, 6 newly installed, 0 to remove and 0 not upgraded.
Need to get 101 MB of archives.
After this operation, 174 MB of additional disk space will be used.
Do you want to continue? [Y/n] y
Get:1 http://archive.ubuntu.com/ubuntu xenial/main amd64 java-common all 0.56ubuntu2 [7,742 B]
Get:2 http://archive.ubuntu.com/ubuntu xenial/main amd64 default-jre-headless amd64 2:1.8-56ubuntu2 [4,380 B]
Get:3 http://archive.ubuntu.com/ubuntu xenial/main amd64 ca-certificates-java all 20160321 [12.9 kB]
Get:4 http://archive.ubuntu.com/ubuntu xenial/main amd64 openjdk-8-jre-headless amd64 8u77-b03-3ubuntu3 [26.9 MB]
Get:5 https://pkg.jenkins.io/debian-stable binary/ jenkins 2.89.4 [73.7 MB]
Get:6 http://archive.ubuntu.com/ubuntu xenial/universe amd64 daemon amd64 0.6.4-1 [98.2 kB]
Fetched 101 MB in 2min 9s (775 kB/s)
Selecting previously unselected package java-common.
(Reading database … 217445 files and directories currently installed.)
Preparing to unpack …/java-common_0.56ubuntu2_all.deb …
Unpacking java-common (0.56ubuntu2) …
Selecting previously unselected package default-jre-headless.
Preparing to unpack …/default-jre-headless_2%3a1.8-56ubuntu2_amd64.deb …
Unpacking default-jre-headless (2:1.8-56ubuntu2) …
Selecting previously unselected package ca-certificates-java.
Preparing to unpack …/ca-certificates-java_20160321_all.deb …
Unpacking ca-certificates-java (20160321) …
Selecting previously unselected package openjdk-8-jre-headless:amd64.
Preparing to unpack …/openjdk-8-jre-headless_8u77-b03-3ubuntu3_amd64.deb …
Unpacking openjdk-8-jre-headless:amd64 (8u77-b03-3ubuntu3) …
Selecting previously unselected package daemon.
Preparing to unpack …/daemon_0.6.4-1_amd64.deb …
Unpacking daemon (0.6.4-1) …
Selecting previously unselected package jenkins.
Preparing to unpack …/jenkins_2.89.4_all.deb …
Unpacking jenkins (2.89.4) …
Processing triggers for man-db (2.7.5-1) …
Processing triggers for ca-certificates (20170717~16.04.1) …
Updating certificates in /etc/ssl/certs…
0 added, 0 removed; done.
Running hooks in /etc/ca-certificates/update.d…
done.
Processing triggers for systemd (229-4ubuntu21.1) …
Processing triggers for ureadahead (0.100.0-19) …
Setting up java-common (0.56ubuntu2) …
Setting up daemon (0.6.4-1) …
Setting up openjdk-8-jre-headless:amd64 (8u77-b03-3ubuntu3) …
update-alternatives: using /usr/lib/jvm/java-8-openjdk-amd64/jre/bin/rmid to provide /usr/bin/rmid (rmid) in auto mode
update-alternatives: using /usr/lib/jvm/java-8-openjdk-amd64/jre/bin/java to provide /usr/bin/java (java) in auto mode
update-alternatives: using /usr/lib/jvm/java-8-openjdk-amd64/jre/bin/keytool to provide /usr/bin/keytool (keytool) in auto mode
update-alternatives: using /usr/lib/jvm/java-8-openjdk-amd64/jre/bin/jjs to provide /usr/bin/jjs (jjs) in auto mode
update-alternatives: using /usr/lib/jvm/java-8-openjdk-amd64/jre/bin/pack200 to provide /usr/bin/pack200 (pack200) in auto mode
update-alternatives: using /usr/lib/jvm/java-8-openjdk-amd64/jre/bin/rmiregistry to provide /usr/bin/rmiregistry (rmiregistry) in auto mode
update-alternatives: using /usr/lib/jvm/java-8-openjdk-amd64/jre/bin/unpack200 to provide /usr/bin/unpack200 (unpack200) in auto mode
update-alternatives: using /usr/lib/jvm/java-8-openjdk-amd64/jre/bin/orbd to provide /usr/bin/orbd (orbd) in auto mode
update-alternatives: using /usr/lib/jvm/java-8-openjdk-amd64/jre/bin/servertool to provide /usr/bin/servertool (servertool) in auto mode
update-alternatives: using /usr/lib/jvm/java-8-openjdk-amd64/jre/bin/tnameserv to provide /usr/bin/tnameserv (tnameserv) in auto mode
update-alternatives: using /usr/lib/jvm/java-8-openjdk-amd64/jre/lib/jexec to provide /usr/bin/jexec (jexec) in auto mode
Setting up ca-certificates-java (20160321) …
Adding debian:Chambers_of_Commerce_Root_-_2008.pem
Adding debian:GeoTrust_Primary_Certification_Authority_-_G3.pem
Adding debian:OISTE_WISeKey_Global_Root_GA_CA.pem
Adding debian:Deutsche_Telekom_Root_CA_2.pem
Adding debian:Izenpe.com.pem
Adding debian:Microsec_e-Szigno_Root_CA_2009.pem
Adding debian:EC-ACC.pem
Adding debian:DigiCert_Global_Root_G2.pem
Adding debian:QuoVadis_Root_CA_3.pem
Adding debian:ePKI_Root_Certification_Authority.pem
Adding debian:GeoTrust_Primary_Certification_Authority_-_G2.pem
Adding debian:Autoridad_de_Certificacion_Firmaprofesional_CIF_A62634068.pem
Adding debian:ACCVRAIZ1.pem
Adding debian:Cybertrust_Global_Root.pem
Adding debian:COMODO_ECC_Certification_Authority.pem
Adding debian:GeoTrust_Universal_CA_2.pem
Adding debian:Entrust_Root_Certification_Authority_-_EC1.pem
Adding debian:Sonera_Class_2_Root_CA.pem
Adding debian:Comodo_AAA_Services_root.pem
Adding debian:Security_Communication_EV_RootCA1.pem
Adding debian:AddTrust_Low-Value_Services_Root.pem
Adding debian:Amazon_Root_CA_1.pem
Adding debian:DST_Root_CA_X3.pem
Adding debian:OpenTrust_Root_CA_G1.pem
Adding debian:T-TeleSec_GlobalRoot_Class_3.pem
Adding debian:Camerfirma_Chambers_of_Commerce_Root.pem
Adding debian:Atos_TrustedRoot_2011.pem
Adding debian:Starfield_Class_2_CA.pem
Adding debian:Certigna.pem
Adding debian:Buypass_Class_3_Root_CA.pem
Adding debian:COMODO_Certification_Authority.pem
Adding debian:thawte_Primary_Root_CA_-_G3.pem
Adding debian:Swisscom_Root_EV_CA_2.pem
Adding debian:Go_Daddy_Class_2_CA.pem
Adding debian:VeriSign_Universal_Root_Certification_Authority.pem
Adding debian:Global_Chambersign_Root_-_2008.pem
Adding debian:CNNIC_ROOT.pem
Adding debian:AddTrust_External_Root.pem
Adding debian:SwissSign_Gold_CA_-_G2.pem
Adding debian:QuoVadis_Root_CA_1_G3.pem
Adding debian:GeoTrust_Primary_Certification_Authority.pem
Adding debian:Hongkong_Post_Root_CA_1.pem
Adding debian:TWCA_Global_Root_CA.pem
Adding debian:ACEDICOM_Root.pem
Adding debian:Go_Daddy_Root_Certificate_Authority_-_G2.pem
Adding debian:Staat_der_Nederlanden_EV_Root_CA.pem
Adding debian:GlobalSign_ECC_Root_CA_-_R4.pem
Adding debian:Entrust_Root_Certification_Authority_-_G2.pem
Adding debian:Taiwan_GRCA.pem
Adding debian:Verisign_Class_3_Public_Primary_Certification_Authority_-_G3.pem
Adding debian:COMODO_RSA_Certification_Authority.pem
Adding debian:ssl-cert-snakeoil.pem
Adding debian:DigiCert_High_Assurance_EV_Root_CA.pem
Adding debian:GeoTrust_Global_CA.pem
Adding debian:Security_Communication_RootCA2.pem
Adding debian:QuoVadis_Root_CA.pem
Adding debian:D-TRUST_Root_Class_3_CA_2_2009.pem
Adding debian:D-TRUST_Root_Class_3_CA_2_EV_2009.pem
Adding debian:UTN_USERFirst_Hardware_Root_CA.pem
Adding debian:DST_ACES_CA_X6.pem
Adding debian:Visa_eCommerce_Root.pem
Adding debian:Certinomis_-_Autorité_Racine.pem
Adding debian:thawte_Primary_Root_CA_-_G2.pem
Adding debian:Staat_der_Nederlanden_Root_CA_-_G2.pem
Adding debian:E-Tugra_Certification_Authority.pem
Adding debian:QuoVadis_Root_CA_2_G3.pem
Adding debian:Entrust.net_Premium_2048_Secure_Server_CA.pem
Adding debian:TURKTRUST_Certificate_Services_Provider_Root_2007.pem
Adding debian:SwissSign_Silver_CA_-_G2.pem
Adding debian:TWCA_Root_Certification_Authority.pem
Adding debian:Certum_Trusted_Network_CA_2.pem
Adding debian:T-TeleSec_GlobalRoot_Class_2.pem
Adding debian:GlobalSign_Root_CA_-_R2.pem
Adding debian:LuxTrust_Global_Root_2.pem
Adding debian:AddTrust_Public_Services_Root.pem
Adding debian:Staat_der_Nederlanden_Root_CA_-_G3.pem
Adding debian:USERTrust_ECC_Certification_Authority.pem
Adding debian:AffirmTrust_Networking.pem
Adding debian:Amazon_Root_CA_4.pem
Adding debian:Starfield_Services_Root_Certificate_Authority_-_G2.pem
Adding debian:TÜRKTRUST_Elektronik_Sertifika_Hizmet_Saglayicisi_H5.pem
Adding debian:ISRG_Root_X1.pem
Adding debian:AC_RAIZ_FNMT-RCM.pem
Adding debian:Swisscom_Root_CA_2.pem
Adding debian:DigiCert_Trusted_Root_G4.pem
Adding debian:GlobalSign_Root_CA.pem
Adding debian:CA_Disig_Root_R2.pem
Adding debian:OISTE_WISeKey_Global_Root_GB_CA.pem
Adding debian:TeliaSonera_Root_CA_v1.pem
Adding debian:Comodo_Trusted_Services_root.pem
Adding debian:Certum_Trusted_Network_CA.pem
Adding debian:NetLock_Arany_=Class_Gold=_Fotanúsítvány.pem
Adding debian:AffirmTrust_Premium.pem
Adding debian:AffirmTrust_Premium_ECC.pem
Adding debian:VeriSign_Class_3_Public_Primary_Certification_Authority_-_G5.pem
Adding debian:Secure_Global_CA.pem
Adding debian:Certinomis_-_Root_CA.pem
Adding debian:AddTrust_Qualified_Certificates_Root.pem
Adding debian:Certplus_Root_CA_G2.pem
Adding debian:Amazon_Root_CA_2.pem
Adding debian:Security_Communication_Root_CA.pem
Adding debian:GeoTrust_Global_CA_2.pem
Adding debian:DigiCert_Global_Root_CA.pem
Adding debian:Starfield_Root_Certificate_Authority_-_G2.pem
Adding debian:IdenTrust_Public_Sector_Root_CA_1.pem
Adding debian:VeriSign_Class_3_Public_Primary_Certification_Authority_-_G4.pem
Adding debian:SZAFIR_ROOT_CA2.pem
Adding debian:PSCProcert.pem
Adding debian:AffirmTrust_Commercial.pem
Adding debian:certSIGN_ROOT_CA.pem
Adding debian:Swisscom_Root_CA_1.pem
Adding debian:Hellenic_Academic_and_Research_Institutions_ECC_RootCA_2015.pem
Adding debian:Certplus_Class_2_Primary_CA.pem
Adding debian:XRamp_Global_CA_Root.pem
Adding debian:GeoTrust_Universal_CA.pem
Adding debian:QuoVadis_Root_CA_3_G3.pem
Adding debian:QuoVadis_Root_CA_2.pem
Adding debian:China_Internet_Network_Information_Center_EV_Certificates_Root.pem
Adding debian:CFCA_EV_ROOT.pem
Adding debian:OpenTrust_Root_CA_G2.pem
Adding debian:Network_Solutions_Certificate_Authority.pem
Adding debian:Amazon_Root_CA_3.pem
Adding debian:Certum_Root_CA.pem
Adding debian:EE_Certification_Centre_Root_CA.pem
Adding debian:Actalis_Authentication_Root_CA.pem
Adding debian:Hellenic_Academic_and_Research_Institutions_RootCA_2015.pem
Adding debian:DigiCert_Assured_ID_Root_G3.pem
Adding debian:SecureTrust_CA.pem
Adding debian:Entrust_Root_Certification_Authority.pem
Adding debian:DigiCert_Assured_ID_Root_G2.pem
Adding debian:Certplus_Root_CA_G1.pem
Adding debian:TUBITAK_Kamu_SM_SSL_Kok_Sertifikasi_-_Surum_1.pem
Adding debian:TÜBITAK_UEKAE_Kök_Sertifika_Hizmet_Saglayicisi_-_Sürüm_3.pem
Adding debian:GlobalSign_Root_CA_-_R3.pem
Adding debian:IdenTrust_Commercial_Root_CA_1.pem
Adding debian:OpenTrust_Root_CA_G3.pem
Adding debian:thawte_Primary_Root_CA.pem
Adding debian:USERTrust_RSA_Certification_Authority.pem
Adding debian:DigiCert_Assured_ID_Root_CA.pem
Adding debian:Buypass_Class_2_Root_CA.pem
Adding debian:CA_Disig_Root_R1.pem
Adding debian:Trustis_FPS_Root_CA.pem
Adding debian:Baltimore_CyberTrust_Root.pem
Adding debian:GlobalSign_ECC_Root_CA_-_R5.pem
Adding debian:Comodo_Secure_Services_root.pem
Adding debian:DigiCert_Global_Root_G3.pem
Adding debian:Hellenic_Academic_and_Research_Institutions_RootCA_2011.pem
Adding debian:Camerfirma_Global_Chambersign_Root.pem
Adding debian:SecureSign_RootCA11.pem
done.
Setting up default-jre-headless (2:1.8-56ubuntu2) …
Setting up jenkins (2.89.4) …
Processing triggers for ca-certificates (20170717~16.04.1) …
Updating certificates in /etc/ssl/certs…
0 added, 0 removed; done.
Running hooks in /etc/ca-certificates/update.d…

done.
done.
Processing triggers for systemd (229-4ubuntu21.1) …
Processing triggers for ureadahead (0.100.0-19) …
vskumar@ubuntu:~$
== End of Jenkins intallation ========>

==== Updates ====>

vskumar@ubuntu:~$
vskumar@ubuntu:~$ sudo apt-get update
Hit:1 http://ppa.launchpad.net/webupd8team/java/ubuntu xenial InRelease
Hit:2 http://archive.ubuntu.com/ubuntu xenial InRelease
Hit:3 https://download.docker.com/linux/ubuntu xenial InRelease
Ign:4 https://pkg.jenkins.io/debian-stable binary/ InRelease
Hit:5 https://pkg.jenkins.io/debian-stable binary/ Release
Reading package lists… Done
vskumar@ubuntu:~$
=============>

Step5:

How to install apache2?:
If we need to use jenkins apache2 is required.
Now let us install apache2

=== Output for apache installation ===>
vskumar@ubuntu:~$
vskumar@ubuntu:~$ sudo apt install apache2
Reading package lists… Done
Building dependency tree
Reading state information… Done
The following additional packages will be installed:
apache2-bin apache2-data apache2-utils libapr1 libaprutil1
libaprutil1-dbd-sqlite3 libaprutil1-ldap liblua5.1-0
Suggested packages:
apache2-doc apache2-suexec-pristine | apache2-suexec-custom
The following NEW packages will be installed:
apache2 apache2-bin apache2-data apache2-utils libapr1 libaprutil1
libaprutil1-dbd-sqlite3 libaprutil1-ldap liblua5.1-0
0 upgraded, 9 newly installed, 0 to remove and 0 not upgraded.
Need to get 1,532 kB of archives.
After this operation, 6,350 kB of additional disk space will be used.
Do you want to continue? [Y/n] y
Get:1 http://archive.ubuntu.com/ubuntu xenial/main amd64 libapr1 amd64 1.5.2-3 [86.0 kB]
Get:2 http://archive.ubuntu.com/ubuntu xenial/main amd64 libaprutil1 amd64 1.5.4-1build1 [77.1 kB]
Get:3 http://archive.ubuntu.com/ubuntu xenial/main amd64 libaprutil1-dbd-sqlite3 amd64 1.5.4-1build1 [10.6 kB]
Get:4 http://archive.ubuntu.com/ubuntu xenial/main amd64 libaprutil1-ldap amd64 1.5.4-1build1 [8,720 B]
Get:5 http://archive.ubuntu.com/ubuntu xenial/main amd64 liblua5.1-0 amd64 5.1.5-8ubuntu1 [102 kB]
Get:6 http://archive.ubuntu.com/ubuntu xenial/main amd64 apache2-bin amd64 2.4.18-2ubuntu3 [918 kB]
Get:7 http://archive.ubuntu.com/ubuntu xenial/main amd64 apache2-utils amd64 2.4.18-2ubuntu3 [81.1 kB]
Get:8 http://archive.ubuntu.com/ubuntu xenial/main amd64 apache2-data all 2.4.18-2ubuntu3 [162 kB]
Get:9 http://archive.ubuntu.com/ubuntu xenial/main amd64 apache2 amd64 2.4.18-2ubuntu3 [86.6 kB]
Fetched 1,532 kB in 5s (270 kB/s)
Selecting previously unselected package libapr1:amd64.
(Reading database … 217703 files and directories currently installed.)
Preparing to unpack …/libapr1_1.5.2-3_amd64.deb …
Unpacking libapr1:amd64 (1.5.2-3) …
Selecting previously unselected package libaprutil1:amd64.
Preparing to unpack …/libaprutil1_1.5.4-1build1_amd64.deb …
Unpacking libaprutil1:amd64 (1.5.4-1build1) …
Selecting previously unselected package libaprutil1-dbd-sqlite3:amd64.
Preparing to unpack …/libaprutil1-dbd-sqlite3_1.5.4-1build1_amd64.deb …
Unpacking libaprutil1-dbd-sqlite3:amd64 (1.5.4-1build1) …
Selecting previously unselected package libaprutil1-ldap:amd64.
Preparing to unpack …/libaprutil1-ldap_1.5.4-1build1_amd64.deb …
Unpacking libaprutil1-ldap:amd64 (1.5.4-1build1) …
Selecting previously unselected package liblua5.1-0:amd64.
Preparing to unpack …/liblua5.1-0_5.1.5-8ubuntu1_amd64.deb …
Unpacking liblua5.1-0:amd64 (5.1.5-8ubuntu1) …
Selecting previously unselected package apache2-bin.
Preparing to unpack …/apache2-bin_2.4.18-2ubuntu3_amd64.deb …
Unpacking apache2-bin (2.4.18-2ubuntu3) …
Selecting previously unselected package apache2-utils.
Preparing to unpack …/apache2-utils_2.4.18-2ubuntu3_amd64.deb …
Unpacking apache2-utils (2.4.18-2ubuntu3) …
Selecting previously unselected package apache2-data.
Preparing to unpack …/apache2-data_2.4.18-2ubuntu3_all.deb …
Unpacking apache2-data (2.4.18-2ubuntu3) …
Selecting previously unselected package apache2.
Preparing to unpack …/apache2_2.4.18-2ubuntu3_amd64.deb …
Unpacking apache2 (2.4.18-2ubuntu3) …
Processing triggers for libc-bin (2.23-0ubuntu10) …
Processing triggers for man-db (2.7.5-1) …
Processing triggers for systemd (229-4ubuntu21.1) …
Processing triggers for ureadahead (0.100.0-19) …
Processing triggers for ufw (0.35-0ubuntu2) …
Setting up libapr1:amd64 (1.5.2-3) …
Setting up libaprutil1:amd64 (1.5.4-1build1) …
Setting up libaprutil1-dbd-sqlite3:amd64 (1.5.4-1build1) …
Setting up libaprutil1-ldap:amd64 (1.5.4-1build1) …
Setting up liblua5.1-0:amd64 (5.1.5-8ubuntu1) …
Setting up apache2-bin (2.4.18-2ubuntu3) …
Setting up apache2-utils (2.4.18-2ubuntu3) …
Setting up apache2-data (2.4.18-2ubuntu3) …
Setting up apache2 (2.4.18-2ubuntu3) …
Enabling module mpm_event.
Enabling module authz_core.
Enabling module authz_host.
Enabling module authn_core.
Enabling module auth_basic.
Enabling module access_compat.
Enabling module authn_file.
Enabling module authz_user.
Enabling module alias.
Enabling module dir.
Enabling module autoindex.
Enabling module env.
Enabling module mime.
Enabling module negotiation.
Enabling module setenvif.
Enabling module filter.
Enabling module deflate.
Enabling module status.
Enabling conf charset.
Enabling conf localized-error-pages.
Enabling conf other-vhosts-access-log.
Enabling conf security.
Enabling conf serve-cgi-bin.
Enabling site 000-default.
Processing triggers for libc-bin (2.23-0ubuntu10) …
Processing triggers for systemd (229-4ubuntu21.1) …
Processing triggers for ureadahead (0.100.0-19) …
Processing triggers for ufw (0.35-0ubuntu2) …
vskumar@ubuntu:~$
=== Apaches is installed ===>

Let us check its status:

== Status of apache2 ===>
vskumar@ubuntu:~$
vskumar@ubuntu:~$ service status apache2
status: unrecognized service
vskumar@ubuntu:~$ service apache2 status
? apache2.service – LSB: Apache2 web server
Loaded: loaded (/etc/init.d/apache2; bad; vendor preset: enabled)
Drop-In: /lib/systemd/system/apache2.service.d
+-apache2-systemd.conf
Active: active (running) since Thu 2018-02-22 02:30:24 PST; 1min 6s ago
Docs: man:systemd-sysv-generator(8)
CGroup: /system.slice/apache2.service
+-12680 /usr/sbin/apache2 -k start
+-12683 /usr/sbin/apache2 -k start
+-12684 /usr/sbin/apache2 -k start

Feb 22 02:30:22 ubuntu systemd[1]: Starting LSB: Apache2 web server…
Feb 22 02:30:22 ubuntu apache2[12651]: * Starting Apache httpd web server apach
Feb 22 02:30:23 ubuntu apache2[12651]: AH00558: apache2: Could not reliably dete
Feb 22 02:30:24 ubuntu apache2[12651]: *
Feb 22 02:30:24 ubuntu systemd[1]: Started LSB: Apache2 web server.
lines 1-16/16 (END)
================>

Now, let us check the status for Jenkins:

===== Jenkins status ===>

vskumar@ubuntu:~$ service jenkins status
? jenkins.service – LSB: Start Jenkins at boot time
Loaded: loaded (/etc/init.d/jenkins; bad; vendor preset: enabled)
Active: active (exited) since Thu 2018-02-22 02:13:57 PST; 23min ago
Docs: man:systemd-sysv-generator(8)

Feb 22 02:13:51 ubuntu systemd[1]: Starting LSB: Start Jenkins at boot time…
Feb 22 02:13:51 ubuntu jenkins[10140]: * Starting Jenkins Automation Server jen
Feb 22 02:13:52 ubuntu su[10168]: Successful su for jenkins by root
Feb 22 02:13:52 ubuntu su[10168]: + ??? root:jenkins
Feb 22 02:13:52 ubuntu su[10168]: pam_unix(su:session): session opened for user
Feb 22 02:13:57 ubuntu jenkins[10140]: …done.
Feb 22 02:13:57 ubuntu systemd[1]: Started LSB: Start Jenkins at boot time.
lines 1-12/12 (END)
==== Jenkins is running ======>

How to check on browser in Ubuntu for Jenkins web page ?:

You can also check the ubuntu browser with the below
url:http://localhost:8080/login?from=%2F
There should be a web page displayed with the message:
“Unlock Jenkins”.

It means Jenkins is available to use.

Step6:
Now, we need to setup the admin password.
Read the content on the web page.
You are advised to use the initial password from:
/var/lib/jenkins/secrets/initialAdminPassword

Let us go to that directory to get copy and paste it on
web page.

In my case I got the below:
==== PWD display ===>
vskumar@ubuntu:~$ sudo cat /var/lib/jenkins/secrets/initialAdminPassword
711a4d7d01244651a490cfd4a61439e2
vskumar@ubuntu:~$
========>

I have pasted it on web page.
Till you change the pwd, this will be the default one.

==== List of the files in jenkins dir ===>
vskumar@ubuntu:/var/lib/jenkins$ ls -l
total 60
-rw-r–r– 1 jenkins jenkins 1820 Feb 22 02:17 config.xml
-rw-r–r– 1 jenkins jenkins 156 Feb 22 02:15 hudson.model.UpdateCenter.xml
-rw——- 1 jenkins jenkins 1712 Feb 22 02:15 identity.key.enc
-rw-r–r– 1 jenkins jenkins 94 Feb 22 02:16 jenkins.CLI.xml
-rw-r–r– 1 jenkins jenkins 6 Feb 22 02:16 jenkins.install.UpgradeWizard.state
drwxr-xr-x 2 jenkins jenkins 4096 Feb 22 02:15 jobs
drwxr-xr-x 3 jenkins jenkins 4096 Feb 22 02:16 logs
-rw-r–r– 1 jenkins jenkins 907 Feb 22 02:16 nodeMonitors.xml
drwxr-xr-x 2 jenkins jenkins 4096 Feb 22 02:15 nodes
drwxr-xr-x 2 jenkins jenkins 4096 Feb 22 02:15 plugins
-rw-r–r– 1 jenkins jenkins 64 Feb 22 02:15 secret.key
-rw-r–r– 1 jenkins jenkins 0 Feb 22 02:15 secret.key.not-so-secret
drwx—— 4 jenkins jenkins 4096 Feb 22 02:16 secrets
drwxr-xr-x 2 jenkins jenkins 4096 Feb 22 02:18 updates
drwxr-xr-x 2 jenkins jenkins 4096 Feb 22 02:16 userContent
drwxr-xr-x 3 jenkins jenkins 4096 Feb 22 02:16 users
vskumar@ubuntu:/var/lib/jenkins$ cd jobs
vskumar@ubuntu:/var/lib/jenkins/jobs$ ls
vskumar@ubuntu:/var/lib/jenkins/jobs$ pwd
/var/lib/jenkins/jobs
vskumar@ubuntu:/var/lib/jenkins/jobs$
==================>
We need to remember the above directories.

By default we can install ‘suggested plugins’ for now.
It shows the plugins updates.
Once they are installed, you will be prompted for a uid/pwd/name/e-mail.
You can fill them, and start using jenkins.

That is all the installation of Jenkins 2.9.

This video is made to motivate the new DevOps engineers to learn and do a kind of trouble shooting, while doing Jenkins installation on a Virtual machine of Ubuntu.

To try one job build you can go through my another blog:

https://vskumar.blog/2017/11/26/2-devops-jenkins2-9-how-to-create-and-build-the-job/

Good luck!! and you can start practicing Jenkins. 

Please leave your feedback!!

Vcard-Shanthi Kumar V-v3

12. DevOps: How to build docker images using dockerfile ? -1


Docker-logo

In continuation of my  previous session on :”11. DevOps: How to Launch a container as a daemon ?”, in this session I would like to demonstrate the exercises on:

“How to build docker images using dockerfile ?:”

These images are basic operating environments, such as ubuntu.
We found these while doing the other lab exercises.
The docker images can craft advanced application stacks for the enterprise and cloud IT environments.
Currently let us craft an image manually by launching a container from a base image.
A best practices is, we can build an automated approach of crafting the images using Dockerfile.
The dockerfile is a a text-based build script which contains special instructions in a sequence for building the correct and the relevant images from the base images.

Please note; we will explore all these combinations in different sessions.

Now, let us understand this automated approach from the below steps:
1. The sequential instructions inside Dockerfile can include selecting the base image as 1st statement.
2. And in the later statements; installing the required application, adding the configuration and the data files, and automatically running the services as well as exposing those services to the external world.

This way the dockerfile based automated build approach has simplified the image building process.

It also offers a great deal of flexibility in organizing the build instructions and in visualizing the complete build process, while running the script instructions.

The Docker Engine tightly integrates this build process with the help of the docker ‘build’ subcommand.

This process involes the below steps:
1. Let us imagine; in the client server scenario of Docker, the Docker server (or daemon) is responsible towards complete build process.
2. And the Docker command-line interface is responsible for transferring the build context, including transferring Dockerfile to the daemon.
Now, let us list our existing images as below, in continuation of previous exercise:
=============>
vskumar@ubuntu:~$
vskumar@ubuntu:~$ sudo docker images
REPOSITORY TAG IMAGE ID CREATED SIZE
docker-exercise/ubuntu-wgetinstall latest e34304119838 7 days ago 169MB
<none> <none> fc7e4564eb92 7 days ago 169MB
hello-world latest f2a91732366c 12 days ago 1.85kB
ubuntu 16.04 20c44cd7596f 2 weeks ago 123MB
ubuntu latest 20c44cd7596f 2 weeks ago 123MB
busybox latest 6ad733544a63 4 weeks ago 1.13MB
busybox 1.24 47bcc53f74dc 20 months ago 1.11MB
vskumar@ubuntu:~$
====================>
Now,  let us create a simple container from the ubuntu base image.
To create it, we can create ‘dockerfile’ without extension using vi in the current pwd.

Please note we do not have vim utility in this Ubuntu base image.
=================>
vskumar@ubuntu:~$ pwd
/home/vskumar
vskumar@ubuntu:~$ vi dockerfile
============>
Now, let us cat the dockerfile as below:
=============>
vskumar@ubuntu:~$ ls -l
total 48
drwxr-xr-x 3 vskumar vskumar 4096 Nov 24 23:32 Desktop
-rw-rw-r– 1 vskumar vskumar 86 Dec 3 04:29 dockerfile
drwxr-xr-x 2 vskumar vskumar 4096 Nov 22 21:23 Documents
drwxr-xr-x 2 vskumar vskumar 4096 Nov 25 06:33 Downloads
-rw-r–r– 1 vskumar vskumar 8980 Nov 22 21:03 examples.desktop
drwxr-xr-x 2 vskumar vskumar 4096 Nov 22 21:23 Music
drwxr-xr-x 2 vskumar vskumar 4096 Nov 25 06:02 Pictures
drwxr-xr-x 2 vskumar vskumar 4096 Nov 22 21:23 Public
drwxr-xr-x 2 vskumar vskumar 4096 Nov 22 21:23 Templates
drwxr-xr-x 2 vskumar vskumar 4096 Nov 22 21:23 Videos
vskumar@ubuntu:~$
vskumar@ubuntu:~$ cat dockerfile
FROM ubuntu
CMD [“echo”, “This is done by vskumar for a lab practice of dockerfile”]
vskumar@ubuntu:~$
================>
From the above dockerfile contents:
1st line FROM ubuntu – denotes it is using the buntu as the base image to create the container.
2nd line: CMD [“echo”, “This is done by vskumar for a lab practice of dockerfile”]
denotes using CMD echo command is executed to print the message “This is done by vskumar for a lab practice of dockerfile”.
Now let us run this file through the below command:
$ sudo docker build .
We can see the output as below:
===============>
vskumar@ubuntu:~$ sudo docker build .
Sending build context to Docker daemon 112MB
Step 1/2 : FROM ubuntu
—> 20c44cd7596f
Step 2/2 : CMD [“echo”, “This is done by vskumar for a lab practice of dockerfile”]
—> Running in 1de59a4799fa
Removing intermediate container 1de59a4799fa
—> 8de083612fef
Successfully built 8de083612fef
vskumar@ubuntu:~$
===================>
Now, let us list the images:
==================>
vskumar@ubuntu:~$
vskumar@ubuntu:~$ sudo docker images
REPOSITORY TAG IMAGE ID CREATED SIZE
<none> <none> 8de083612fef About a minute ago 123MB
docker-exercise/ubuntu-wgetinstall latest e34304119838 7 days ago 169MB
<none> <none> fc7e4564eb92 7 days ago 169MB
hello-world latest f2a91732366c 12 days ago 1.85kB
ubuntu 16.04 20c44cd7596f 2 weeks ago 123MB
ubuntu latest 20c44cd7596f 2 weeks ago 123MB
busybox latest 6ad733544a63 4 weeks ago 1.13MB
busybox 1.24 47bcc53f74dc 20 months ago 1.11MB
vskumar@ubuntu:~$
==========================>
We can see Imgae id: 8de083612fef is created just now.
Look into that line there is no tag given.
Now let us tag it as below:
$ sudo docker tag 8de083612fef ubuntu-testbox1
================>
vskumar@ubuntu:~$
vskumar@ubuntu:~$ sudo docker tag 8de083612fef ubuntu-testbox1
vskumar@ubuntu:~$ sudo docker images
REPOSITORY TAG IMAGE ID CREATED SIZE
ubuntu-testbox1 latest 8de083612fef 4 minutes ago 123MB
docker-exercise/ubuntu-wgetinstall latest e34304119838 7 days ago 169MB
<none> <none> fc7e4564eb92 7 days ago 169MB
hello-world latest f2a91732366c 12 days ago 1.85kB
ubuntu 16.04 20c44cd7596f 2 weeks ago 123MB
ubuntu latest 20c44cd7596f 2 weeks ago 123MB
busybox latest 6ad733544a63 4 weeks ago 1.13MB
busybox 1.24 47bcc53f74dc 20 months ago 1.11MB
vskumar@ubuntu:~$
====================>
Now, let us do some housekeeping on these containers.
Let us list the containers using ps -a command
====================>
vskumar@ubuntu:~$ sudo docker ps -a
CONTAINER ID IMAGE COMMAND CREATED STATUS PORTS NAMES
0fe495fc93ed ubuntu “/bin/bash -c ‘while…” 8 hours ago Exited (137) 4 hours ago hungry_engelbart
10ffea6140f9 ubuntu “bash” 7 days ago Exited (0) 7 days ago quizzical_lalande
b2a79f8d2fe6 ubuntu “/bin/bash -c ‘while…” 7 days ago Exited (255) 7 days ago goofy_borg
155f4b0764b1 ubuntu:16.04 “/bin/bash” 7 days ago Exited (0) 7 days ago zen_volhard
vskumar@ubuntu:~$
=====================>
I want to remove all of them. We can recreate with the dockerfile as an exercise.
$ Sudo docker containers prune
=======================================>
vskumar@ubuntu:~$ sudo docker ps -aq
0fe495fc93ed
10ffea6140f9
b2a79f8d2fe6
155f4b0764b1
vskumar@ubuntu:~$ sudo docker container prune
WARNING! This will remove all stopped containers.
Are you sure you want to continue? [y/N] y
Deleted Containers:
0fe495fc93edee3aaadc7fc0fbf21997f0ca3cde4d7e563aa8c61352a43957dd
10ffea6140f9c93b37bad2f9d159ad53aa121c0de69a9d145f07cc12f9591324
b2a79f8d2fe65453fce19f00d7adf03ed6dcced69ae68fba94ad0c416545263e
155f4b0764b16f1c8776a101cced6ea95c55eeabe69aeab8520cbe925bedc456

Total reclaimed space: 186B
vskumar@ubuntu:~$ sudo docker ps -aq
vskumar@ubuntu:~$
============== so now there are no containers =========>
Let us build the container.
Before building let us check the available images:
==================>
vskumar@ubuntu:~$ sudo docker images
REPOSITORY TAG IMAGE ID CREATED SIZE
ubuntu-testbox1 latest 8de083612fef 24 minutes ago 123MB
docker-exercise/ubuntu-wgetinstall latest e34304119838 7 days ago 169MB
<none> <none> fc7e4564eb92 7 days ago 169MB
hello-world latest f2a91732366c 12 days ago 1.85kB
ubuntu 16.04 20c44cd7596f 2 weeks ago 123MB
ubuntu latest 20c44cd7596f 2 weeks ago 123MB
busybox latest 6ad733544a63 4 weeks ago 1.13MB
busybox 1.24 47bcc53f74dc 20 months ago 1.11MB
vskumar@ubuntu:~$
====================>
Let us remove some more images also.
We need to use the below commands:
=========== Let us try one image removal =========>
vskumar@ubuntu:~$ sudo docker images
REPOSITORY TAG IMAGE ID CREATED SIZE
ubuntu-testbox1 latest 8de083612fef 33 minutes ago 123MB
docker-exercise/ubuntu-wgetinstall latest e34304119838 7 days ago 169MB
<none> <none> fc7e4564eb92 7 days ago 169MB
hello-world latest f2a91732366c 12 days ago 1.85kB
ubuntu 16.04 20c44cd7596f 2 weeks ago 123MB
ubuntu latest 20c44cd7596f 2 weeks ago 123MB
busybox latest 6ad733544a63 4 weeks ago 1.13MB
busybox 1.24 47bcc53f74dc 20 months ago 1.11MB
vskumar@ubuntu:~$ sudo docker rmi image 47bcc53f74dc
Untagged: busybox:1.24
Untagged: busybox@sha256:8ea3273d79b47a8b6d018be398c17590a4b5ec604515f416c5b797db9dde3ad8
Deleted: sha256:47bcc53f74dc94b1920f0b34f6036096526296767650f223433fe65c35f149eb
Deleted: sha256:f6075681a244e9df4ab126bce921292673c9f37f71b20f6be1dd3bb99b4fdd72
Deleted: sha256:1834950e52ce4d5a88a1bbd131c537f4d0e56d10ff0dd69e66be3b7dfa9df7e6
Error: No such image: image
vskumar@ubuntu:~$
=================================>
So, by using :
sudo docker rmi image [image id], we can remove the image.

Now, further continuation of our dockerfile exercise;
We can create a container from ubuntu base image and install vim package on it with the help of dockerfile.
To do this we need to have following dockerfile script.
——————>
FROM ubuntu
RUN apt-get update
RUN apt-get -y install vim
CMD [“echo”, “This is done by vskumar for a lab demo on dockerfile”]
—————–>
Before doing it, let me do some housekeeping.
I have removed the below image:
==================>
vskumar@ubuntu:~$
vskumar@ubuntu:~$ sudo docker rmi image 6ad733544a63
Untagged: busybox:latest
Untagged: busybox@sha256:bbc3a03235220b170ba48a157dd097dd1379299370e1ed99ce976df0355d24f0
Deleted: sha256:6ad733544a6317992a6fac4eb19fe1df577d4dec7529efec28a5bd0edad0fd30
Deleted: sha256:0271b8eebde3fa9a6126b1f2335e170f902731ab4942f9f1914e77016540c7bb
Error: No such image: image
=====================>
See the current status:
===================>
vskumar@ubuntu:~$ ls
Desktop dockerfile Documents Downloads examples.desktop Music Pictures Public Templates Videos
vskumar@ubuntu:~$ sudo docker images
REPOSITORY TAG IMAGE ID CREATED SIZE
ubuntu-testbox1 latest 8de083612fef About an hour ago 123MB
docker-exercise/ubuntu-wgetinstall latest e34304119838 7 days ago 169MB
<none> <none> fc7e4564eb92 7 days ago 169MB
hello-world latest f2a91732366c 12 days ago 1.85kB
ubuntu 16.04 20c44cd7596f 2 weeks ago 123MB
vskumar@ubuntu:~$
======================>
Now let me update the dockerfile through vi and cat that file:
====================>
vskumar@ubuntu:~$
vskumar@ubuntu:~$ pwd
/home/vskumar
vskumar@ubuntu:~$ vi dockerfile
vskumar@ubuntu:~$ cat dockerfile
FROM ubuntu
RUN apt-get update
RUN apt-get -y install vim
CMD [“echo”, “This is done by vskumar for a lab practice of dockerfile”]
vskumar@ubuntu:~$
====================>
Now let me run the below command:
$ sudo docker build -t ubuntu-vmbox .
This time; I have added the tag name as ‘ ubuntu-vmbox’.
We need to understand; there are below tasks it involves:
1. Updating the ubuntu libraries – it takes some time by displaying lot of output.
2. Installing vim utility. — This also takes some time.
3. Displaying the message.
We can see this large size output:
=========== Update the packages and install the vim in a conatiner ==========>
vskumar@ubuntu:~$ pwd
/home/vskumar
vskumar@ubuntu:~$ sudo docker build -t ubuntu-vmbox .
Sending build context to Docker daemon 112MB
Step 1/4 : FROM ubuntu
latest: Pulling from library/ubuntu
Digest: sha256:7c67a2206d3c04703e5c23518707bdd4916c057562dd51c74b99b2ba26af0f79
Status: Downloaded newer image for ubuntu:latest
—> 20c44cd7596f
Step 2/4 : RUN apt-get update
—> Running in df81eaef9437
Get:1 http://archive.ubuntu.com/ubuntu xenial InRelease [247 kB]
Get:2 http://security.ubuntu.com/ubuntu xenial-security InRelease [102 kB]
Get:3 http://archive.ubuntu.com/ubuntu xenial-updates InRelease [102 kB]
Get:4 http://archive.ubuntu.com/ubuntu xenial-backports InRelease [102 kB]
Get:5 http://archive.ubuntu.com/ubuntu xenial/universe Sources [9802 kB]
Get:6 http://security.ubuntu.com/ubuntu xenial-security/universe Sources [53.1 kB]
Get:7 http://archive.ubuntu.com/ubuntu xenial/main amd64 Packages [1558 kB]
Get:8 http://archive.ubuntu.com/ubuntu xenial/restricted amd64 Packages [14.1 kB]
Get:9 http://archive.ubuntu.com/ubuntu xenial/universe amd64 Packages [9827 kB]
Get:10 http://archive.ubuntu.com/ubuntu xenial/multiverse amd64 Packages [176 kB]
Get:11 http://archive.ubuntu.com/ubuntu xenial-updates/universe Sources [231 kB]
Get:12 http://archive.ubuntu.com/ubuntu xenial-updates/main amd64 Packages [866 kB]
Get:13 http://archive.ubuntu.com/ubuntu xenial-updates/restricted amd64 Packages [13.7 kB]
Get:14 http://archive.ubuntu.com/ubuntu xenial-updates/universe amd64 Packages [719 kB]
Get:15 http://archive.ubuntu.com/ubuntu xenial-updates/multiverse amd64 Packages [18.5 kB]
Get:16 http://archive.ubuntu.com/ubuntu xenial-backports/main amd64 Packages [5174 B]
Get:17 http://archive.ubuntu.com/ubuntu xenial-backports/universe amd64 Packages [7150 B]
Get:18 http://security.ubuntu.com/ubuntu xenial-security/main amd64 Packages [505 kB]
Get:19 http://security.ubuntu.com/ubuntu xenial-security/restricted amd64 Packages [12.9 kB]
Get:20 http://security.ubuntu.com/ubuntu xenial-security/universe amd64 Packages [229 kB]
Get:21 http://security.ubuntu.com/ubuntu xenial-security/multiverse amd64 Packages [3479 B]
Fetched 24.6 MB in 2min 5s (196 kB/s)
Reading package lists…
Removing intermediate container df81eaef9437
—> 13cd766374bc
Step 3/4 : RUN apt-get -y install vim
—> Running in d37783a8cb7d
Reading package lists…
Building dependency tree…
Reading state information…
The following additional packages will be installed:
file libexpat1 libgpm2 libmagic1 libmpdec2 libpython3.5 libpython3.5-minimal
libpython3.5-stdlib libsqlite3-0 libssl1.0.0 mime-support vim-common
vim-runtime
Suggested packages:
gpm ctags vim-doc vim-scripts vim-gnome-py2 | vim-gtk-py2 | vim-gtk3-py2
| vim-athena-py2 | vim-nox-py2
The following NEW packages will be installed:
file libexpat1 libgpm2 libmagic1 libmpdec2 libpython3.5 libpython3.5-minimal
libpython3.5-stdlib libsqlite3-0 libssl1.0.0 mime-support vim vim-common
vim-runtime
0 upgraded, 14 newly installed, 0 to remove and 2 not upgraded.
Need to get 12.2 MB of archives.
After this operation, 58.3 MB of additional disk space will be used.
Get:1 http://archive.ubuntu.com/ubuntu xenial/main amd64 libgpm2 amd64 1.20.4-6.1 [16.5 kB]
Get:2 http://archive.ubuntu.com/ubuntu xenial/main amd64 libmagic1 amd64 1:5.25-2ubuntu1 [216 kB]
Get:3 http://archive.ubuntu.com/ubuntu xenial/main amd64 file amd64 1:5.25-2ubuntu1 [21.2 kB]
Get:4 http://archive.ubuntu.com/ubuntu xenial-updates/main amd64 libexpat1 amd64 2.1.0-7ubuntu0.16.04.3 [71.2 kB]
Get:5 http://archive.ubuntu.com/ubuntu xenial/main amd64 libmpdec2 amd64 2.4.2-1 [82.6 kB]
Get:6 http://archive.ubuntu.com/ubuntu xenial-updates/main amd64 libssl1.0.0 amd64 1.0.2g-1ubuntu4.9 [1085 kB]
Get:7 http://archive.ubuntu.com/ubuntu xenial-updates/main amd64 libpython3.5-minimal amd64 3.5.2-2ubuntu0~16.04.4 [523 kB]
Get:8 http://archive.ubuntu.com/ubuntu xenial/main amd64 mime-support all 3.59ubuntu1 [31.0 kB]
Get:9 http://archive.ubuntu.com/ubuntu xenial/main amd64 libsqlite3-0 amd64 3.11.0-1ubuntu1 [396 kB]
Get:10 http://archive.ubuntu.com/ubuntu xenial-updates/main amd64 libpython3.5-stdlib amd64 3.5.2-2ubuntu0~16.04.4 [2132 kB]
Get:11 http://archive.ubuntu.com/ubuntu xenial-updates/main amd64 vim-common amd64 2:7.4.1689-3ubuntu1.2 [103 kB]
Get:12 http://archive.ubuntu.com/ubuntu xenial-updates/main amd64 libpython3.5 amd64 3.5.2-2ubuntu0~16.04.4 [1360 kB]
Get:13 http://archive.ubuntu.com/ubuntu xenial-updates/main amd64 vim-runtime all 2:7.4.1689-3ubuntu1.2 [5164 kB]
Get:14 http://archive.ubuntu.com/ubuntu xenial-updates/main amd64 vim amd64 2:7.4.1689-3ubuntu1.2 [1036 kB]
debconf: delaying package configuration, since apt-utils is not installed
Fetched 12.2 MB in 12s (949 kB/s)
Selecting previously unselected package libgpm2:amd64.
(Reading database … 4768 files and directories currently installed.)
Preparing to unpack …/libgpm2_1.20.4-6.1_amd64.deb …
Unpacking libgpm2:amd64 (1.20.4-6.1) …
Selecting previously unselected package libmagic1:amd64.
Preparing to unpack …/libmagic1_1%3a5.25-2ubuntu1_amd64.deb …
Unpacking libmagic1:amd64 (1:5.25-2ubuntu1) …
Selecting previously unselected package file.
Preparing to unpack …/file_1%3a5.25-2ubuntu1_amd64.deb …
Unpacking file (1:5.25-2ubuntu1) …
Selecting previously unselected package libexpat1:amd64.
Preparing to unpack …/libexpat1_2.1.0-7ubuntu0.16.04.3_amd64.deb …
Unpacking libexpat1:amd64 (2.1.0-7ubuntu0.16.04.3) …
Selecting previously unselected package libmpdec2:amd64.
Preparing to unpack …/libmpdec2_2.4.2-1_amd64.deb …
Unpacking libmpdec2:amd64 (2.4.2-1) …
Selecting previously unselected package libssl1.0.0:amd64.
Preparing to unpack …/libssl1.0.0_1.0.2g-1ubuntu4.9_amd64.deb …
Unpacking libssl1.0.0:amd64 (1.0.2g-1ubuntu4.9) …
Selecting previously unselected package libpython3.5-minimal:amd64.
Preparing to unpack …/libpython3.5-minimal_3.5.2-2ubuntu0~16.04.4_amd64.deb …
Unpacking libpython3.5-minimal:amd64 (3.5.2-2ubuntu0~16.04.4) …
Selecting previously unselected package mime-support.
Preparing to unpack …/mime-support_3.59ubuntu1_all.deb …
Unpacking mime-support (3.59ubuntu1) …
Selecting previously unselected package libsqlite3-0:amd64.
Preparing to unpack …/libsqlite3-0_3.11.0-1ubuntu1_amd64.deb …
Unpacking libsqlite3-0:amd64 (3.11.0-1ubuntu1) …
Selecting previously unselected package libpython3.5-stdlib:amd64.
Preparing to unpack …/libpython3.5-stdlib_3.5.2-2ubuntu0~16.04.4_amd64.deb …
Unpacking libpython3.5-stdlib:amd64 (3.5.2-2ubuntu0~16.04.4) …
Selecting previously unselected package vim-common.
Preparing to unpack …/vim-common_2%3a7.4.1689-3ubuntu1.2_amd64.deb …
Unpacking vim-common (2:7.4.1689-3ubuntu1.2) …
Selecting previously unselected package libpython3.5:amd64.
Preparing to unpack …/libpython3.5_3.5.2-2ubuntu0~16.04.4_amd64.deb …
Unpacking libpython3.5:amd64 (3.5.2-2ubuntu0~16.04.4) …
Selecting previously unselected package vim-runtime.
Preparing to unpack …/vim-runtime_2%3a7.4.1689-3ubuntu1.2_all.deb …
Adding ‘diversion of /usr/share/vim/vim74/doc/help.txt to /usr/share/vim/vim74/doc/help.txt.vim-tiny by vim-runtime’
Adding ‘diversion of /usr/share/vim/vim74/doc/tags to /usr/share/vim/vim74/doc/tags.vim-tiny by vim-runtime’
Unpacking vim-runtime (2:7.4.1689-3ubuntu1.2) …
Selecting previously unselected package vim.
Preparing to unpack …/vim_2%3a7.4.1689-3ubuntu1.2_amd64.deb …
Unpacking vim (2:7.4.1689-3ubuntu1.2) …
Processing triggers for libc-bin (2.23-0ubuntu9) …
Setting up libgpm2:amd64 (1.20.4-6.1) …
Setting up libmagic1:amd64 (1:5.25-2ubuntu1) …
Setting up file (1:5.25-2ubuntu1) …
Setting up libexpat1:amd64 (2.1.0-7ubuntu0.16.04.3) …
Setting up libmpdec2:amd64 (2.4.2-1) …
Setting up libssl1.0.0:amd64 (1.0.2g-1ubuntu4.9) …
debconf: unable to initialize frontend: Dialog
debconf: (TERM is not set, so the dialog frontend is not usable.)
debconf: falling back to frontend: Readline
debconf: unable to initialize frontend: Readline
debconf: (Can’t locate Term/ReadLine.pm in @INC (you may need to install the Term::ReadLine module) (@INC contains: /etc/perl /usr/local/lib/x86_64-linux-gnu/perl/5.22.1 /usr/local/share/perl/5.22.1 /usr/lib/x86_64-linux-gnu/perl5/5.22 /usr/share/perl5 /usr/lib/x86_64-linux-gnu/perl/5.22 /usr/share/perl/5.22 /usr/local/lib/site_perl /usr/lib/x86_64-linux-gnu/perl-base .) at /usr/share/perl5/Debconf/FrontEnd/Readline.pm line 7.)
debconf: falling back to frontend: Teletype
Setting up libpython3.5-minimal:amd64 (3.5.2-2ubuntu0~16.04.4) …
Setting up mime-support (3.59ubuntu1) …
Setting up libsqlite3-0:amd64 (3.11.0-1ubuntu1) …
Setting up libpython3.5-stdlib:amd64 (3.5.2-2ubuntu0~16.04.4) …
Setting up vim-common (2:7.4.1689-3ubuntu1.2) …
Setting up libpython3.5:amd64 (3.5.2-2ubuntu0~16.04.4) …
Setting up vim-runtime (2:7.4.1689-3ubuntu1.2) …
Setting up vim (2:7.4.1689-3ubuntu1.2) …
update-alternatives: using /usr/bin/vim.basic to provide /usr/bin/vim (vim) in auto mode
update-alternatives: using /usr/bin/vim.basic to provide /usr/bin/vimdiff (vimdiff) in auto mode
update-alternatives: using /usr/bin/vim.basic to provide /usr/bin/rvim (rvim) in auto mode
update-alternatives: using /usr/bin/vim.basic to provide /usr/bin/rview (rview) in auto mode
update-alternatives: using /usr/bin/vim.basic to provide /usr/bin/vi (vi) in auto mode
update-alternatives: using /usr/bin/vim.basic to provide /usr/bin/view (view) in auto mode
update-alternatives: using /usr/bin/vim.basic to provide /usr/bin/ex (ex) in auto mode
update-alternatives: using /usr/bin/vim.basic to provide /usr/bin/editor (editor) in auto mode
Processing triggers for libc-bin (2.23-0ubuntu9) …
Removing intermediate container d37783a8cb7d
—> c07c6f2d2c65
Step 4/4 : CMD [“echo”, “This is done by vskumar for a lab practice of dockerfile”]
—> Running in f7e85f87b578
Removing intermediate container f7e85f87b578
—> f6675f4738b7
Successfully built f6675f4738b7
Successfully tagged ubuntu-vmbox:latest
vskumar@ubuntu:~$
=== Finally you can see the ‘ubuntu-vmbox’ tagged conatiner ======>
We can see the latest image from the below images:
===== Current images list =====>
vskumar@ubuntu:~$ sudo docker images
REPOSITORY TAG IMAGE ID CREATED SIZE
ubuntu-vmbox latest f6675f4738b7 3 minutes ago 220MB
ubuntu-testbox1 latest 8de083612fef About an hour ago 123MB
docker-exercise/ubuntu-wgetinstall latest e34304119838 7 days ago 169MB
<none> <none> fc7e4564eb92 7 days ago 169MB
hello-world latest f2a91732366c 12 days ago 1.85kB
ubuntu 16.04 20c44cd7596f 2 weeks ago 123MB
ubuntu latest 20c44cd7596f 2 weeks ago 123MB
vskumar@ubuntu:~$
=======================>
Now, I want to work with this newly created container. Please recollect my blog “https://vskumar.blog/2017/11/29/6-devops-how-to-work-with-interactive-docker-containers/”.
As we did practice in it; we can use the below command to work with this new container:

sudo docker run -i -t ubuntu-vmbox /bin/bash
I want to test the vim is working on it. See the below output:
==================>
vskumar@ubuntu:~$ sudo docker run -i -t ubuntu-vmbox /bin/bash

root@1169bb1285cf:/#
root@1169bb1285cf:/# pwd
/
root@1169bb1285cf:/# ls
bin boot dev etc home lib lib64 media mnt opt proc root run sbin srv sys tmp usr var
root@1169bb1285cf:/# vim test1
===== I have created the file with vim successfully ====>
Now let me use cat command and see its output:

================>
root@1169bb1285cf:/#
root@1169bb1285cf:/# ls
bin boot dev etc home lib lib64 media mnt opt proc root run sbin srv sys test1 tmp usr var
root@1169bb1285cf:/# cat test1
testing this vim box……
root@1169bb1285cf:/#
=================>

So, in this exercise we have updated the ubuntu libraries and installed vim utility.
And tested the container for vim usage by using interactive mode.

=========== Now let me exit and check the list of images =====>
root@1169bb1285cf:/#
root@1169bb1285cf:/# exit
exit
vskumar@ubuntu:~$ sudo docker images
REPOSITORY TAG IMAGE ID CREATED SIZE
ubuntu-vmbox latest f6675f4738b7 13 minutes ago 220MB
ubuntu-testbox1 latest 8de083612fef About an hour ago 123MB
docker-exercise/ubuntu-wgetinstall latest e34304119838 7 days ago 169MB
<none> <none> fc7e4564eb92 7 days ago 169MB
hello-world latest f2a91732366c 12 days ago 1.85kB
ubuntu 16.04 20c44cd7596f 2 weeks ago 123MB
ubuntu latest 20c44cd7596f 2 weeks ago 123MB
vskumar@ubuntu:~$
=============================>
So, the new container ‘ubuntu-vmbox’ is existing.

Now, I want to remove some images:
sudo docker rmi 20c44cd7596f
================>
vskumar@ubuntu:~$ sudo docker images
REPOSITORY TAG IMAGE ID CREATED SIZE
ubuntu-vmbox latest f6675f4738b7 18 minutes ago 220MB
ubuntu-testbox1 latest 8de083612fef About an hour ago 123MB
docker-exercise/ubuntu-wgetinstall latest e34304119838 7 days ago 169MB
<none> <none> fc7e4564eb92 7 days ago 169MB
hello-world latest f2a91732366c 12 days ago 1.85kB
ubuntu 16.04 20c44cd7596f 2 weeks ago 123MB
ubuntu latest 20c44cd7596f 2 weeks ago 123MB
vskumar@ubuntu:~$ sudo docker rmi 20c44cd7596f
Error response from daemon: conflict: unable to delete 20c44cd7596f (cannot be forced) – image has dependent child images
vskumar@ubuntu:~$
== Please note the last image was the base to build the top tow containers ===>
Hence it has the child and parent relationship.
First we need to remove the child images and later the parent need to be removed.
=== You can see the removal of child one and one more image=====>
vskumar@ubuntu:~$ sudo docker images
REPOSITORY TAG IMAGE ID CREATED SIZE
ubuntu-vmbox latest f6675f4738b7 20 minutes ago 220MB
ubuntu-testbox1 latest 8de083612fef 2 hours ago 123MB
docker-exercise/ubuntu-wgetinstall latest e34304119838 7 days ago 169MB
<none> <none> fc7e4564eb92 7 days ago 169MB
hello-world latest f2a91732366c 12 days ago 1.85kB
ubuntu 16.04 20c44cd7596f 2 weeks ago 123MB
ubuntu latest 20c44cd7596f 2 weeks ago 123MB
vskumar@ubuntu:~$ sudo docker rmi 8de083612fef
Untagged: ubuntu-testbox1:latest
Deleted: sha256:8de083612fefbf9723913748f7db4aba4154b17adc500d011f44df356736f06c
vskumar@ubuntu:~$ sudo docker rmi e34304119838
Untagged: docker-exercise/ubuntu-wgetinstall:latest
Deleted: sha256:e34304119838d79da60e12776529106c350b1972cd517648e8ab90311fad7b1a
vskumar@ubuntu:~$ sudo docker images
REPOSITORY TAG IMAGE ID CREATED SIZE
ubuntu-vmbox latest f6675f4738b7 21 minutes ago 220MB
<none> <none> fc7e4564eb92 7 days ago 169MB
hello-world latest f2a91732366c 12 days ago 1.85kB
ubuntu 16.04 20c44cd7596f 2 weeks ago 123MB
ubuntu latest 20c44cd7596f 2 weeks ago 123MB
vskumar@ubuntu:~$
=================>
Let me do some more exercises on housekeeping.
I would like to present some more dependency issues for the above images. You can clearly see the output:
========= Dependencies =======>
vskumar@ubuntu:~$ sudo docker images
REPOSITORY TAG IMAGE ID CREATED SIZE
ubuntu-vmbox latest f6675f4738b7 22 minutes ago 220MB
<none> <none> fc7e4564eb92 7 days ago 169MB
hello-world latest f2a91732366c 12 days ago 1.85kB
ubuntu 16.04 20c44cd7596f 2 weeks ago 123MB
ubuntu latest 20c44cd7596f 2 weeks ago 123MB
vskumar@ubuntu:~$ sudo docker rmi fc7e4564eb92
Deleted: sha256:fc7e4564eb928ccfe068c789f0d650967e8d5dc42d4e8d92409aab6614364075
Deleted: sha256:b16d78406b12e6dbc174f4e71bedb7b9edc0593cad10458ddf042738694c06db
vskumar@ubuntu:~$ sudo docker rmi 20c44cd7596f
Error response from daemon: conflict: unable to delete 20c44cd7596f (cannot be forced) – image has dependent child images
vskumar@ubuntu:~$ sudo docker rmi f6675f4738b7
Error response from daemon: conflict: unable to delete f6675f4738b7 (must be forced) – image is being used by stopped container 1169bb1285cf
vskumar@ubuntu:~$ sudo docker ps -a
CONTAINER ID IMAGE COMMAND CREATED STATUS PORTS NAMES
1169bb1285cf ubuntu-vmbox “/bin/bash” 15 minutes ago Exited (0) 11 minutes ago heuristic_mayer
vskumar@ubuntu:~$
====================>
It means the container “1169bb1285cf ubuntu-vmbox” is the child to image id:f6675f4738b7.
===========>
vskumar@ubuntu:~$ sudo docker images
REPOSITORY TAG IMAGE ID CREATED SIZE
ubuntu-vmbox latest f6675f4738b7 27 minutes ago 220MB
hello-world latest f2a91732366c 12 days ago 1.85kB
ubuntu 16.04 20c44cd7596f 2 weeks ago 123MB
ubuntu latest 20c44cd7596f 2 weeks ago 123MB
vskumar@ubuntu:~$ sudo docker ps -a
CONTAINER ID IMAGE COMMAND CREATED STATUS PORTS NAMES
1169bb1285cf ubuntu-vmbox “/bin/bash” 19 minutes ago Exited (0) 14 minutes ago heuristic_mayer
vskumar@ubuntu:~$
==============>
So if I want to remove Image id: f6675f4738b7, I need to remove the container id:1169bb1285cf , and later I need to remove this image.
$ sudo docker rm container 1169bb1285cf
And later image removal command need to be used as below.
======================>
vskumar@ubuntu:~$ sudo docker images
REPOSITORY TAG IMAGE ID CREATED SIZE
ubuntu-vmbox latest f6675f4738b7 31 minutes ago 220MB
hello-world latest f2a91732366c 12 days ago 1.85kB
ubuntu 16.04 20c44cd7596f 2 weeks ago 123MB
ubuntu latest 20c44cd7596f 2 weeks ago 123MB
vskumar@ubuntu:~$ sudo docker rmi f6675f4738b7
Untagged: ubuntu-vmbox:latest
Deleted: sha256:f6675f4738b721780721f345906a0c78c13a67ee8239a16f071504b217f41658
Deleted: sha256:c07c6f2d2c651dd406977d42d5504c941d7f975a84c8547abaf3869b50942820
Deleted: sha256:4855cfb7ae6f84279bbbfe87e7691377531a541785c613014f64909e6e0f4528
Deleted: sha256:13cd766374bcb31cc0e8cac971e82754bb8e1bc66780abaff264f847e00a94b2
Deleted: sha256:dc6fab8a33a18a8c840e19612253657c4610ab865a26de5a31260f71bcef5f76
vskumar@ubuntu:~$
========================>
So we have the below images only now:
==== Current images ======>
vskumar@ubuntu:~$ sudo docker images
REPOSITORY TAG IMAGE ID CREATED SIZE
hello-world latest f2a91732366c 12 days ago 1.85kB
ubuntu 16.04 20c44cd7596f 2 weeks ago 123MB
ubuntu latest 20c44cd7596f 2 weeks ago 123MB
vskumar@ubuntu:~$
==========================>
We can try to remove the above images:
========= See it is declined due to it is base image ===========>
vskumar@ubuntu:~$ sudo docker images
REPOSITORY TAG IMAGE ID CREATED SIZE
hello-world latest f2a91732366c 12 days ago 1.85kB
ubuntu 16.04 20c44cd7596f 2 weeks ago 123MB
ubuntu latest 20c44cd7596f 2 weeks ago 123MB
vskumar@ubuntu:~$ sudo docker rmi 20c44cd7596f
Error response from daemon: conflict: unable to delete 20c44cd7596f (must be forced) – image is referenced in multiple repositories
vskumar@ubuntu:~$
=========================>
Both ubuntu images are interlinked and they can not be removed as the base docker engine is working on top of their OS.

We will stop this session at this time.

We will continue some more sessions on “dockerfile”.


Vcard-Shanthi Kumar V-v3

11. DevOps: How to Launch a container as a daemon ?

Docker-logo

In continuation of my previous blog on “10. DevOps: How to Build images from Docker containers?”, I am continuing my lab exercises. In this session we can see ”

How to Launch a container as a daemon ?:

Note: If you want to recollect the docker commands to be used during your current lab practice, visit my blog link:

https://vskumarblogs.wordpress.com/2017/12/13/some-useful-docker-commands-for-handling-images-and-containers/


Let us recap the past exercises; So far we have experimented with an interactive container, tracked the changes that were made to the containers., created images from the containers, and then gained insights in the containerization scenarios.

Now, let us see the container usage in a detached mode.

When we run the container in a detached mode it runs under a daemon process.

I want to use the “ubuntu” image and run detached mode command.

First, let me check my current docker images:

==================>

vskumar@ubuntu:~$

vskumar@ubuntu:~$ sudo docker images

[sudo] password for vskumar:

REPOSITORY TAG IMAGE ID CREATED SIZE

docker-exercise/ubuntu-wgetinstall latest e34304119838 7 days ago 169MB

<none> <none> fc7e4564eb92 7 days ago 169MB

hello-world latest f2a91732366c 12 days ago 1.85kB

ubuntu 16.04 20c44cd7596f 2 weeks ago 123MB

ubuntu latest 20c44cd7596f 2 weeks ago 123MB

busybox latest 6ad733544a63 4 weeks ago 1.13MB

busybox 1.24 47bcc53f74dc 20 months ago 1.11MB

vskumar@ubuntu:~$

===================>

You can see my previous image with ‘docker-exercise/ubuntu-wgetinstall ‘. This was created in the previous exercise.

As per our plan in this session I am using the below commands to run the ubuntu image as below:

sudo docker run -d ubuntu \

    /bin/bash -c "while true; do date; sleep 5; done";

========== Output ======>
vskumar@ubuntu:~$  sudo docker run -d ubuntu \
>     /bin/bash -c "while true; do date; sleep 5; done";
0fe495fc93edee3aaadc7fc0fbf21997f0ca3cde4d7e563aa8c61352a43957dd
vskumar@ubuntu:~$ $ 
=======================>

Now, to view the docker logs I want to run the docker logs subcommand on image id: ‘ 0fe495fc93edee3aaadc7fc0fbf21997f0ca3cde4d7e563aa8c61352a43957dd’

$ sudo docker logs 0fe495fc93edee3aaadc7fc0fbf21997f0ca3cde4d7e563aa8c61352a43957dd;

=====See the output of the Daemon process running with the ubuntu image ===============>

vskumar@ubuntu:~$ sudo docker logs 0fe495fc93edee3aaadc7fc0fbf21997f0ca3cde4d7e563aa8c61352a43957dd;

Sun Dec 3 05:11:57 UTC 2017

Sun Dec 3 05:12:02 UTC 2017

Sun Dec 3 05:12:07 UTC 2017

Sun Dec 3 05:12:12 UTC 2017

Sun Dec 3 05:12:17 UTC 2017

Sun Dec 3 05:12:22 UTC 2017

Sun Dec 3 05:12:27 UTC 2017

Sun Dec 3 05:12:32 UTC 2017

Sun Dec 3 05:12:37 UTC 2017

Sun Dec 3 05:12:42 UTC 2017

Sun Dec 3 05:12:48 UTC 2017

Sun Dec 3 05:12:53 UTC 2017

Sun Dec 3 05:12:58 UTC 2017

Sun Dec 3 05:13:03 UTC 2017

Sun Dec 3 05:13:08 UTC 2017

Sun Dec 3 05:13:13 UTC 2017

Sun Dec 3 05:13:18 UTC 2017

Sun Dec 3 05:13:23 UTC 2017

Sun Dec 3 05:13:28 UTC 2017

Sun Dec 3 05:13:33 UTC 2017

Sun Dec 3 05:13:38 UTC 2017

Sun Dec 3 05:13:43 UTC 2017

Sun Dec 3 05:13:48 UTC 2017

Sun Dec 3 05:13:53 UTC 2017

Sun Dec 3 05:13:58 UTC 2017

Sun Dec 3 05:14:03 UTC 2017

Sun Dec 3 05:14:08 UTC 2017

Sun Dec 3 05:14:13 UTC 2017

Sun Dec 3 05:14:18 UTC 2017

Sun Dec 3 05:14:23 UTC 2017

Sun Dec 3 05:14:28 UTC 2017

Sun Dec 3 05:14:33 UTC 2017

Sun Dec 3 05:14:38 UTC 2017

Sun Dec 3 05:14:43 UTC 2017

Sun Dec 3 05:14:48 UTC 2017

Sun Dec 3 05:14:53 UTC 2017

Sun Dec 3 05:14:58 UTC 2017

Sun Dec 3 05:15:03 UTC 2017

Sun Dec 3 05:15:08 UTC 2017

Sun Dec 3 05:15:13 UTC 2017

Sun Dec 3 05:15:18 UTC 2017

Sun Dec 3 05:15:23 UTC 2017

vskumar@ubuntu:~$

=================You can see the output for every few seconds listed =======>

It means the container is running as a daemon.

Now, let us use ps -eaf command to check the processed running in linux by using :

$ ps -eaf | grep ‘daemon’

========= See the output of daemon processes ==========>

vskumar@ubuntu:~$

vskumar@ubuntu:~$ ps -eaf | grep ‘daemon’

message+ 837 1 0 20:26 ? 00:00:05 /usr/bin/dbus-daemon –system –address=systemd: –nofork –nopidfile –systemd-activation

root 871 1 0 20:26 ? 00:00:03 /usr/sbin/NetworkManager –no-daemon

avahi 873 1 0 20:26 ? 00:00:00 avahi-daemon: running [ubuntu.local]

root 876 1 0 20:26 ? 00:00:01 /usr/lib/accountsservice/accounts-daemon

avahi 893 873 0 20:26 ? 00:00:00 avahi-daemon: chroot helper

rtkit 1370 1 0 20:28 ? 00:00:00 /usr/lib/rtkit/rtkit-daemon

vskumar 2426 1 0 20:55 ? 00:00:00 /usr/bin/gnome-keyring-daemon –daemonize –login

vskumar 2508 2428 0 20:55 ? 00:00:00 upstart-udev-bridge –daemon –user

vskumar 2515 2428 0 20:55 ? 00:00:04 dbus-daemon –fork –session –address=unix:abstract=/tmp/dbus-nPaV5rWlQc

vskumar 2570 2428 0 20:55 ? 00:00:03 /usr/lib/x86_64-linux-gnu/bamf/bamfdaemon

vskumar 2572 2428 0 20:55 ? 00:00:04 /usr/bin/ibus-daemon –daemonize –xim –address unix:tmpdir=/tmp/ibus

vskumar 2575 2428 0 20:55 ? 00:00:00 upstart-file-bridge –daemon –user

vskumar 2579 2428 0 20:55 ? 00:00:00 upstart-dbus-bridge –daemon –system –user –bus-name system

vskumar 2582 2428 0 20:55 ? 00:00:00 upstart-dbus-bridge –daemon –session –user –bus-name session

vskumar 2605 2428 0 20:55 ? 00:00:00 /usr/lib/ibus/ibus-x11 –kill-daemon

vskumar 2630 2428 0 20:56 ? 00:00:00 gpg-agent –homedir /home/vskumar/.gnupg –use-standard-socket –daemon

vskumar 2645 2428 0 20:56 ? 00:00:02 /usr/lib/unity-settings-daemon/unity-settings-daemon

vskumar 2664 2653 0 20:56 ? 00:00:00 /usr/bin/dbus-daemon –config-file=/etc/at-spi2/accessibility.conf –nofork –print-address 3

vskumar 2851 2654 0 20:56 ? 00:00:01 /usr/lib/unity-settings-daemon/unity-fallback-mount-helper

vskumar 2914 2428 0 20:57 ? 00:00:00 /bin/sh -c /usr/lib/x86_64-linux-gnu/zeitgeist/zeitgeist-maybe-vacuum; /usr/bin/zeitgeist-daemon

vskumar 2920 2914 0 20:57 ? 00:00:00 /usr/bin/zeitgeist-daemon

vskumar 3094 2428 0 21:00 ? 00:00:01 /usr/lib/x86_64-linux-gnu/unity-lens-files/unity-files-daemon

root 4148 1253 0 21:11 ? 00:00:00 docker-containerd-shim –namespace moby –workdir /var/lib/docker/containerd/daemon/io.containerd.runtime.v1.linux/moby/0fe495fc93edee3aaadc7fc0fbf21997f0ca3cde4d7e563aa8c61352a43957dd –address /var/run/docker/containerd/docker-containerd.sock –runtime-root /var/run/docker/runtime-runc

vskumar 4480 3206 0 21:19 pts/19 00:00:00 grep –color=auto daemon

vskumar@ubuntu:~$

======== You can see the list of processes running currently ========>

So we are successful! to run a container in a detached mode [not in an interactive mode!] using the command: ‘ sudo docker run -d ubuntu’

You can think in an application architecture having multiple servers or SOA running with different services.

You can simulate the same services using the docker containers, by setting up as images by configuring the required services and connect them to the architecture.

This way the advantages of containers can be utilized well. Where different companies are using and implementing their applications into containers architecture by saving lot of infrastructure cost. No hardware or physical servers are required. Lot of space also can be saved. The microservices architecture leads to the same way.

At this point, I would like to stop this session and in the next blog we will see other exercises.

Vcard-Shanthi Kumar V-v3


10. DevOps: How to Build images from Docker containers?

Docker-logo

This is in continuation of my last blog “9. DevOps: How to do Containers housekeeping ?”. In this blog I would like to demonstrate on:

How to Build images from docker containers?:

Note: If you want to recollect the docker commands to be used during your current lab practice, visit my blog link:

https://vskumarblogs.wordpress.com/2017/12/13/some-useful-docker-commands-for-handling-images-and-containers/

So far we have built the containers and operated them through the previous exercises. Now, let us see how  can we add  software to our base image on a running container and then convert that container into an image for future usage.

Let’s take ubuntu:16.04 as our base image, install the wget application, and then convert the running container to an image with the below steps:

To make ubuntu:16.04 container is our base image, we need to install the wget application, and then convert it as the running container to a docker image by using the below steps:

  1. Launch an ubuntu:16.04 container using the docker run subcommand, as shown below:
      $ sudo docker run -i -t ubuntu:16.04 /bin/bash
========================>
vskumar@ubuntu:~$ sudo docker ps -aq
155f4b0764b1
vskumar@ubuntu:~$ sudo docker ps -a
CONTAINER ID        IMAGE               COMMAND             CREATED             STATUS              PORTS               NAMES
155f4b0764b1        ubuntu:16.04        "/bin/bash"         2 hours ago         Up 11 minutes                           zen_volhard
vskumar@ubuntu:~$ sudo docker run -i -t ubuntu:16.04 /bin/bash
root@3484664d454a:/# 
=========================>
2. Now, let's  verify is wget  available for this image or not.
============== the display shows there is no wget in this image =========>

root@3484664d454a:/# ls
bin  boot  dev  etc  home  lib  lib64  media  mnt  opt  proc  root  run  sbin  srv  sys  tmp  usr  var
root@3484664d454a:/# which wget
root@3484664d454a:/# 

      root@472c96295678:/# apt-get update
==================>
As we know that it is a brand new ubuntu container we built it, before installing wget we must synchronize it with the Ubuntu package repository, as shown below:
====================>
root@3484664d454a:/# apt-get update
Get:1 http://archive.ubuntu.com/ubuntu xenial InRelease [247 kB]         
Get:2 http://security.ubuntu.com/ubuntu xenial-security InRelease [102 kB]
Get:3 http://archive.ubuntu.com/ubuntu xenial-updates InRelease [102 kB]                                                                      
Get:4 http://archive.ubuntu.com/ubuntu xenial-backports InRelease [102 kB]                                                                    
Get:5 http://archive.ubuntu.com/ubuntu xenial/universe Sources [9802 kB]                                                                      
Get:6 http://security.ubuntu.com/ubuntu xenial-security/universe Sources [53.1 kB]                                                            
Get:7 http://security.ubuntu.com/ubuntu xenial-security/main amd64 Packages [504 kB]                                                          
Get:8 http://security.ubuntu.com/ubuntu xenial-security/restricted amd64 Packages [12.9 kB]                                                   
Get:9 http://security.ubuntu.com/ubuntu xenial-security/universe amd64 Packages [229 kB]                                                      
Get:10 http://security.ubuntu.com/ubuntu xenial-security/multiverse amd64 Packages [3479 B]                                                   
Get:11 http://archive.ubuntu.com/ubuntu xenial/main amd64 Packages [1558 kB]                                                                  
Get:12 http://archive.ubuntu.com/ubuntu xenial/restricted amd64 Packages [14.1 kB]                                                            
Get:13 http://archive.ubuntu.com/ubuntu xenial/universe amd64 Packages [9827 kB]                                                              
Get:14 http://archive.ubuntu.com/ubuntu xenial/multiverse amd64 Packages [176 kB]                                                             
Get:15 http://archive.ubuntu.com/ubuntu xenial-updates/universe Sources [228 kB]                                                              
Get:16 http://archive.ubuntu.com/ubuntu xenial-updates/main amd64 Packages [864 kB]                                                           
Get:17 http://archive.ubuntu.com/ubuntu xenial-updates/restricted amd64 Packages [13.7 kB]                                                    
Get:18 http://archive.ubuntu.com/ubuntu xenial-updates/universe amd64 Packages [711 kB]                                                       
Get:19 http://archive.ubuntu.com/ubuntu xenial-updates/multiverse amd64 Packages [18.5 kB]                                                    
Get:20 http://archive.ubuntu.com/ubuntu xenial-backports/main amd64 Packages [5174 B]                                                         
Get:21 http://archive.ubuntu.com/ubuntu xenial-backports/universe amd64 Packages [7135 B]                                                     
Fetched 24.6 MB in 59s (412 kB/s)                                                                                                             
Reading package lists... Done
root@3484664d454a:/# 
================================>
Now, we can install wget as below:
=========== Output of wget installation on container ===========>

root@3484664d454a:/# 
root@3484664d454a:/# apt-get install -y wget
Reading package lists... Done
Building dependency tree        
Reading state information... Done
The following additional packages will be installed:
  ca-certificates libidn11 libssl1.0.0 openssl
The following NEW packages will be installed:
  ca-certificates libidn11 libssl1.0.0 openssl wget
0 upgraded, 5 newly installed, 0 to remove and 1 not upgraded.
Need to get 2089 kB of archives.
After this operation, 6027 kB of additional disk space will be used.
Get:1 http://archive.ubuntu.com/ubuntu xenial-updates/main amd64 libidn11 amd64 1.32-3ubuntu1.2 [46.5 kB]
Get:2 http://archive.ubuntu.com/ubuntu xenial-updates/main amd64 libssl1.0.0 amd64 1.0.2g-1ubuntu4.9 [1085 kB]
Get:3 http://archive.ubuntu.com/ubuntu xenial-updates/main amd64 openssl amd64 1.0.2g-1ubuntu4.9 [492 kB]
Get:4 http://archive.ubuntu.com/ubuntu xenial-updates/main amd64 ca-certificates all 20170717~16.04.1 [168 kB]
Get:5 http://archive.ubuntu.com/ubuntu xenial-updates/main amd64 wget amd64 1.17.1-1ubuntu1.3 [299 kB]
Fetched 2089 kB in 4s (421 kB/s)
debconf: delaying package configuration, since apt-utils is not installed
Selecting previously unselected package libidn11:amd64.
(Reading database ... 4768 files and directories currently installed.)
Preparing to unpack .../libidn11_1.32-3ubuntu1.2_amd64.deb ...
Unpacking libidn11:amd64 (1.32-3ubuntu1.2) ...
Selecting previously unselected package libssl1.0.0:amd64.
Preparing to unpack .../libssl1.0.0_1.0.2g-1ubuntu4.9_amd64.deb ...
Unpacking libssl1.0.0:amd64 (1.0.2g-1ubuntu4.9) ...
Selecting previously unselected package openssl.
Preparing to unpack .../openssl_1.0.2g-1ubuntu4.9_amd64.deb ...
Unpacking openssl (1.0.2g-1ubuntu4.9) ...
Selecting previously unselected package ca-certificates.
Preparing to unpack .../ca-certificates_20170717~16.04.1_all.deb ...
Unpacking ca-certificates (20170717~16.04.1) ...
Selecting previously unselected package wget.
Preparing to unpack .../wget_1.17.1-1ubuntu1.3_amd64.deb ...
Unpacking wget (1.17.1-1ubuntu1.3) ...
Processing triggers for libc-bin (2.23-0ubuntu9) ...
Setting up libidn11:amd64 (1.32-3ubuntu1.2) ...
Setting up libssl1.0.0:amd64 (1.0.2g-1ubuntu4.9) ...
debconf: unable to initialize frontend: Dialog
debconf: (No usable dialog-like program is installed, so the dialog based frontend cannot be used. at /usr/share/perl5/Debconf/FrontEnd/Dialog.pm line 76.)
debconf: falling back to frontend: Readline
debconf: unable to initialize frontend: Readline
debconf: (Can't locate Term/ReadLine.pm in @INC (you may need to install the Term::ReadLine module) (@INC contains: /etc/perl /usr/local/lib/x86_64-linux-gnu/perl/5.22.1 /usr/local/share/perl/5.22.1 /usr/lib/x86_64-linux-gnu/perl5/5.22 /usr/share/perl5 /usr/lib/x86_64-linux-gnu/perl/5.22 /usr/share/perl/5.22 /usr/local/lib/site_perl /usr/lib/x86_64-linux-gnu/perl-base .) at /usr/share/perl5/Debconf/FrontEnd/Readline.pm line 7.)
debconf: falling back to frontend: Teletype
Setting up openssl (1.0.2g-1ubuntu4.9) ...
Setting up ca-certificates (20170717~16.04.1) ...
debconf: unable to initialize frontend: Dialog
debconf: (No usable dialog-like program is installed, so the dialog based frontend cannot be used. at /usr/share/perl5/Debconf/FrontEnd/Dialog.pm line 76.)
debconf: falling back to frontend: Readline
debconf: unable to initialize frontend: Readline
debconf: (Can't locate Term/ReadLine.pm in @INC (you may need to install the Term::ReadLine module) (@INC contains: /etc/perl /usr/local/lib/x86_64-linux-gnu/perl/5.22.1 /usr/local/share/perl/5.22.1 /usr/lib/x86_64-linux-gnu/perl5/5.22 /usr/share/perl5 /usr/lib/x86_64-linux-gnu/perl/5.22 /usr/share/perl/5.22 /usr/local/lib/site_perl /usr/lib/x86_64-linux-gnu/perl-base .) at /usr/share/perl5/Debconf/FrontEnd/Readline.pm line 7.)
debconf: falling back to frontend: Teletype
Setting up wget (1.17.1-1ubuntu1.3) ...
Processing triggers for libc-bin (2.23-0ubuntu9) ...
Processing triggers for ca-certificates (20170717~16.04.1) ...
Updating certificates in /etc/ssl/certs...
148 added, 0 removed; done.
Running hooks in /etc/ca-certificates/update.d...
done.
root@3484664d454a:/# 
=========================== End of installation ===========>
Now, we can verify with  'which wget ' command
============>
root@3484664d454a:/# which wget
/usr/bin/wget
root@3484664d454a:/# 
============>
Please let us recollect; installation of any software would alter the Dockwer base image composition. In which, we can also trace using the docker diff subcommand as we did in the previous exercises. 
I will open a second Terminal/screen, the docker diff subcommand can be issued from it, as below:
      $ sudo docker diff 472c96295678
===============>
vskumar@ubuntu:~$  
vskumar@ubuntu:~$ sudo docker ps
CONTAINER ID        IMAGE               COMMAND             CREATED             STATUS              PORTS               NAMES
3484664d454a        ubuntu:16.04        "/bin/bash"         15 minutes ago      Up 15 minutes                           jolly_cray
155f4b0764b1        ubuntu:16.04        "/bin/bash"         2 hours ago         Up 40 minutes                           zen_volhard
vskumar@ubuntu:~$ sudo docker diff 155f4b0764b1
C /root
A /root/.bash_history
vskumar@ubuntu:~$ 
============>

How to save this container ?:
The docker commit subcommand can be performed on a running or a stopped container. When a commit is performed on a running container, the Docker Engine pauses the container during the commit operation in order to avoid any data inconsistency. 
Now we can stop our running container.
We can commit a container to an image with the docker commit subcommand, as shown here:
      $ sudo docker commit 

================== Using commit for container ============>

root@3484664d454a:/# 
root@3484664d454a:/# exit
exit
vskumar@ubuntu:~$ sudo docker commit 3484664d454a
[sudo] password for vskumar: 
Sorry, try again.
[sudo] password for vskumar: 
sha256:fc7e4564eb928ccfe068c789f0d650967e8d5dc42d4e8d92409aab6614364075
vskumar@ubuntu:~$ 
=======================>
You can see the container id from the above output.

=========== We can also give a message to the commit command as below ===>
vskumar@ubuntu:~$ sudo docker commit 3484664d454a  Docker-exercise/ubuntu-wgetinstall
invalid reference format: repository name must be lowercase
vskumar@ubuntu:~$ sudo docker commit 3484664d454a  docker-exercise/ubuntu-wgetinstall
sha256:e34304119838d79da60e12776529106c350b1972cd517648e8ab90311fad7b1a
vskumar@ubuntu:~$ sudo docker ps -a
CONTAINER ID        IMAGE               COMMAND             CREATED             STATUS                       PORTS               NAMES
3484664d454a        ubuntu:16.04        "/bin/bash"         24 minutes ago      Exited (130) 6 minutes ago                       jolly_cray
155f4b0764b1        ubuntu:16.04        "/bin/bash"         2 hours ago         Up About an hour                                 zen_volhard
vskumar@ubuntu:~$ 
===================== Note there are two containers created  ====>
Now, I want to remove one container :
==========>

vskumar@ubuntu:~$ sudo docker rm 3484664d454a
3484664d454a
vskumar@ubuntu:~$ sudo docker ps -a
CONTAINER ID        IMAGE               COMMAND             CREATED             STATUS              PORTS               NAMES
155f4b0764b1        ubuntu:16.04        "/bin/bash"         3 hours ago         Up About an hour                        zen_volhard
vskumar@ubuntu:~$ 
========================>

Now let us check the docker images how many we have in our store :
=========== List of images ==========>
vskumar@ubuntu:~$ 
vskumar@ubuntu:~$ sudo docker images
REPOSITORY                           TAG                 IMAGE ID            CREATED             SIZE
docker-exercise/ubuntu-wgetinstall   latest              e34304119838        5 minutes ago       169MB
<none>                               <none>              fc7e4564eb92        7 minutes ago       169MB
hello-world                          latest              f2a91732366c        5 days ago          1.85kB
ubuntu                               16.04               20c44cd7596f        8 days ago          123MB
ubuntu                               latest              20c44cd7596f        8 days ago          123MB
busybox                              latest              6ad733544a63        3 weeks ago         1.13MB
busybox                              1.24                47bcc53f74dc        20 months ago       1.11MB
vskumar@ubuntu:~$ 

==============================>
How to remove images:

by using :

sudo docker rmi image [image id], we can remove the image. For example; if you want to remove the image id:
47bcc53f74dc
you can use: $ sudo docker rmi image 47bcc53f74dc
=================>
vskumar@ubuntu:~$ sudo docker rmi image 47bcc53f74dc
Untagged: busybox:1.24
Untagged: busybox@sha256:8ea3273d79b47a8b6d018be398c17590a4b5ec604515f416c5b797db9dde3ad8
Deleted: sha256:47bcc53f74dc94b1920f0b34f6036096526296767650f223433fe65c35f149eb
Deleted: sha256:f6075681a244e9df4ab126bce921292673c9f37f71b20f6be1dd3bb99b4fdd72
Deleted: sha256:1834950e52ce4d5a88a1bbd131c537f4d0e56d10ff0dd69e66be3b7dfa9df7e6
Error: No such image: image
vskumar@ubuntu:~$ 
=================>
 

So by using :

sudo docker rmi image [image id], we can remove the image.  Just recollect the difference between the image removal and container removal. For containers removal refer to my blog on "Housekeeping containers". Now we have learned how to create an image from containers using a few easy steps by installing the wget application. You can also add some other software applications to the same or different container(s) in the similar way.

You can use this method for testing also.  Let us say, you want to test a set of java programs. Then you need to install jdk and copy your programs. Write a shell script to compile and execute the programs by piping their output into a text file in a Linux background. So this way, you will be using the container as a test environment also.

The most easy and recommended way of creating an image is to use the Dockerfile method.

Within dockerfile we can mention the setup required to build a container through different steps. Then dockerfile creates the required setup for a container, under docker’s building activity.

We will see it in future exercises.

Please leave your feedback!

Vcard-Shanthi Kumar V-v39. DevOps: How to do Containers housekeeping ?

9. DevOps: How to do Containers housekeeping ?

Docker-logo

In  continuation of my previous blog on “8. DevOps:How to control and operate docker containers”, in this blog I would like to show some lab practice on “docker Containers housekeeping”.

From the previous lab sessions, we have seen many containers when we used ps -a option.

We have used two containers most of the times.

Others are not required. This time we will see how to remove a container physically.

Let us consider the below containers to remove using rm command:

32bc16b508d4        ubuntu 
a744246ffb8e        hello-world
1dd55efde43f        hello-world

$sudo docker rm 1dd55efde43f 
$sudo docker rm a744246ffb8e 
$sudo docker rm 32bc16b508d4 
================ You can see the above three containers are removed =========>
vskumar@ubuntu:~$ sudo docker rm 1dd55efde43f 
1dd55efde43f
vskumar@ubuntu:~$ sudo docker rm a744246ffb8e 
a744246ffb8e
vskumar@ubuntu:~$ sudo docker rm 32bc16b508d4 
32bc16b508d4
vskumar@ubuntu:~$ sudo docker ps -a |more
CONTAINER ID        IMAGE               COMMAND                 CREATED         
    STATUS                         PORTS               NAMES
f123dbd09116        ubuntu:16.04        "/bin/bash"             18 minutes ago  
    Exited (0) 18 minutes ago                          elastic_nightingale
3cfdea29ce6e        ubuntu              "bash"                  27 minutes ago  
    Exited (0) 26 minutes ago                          gallant_nobel
155f4b0764b1        ubuntu:16.04        "/bin/bash"             About an hour ag
o   Exited (0) 12 minutes ago                          zen_volhard
11e293722c64        ubuntu:16.04        "/bin/bash"             About an hour ag
o   Exited (0) About an hour ago                       dreamy_bassi
d10ad2bd62f7        ubuntu:16.04        "/bin/bash"             About an hour ag
o   Exited (0) About an hour ago                       cranky_dijkstra
cb1ff260d48e        ubuntu              "ls /usr/src"           11 hours ago    
    Exited (0) 11 hours ago                            wonderful_hawking
b20691fd8fb5        ubuntu              "ls /usr"               11 hours ago    
    Exited (0) 11 hours ago                            friendly_mirzakhani
431ba4c53028        ubuntu              "ls"                    11 hours ago    
    Exited (0) 28 minutes ago                          affectionate_nobel
2c31684bb1f4        ubuntu              "ls -la"                11 hours ago    
    Exited (0) 11 hours ago                            zealous_meitner
fe2e3b449daf        ubuntu              "ls -la /home/."        11 hours ago    
    Exited (0) 11 hours ago                            dreamy_shirley
c44bdd05b94d        ubuntu              "ls -la home."          11 hours ago    
    Exited (2) 11 hours ago                            elastic_pasteur
8b8afa82859a        ubuntu              "ls -la"                11 hours ago    
    Exited (0) 11 hours ago                            festive_panini
2811eb37af61        ubuntu              "ls -la 604831dbce2a"   11 hours ago    
    Exited (2) 11 hours ago                            jolly_swartz
604831dbce2a        ubuntu:16.04        "/bin/bash"             11 hours ago    
    Exited (0) 11 hours ago                            vibrant_ride
718636415a7f        ubuntu:16.04        "/bin/bash"             12 hours ago    
    Exited (0) 12 hours ago                            reverent_noyce
53a7751d4673        ubuntu:16.04        "/bin/bash"             13 hours ago    
    Exited (0) 13 hours ago                            musing_chandrasekhar
1ba71598b7b8        hello-world         "/hello"                16 hours ago    
    Exited (0) 16 hours ago                            musing_kare
vskumar@ubuntu:~$  
==============>
Now let us consider some more examples  as below:
3cfdea29ce6e        ubuntu 
cb1ff260d48e        ubuntu 
b20691fd8fb5        ubuntu 
431ba4c53028        ubuntu 
c31684bb1f4        ubuntu 
2c31684bb1f4        ubuntu 
fe2e3b449daf        ubuntu
c44bdd05b94d        ubuntu 
2811eb37af61        ubuntu
Now, let us use the below rm commands:
$sudo docker rm 3cfdea29ce6e
$sudo docker rm cb1ff260d48e
$sudo docker rm b20691fd8fb5 
$sudo docker rm 431ba4c53028 
$sudo docker rm 2c31684bb1f4
$sudo docker rm fe2e3b449daf 
$sudo docker rm c44bdd05b94d
$sudo docker rm 2811eb37af61
=================>
See the below output also:
 ================== Container removal ==========>
vskumar@ubuntu:~$ clear

vskumar@ubuntu:~$ sudo docker rm 3cfdea29ce6e
3cfdea29ce6e
vskumar@ubuntu:~$ sudo docker rm cb1ff260d48e
cb1ff260d48e
vskumar@ubuntu:~$ sudo docker rm b20691fd8fb5
b20691fd8fb5
vskumar@ubuntu:~$ sudo docker rm 431ba4c53028
431ba4c53028
vskumar@ubuntu:~$ sudo docker rm 2c31684bb1f4
2c31684bb1f4
vskumar@ubuntu:~$ sudo docker rm fe2e3b449daf
fe2e3b449daf
vskumar@ubuntu:~$ sudo docker rm fc44bdd05b94d
Error: No such container: fc44bdd05b94d
vskumar@ubuntu:~$ sudo docker rm c44bdd05b94d
c44bdd05b94d
vskumar@ubuntu:~$ sudo docker rm 2811eb37af61
2811eb37af61
vskumar@ubuntu:~$ 
==========================>
Now we can see the list of available containers:
============= List of latest containers ==============>
vskumar@ubuntu:~$ sudo docker ps -a |more
CONTAINER ID        IMAGE               COMMAND             CREATED             STATUS                         PORTS               NAMES
f123dbd09116        ubuntu:16.04        "/bin/bash"         28 minutes ago      Exited (0) 28 minutes ago                          elastic_nigh
tingale
155f4b0764b1        ubuntu:16.04        "/bin/bash"         About an hour ago   Exited (0) 22 minutes ago                          zen_volhard
11e293722c64        ubuntu:16.04        "/bin/bash"         About an hour ago   Exited (0) About an hour ago                       dreamy_bassi
d10ad2bd62f7        ubuntu:16.04        "/bin/bash"         2 hours ago         Exited (0) About an hour ago                       cranky_dijks
tra
8b8afa82859a        ubuntu              "ls -la"            11 hours ago        Exited (0) 11 hours ago                            festive_pani
ni
604831dbce2a        ubuntu:16.04        "/bin/bash"         12 hours ago        Exited (0) 11 hours ago                            vibrant_ride
718636415a7f        ubuntu:16.04        "/bin/bash"         12 hours ago        Exited (0) 12 hours ago                            reverent_noy
ce
53a7751d4673        ubuntu:16.04        "/bin/bash"         13 hours ago        Exited (0) 13 hours ago                            musing_chand
rasekhar
1ba71598b7b8        hello-world         "/hello"            16 hours ago        Exited (0) 16 hours ago                            musing_kare
vskumar@ubuntu:~$ 
===========================>
Now, I wan to keep very few containers only and remove the below containers:

604831dbce2a        ubuntu:16.04
718636415a7f        ubuntu:16.04 
53a7751d4673        ubuntu:16.04
8b8afa82859a        ubuntu 
I want to use the below  commands to remove  the above containers:
$sudo docker rm 604831dbce2a
$sudo docker rm 718636415a7f
$sudo docker rm 53a7751d4673
$sudo docker rm 8b8afa82859a

========================= We can see the latest/limited containers =======>
vskumar@ubuntu:~$ sudo docker rm 604831dbce2a
604831dbce2a
vskumar@ubuntu:~$ sudo docker rm 718636415a7f
718636415a7f
vskumar@ubuntu:~$ sudo docker rm 53a7751d4673
53a7751d4673
vskumar@ubuntu:~$ sudo docker rm 8b8afa82859a
8b8afa82859a
vskumar@ubuntu:~$ sudo docker ps -a
CONTAINER ID        IMAGE               COMMAND             CREATED             STATUS                         PORTS               NAMES
f123dbd09116        ubuntu:16.04        "/bin/bash"         36 minutes ago      Exited (0) 36 minutes ago                          elastic_nightingale
155f4b0764b1        ubuntu:16.04        "/bin/bash"         About an hour ago   Exited (0) 30 minutes ago                          zen_volhard
11e293722c64        ubuntu:16.04        "/bin/bash"         About an hour ago   Exited (0) About an hour ago                       dreamy_bassi
d10ad2bd62f7        ubuntu:16.04        "/bin/bash"         2 hours ago         Exited (0) About an hour ago                       cranky_dijkstra
1ba71598b7b8        hello-world         "/hello"            16 hours ago        Exited (0) 16 hours ago                            musing_kare
vskumar@ubuntu:~$ sudo docker ps 
CONTAINER ID        IMAGE               COMMAND             CREATED             STATUS              PORTS               NAMES
vskumar@ubuntu:~$ 
================================>
We can also see the current container ids as below:
========== Listing containers ids ===============>
vskumar@ubuntu:~$ sudo docker ps -aq
f123dbd09116
155f4b0764b1
11e293722c64
d10ad2bd62f7
1ba71598b7b8
vskumar@ubuntu:~$ 
===============================>
To remove the inactive containers there is a prune command. Let us try with it.
Before doing it I want to make a container active and try this prune command on it:
================= I have made one container Active ======>
vskumar@ubuntu:~$ sudo docker ps -a
CONTAINER ID        IMAGE               COMMAND             CREATED             STATUS                         PORTS               NAMES
f123dbd09116        ubuntu:16.04        "/bin/bash"         About an hour ago   Exited (0) About an hour ago                       elastic_nightingale
155f4b0764b1        ubuntu:16.04        "/bin/bash"         2 hours ago         Exited (0) 40 minutes ago                          zen_volhard
11e293722c64        ubuntu:16.04        "/bin/bash"         2 hours ago         Exited (0) 2 hours ago                             dreamy_bassi
d10ad2bd62f7        ubuntu:16.04        "/bin/bash"         2 hours ago         Exited (0) 2 hours ago                             cranky_dijkstra
1ba71598b7b8        hello-world         "/hello"            17 hours ago        Exited (0) 17 hours ago                            musing_kare
vskumar@ubuntu:~$ sudo docker start 155f4b0764b1
155f4b0764b1
vskumar@ubuntu:~$ sudo docker ps 
CONTAINER ID        IMAGE               COMMAND             CREATED             STATUS              PORTS               NAMES
155f4b0764b1        ubuntu:16.04        "/bin/bash"         2 hours ago         Up 6 seconds                            zen_volhard
vskumar@ubuntu:~$ 
========================>
To use prune , below format should be used:
$ sudo docker container prune
=========== The usage of prune command =======>
vskumar@ubuntu:~$ 
vskumar@ubuntu:~$ sudo docker container prune
WARNING! This will remove all stopped containers.
Are you sure you want to continue? [y/N] y
Deleted Containers:
f123dbd09116561a042e12060f449daa9a36d9a59034b1dd1b96846e66ead14d
11e293722c646a0def7a8a1f2cdf85a47654eb62ef7701bd2d7221c7e69a943f
d10ad2bd62f7a8de379272f21dfccec89c0e5829b3a58ce01927530b6b44ea01
1ba71598b7b8d97fcbd3a589a6665238690be99936b6782647b5040eeb82aafa
Total reclaimed space: 844B
vskumar@ubuntu:~$ 
========== You can see the removed container ids =============>
You can see the existing  containers:
====== Available containers after Housekeeping is done =========>
vskumar@ubuntu:~$ 
vskumar@ubuntu:~$ sudo docker ps
CONTAINER ID        IMAGE               COMMAND             CREATED             STATUS              PORTS               NAMES
155f4b0764b1        ubuntu:16.04        "/bin/bash"         2 hours ago         Up 6 minutes                            zen_volhard
vskumar@ubuntu:~$ sudo docker ps -a
CONTAINER ID        IMAGE               COMMAND             CREATED             STATUS              PORTS               NAMES
155f4b0764b1        ubuntu:16.04        "/bin/bash"         2 hours ago         Up 6 minutes                            zen_volhard
vskumar@ubuntu:~$ sudo docker ps -aq
155f4b0764b1
vskumar@ubuntu:~$
===================>
In this exercise we have seen the housekeeping of containers well.
Please note if you have deleted all the containers by mistake, you need to install the containers again. 
Follow the containers creation exercise.

I would like to break this session at this point. In the next blog I would like to present the lab practice on:

 “How to Build images from Docker containers?

Vcard-Shanthi Kumar V


8. DevOps:How to control and operate docker containers

Docker-logo

In  continuation of my previous blog on “7. DevOps: How to track changes in a container”, in this blog I would like to show some lab practice “How to control and operate docker containers”.

Controlling/operating Docker container:

In this exercise initially, we can see on how to start/stop/restart the containers.

The Docker Engine enables us to start, stop, and restart a container with a set of docker subcommands.

Let me display the docker images:

=======================>

vskumar@ubuntu:~$ sudo service docker status

docker.service – Docker Application Container Engine

Loaded: loaded (/lib/systemd/system/docker.service; enabled; vendor preset: e

Active: active (running) since Sat 2017-11-25 15:09:35 PST; 2min 24s ago

Docs: https://docs.docker.com

Main PID: 1356 (dockerd)

Tasks: 30

Memory: 95.2M

CPU: 3.998s

=========================>

vskumar@ubuntu:~$ sudo docker images

REPOSITORY TAG IMAGE ID CREATED SIZE

hello-world latest f2a91732366c 4 days ago 1.85kB

ubuntu 16.04 20c44cd7596f 8 days ago 123MB

ubuntu latest 20c44cd7596f 8 days ago 123MB

busybox latest 6ad733544a63 3 weeks ago 1.13MB

busybox 1.24 47bcc53f74dc 20 months ago 1.11MB

vskumar@ubuntu:~$

=======================>

Now, I want to launch our container ubuntu 16.04 with start subcommand and experiment with the docker stop subcommand, as given below:

$ sudo docker run -i -t ubuntu:16.04 /bin/bash

======================>
vskumar@ubuntu:~$ 
vskumar@ubuntu:~$ sudo docker run -i -t ubuntu:16.04 /bin/bash
root@d10ad2bd62f7:/# 
======================>
Now, we are with this container in interactive mode.
Let us apply some linux commands as below:
========================>
root@d10ad2bd62f7:/# pwd
/
root@d10ad2bd62f7:/# ls
bin   dev  home  lib64  mnt  proc  run   srv  tmp  var
boot  etc  lib   media  opt  root  sbin  sys  usr
root@d10ad2bd62f7:/# cd home
root@d10ad2bd62f7:/home# ls
root@d10ad2bd62f7:/home# cd ../var
root@d10ad2bd62f7:/var# ls
backups  cache  lib  local  lock  log  mail  opt  run  spool  tmp
root@d10ad2bd62f7:/var# cd tmp
root@d10ad2bd62f7:/var/tmp# pwd
/var/tmp
root@d10ad2bd62f7:/var/tmp# ls
root@d10ad2bd62f7:/var/tmp# cd ../lib
root@d10ad2bd62f7:/var/lib# ls
apt  dpkg  initscripts  insserv  misc  pam  systemd  update-rc.d  urandom
root@d10ad2bd62f7:/var/lib# 
================================>

Now I want to create a file as below in this container:
==================>

root@d10ad2bd62f7:/var/lib# pwd
/var/lib
root@d10ad2bd62f7:/var/lib# cd ../../home
root@d10ad2bd62f7:/home# ls
root@d10ad2bd62f7:/home# touch file1.txt
===================>

Let me add some text into this file as below:
==========>
root@d10ad2bd62f7:/home# echo " Testing containers " > file1.txt
root@d10ad2bd62f7:/home# echo " Applying stop command on containers " > file1.txt
root@d10ad2bd62f7:/home# cat file1.txt
 Applying stop command on containers 
root@d10ad2bd62f7:/home# echo " Testing containers " > file1.txtroot@d10ad2bd62f7:/home# echo " Applying stop command on containers " >> file1.txt
root@d10ad2bd62f7:/home# ls
file1.txt
root@d10ad2bd62f7:/home# ls -l
total 4
-rw-r--r-- 1 root root 59 Nov 25 23:20 file1.txt
root@d10ad2bd62f7:/home# cat file1.txt 
Testing containers 
Applying stop command on containers 
root@d10ad2bd62f7:/home# 
===============>

I have applied some more linux file operations on this container as below:
=================>
root@d10ad2bd62f7:/home#      
root@d10ad2bd62f7:/home# cat file1.txt >> file2.txt
root@d10ad2bd62f7:/home# ls
file1.txt  file2.txt
root@d10ad2bd62f7:/home# ls -l
total 8
-rw-r--r-- 1 root root 59 Nov 25 23:20 file1.txt
-rw-r--r-- 1 root root 59 Nov 25 23:22 file2.txt
root@d10ad2bd62f7:/home# diff file1.txt file2.txt
root@d10ad2bd62f7:/home# echo " Applying restart command also on containers " >> file1.txt
root@d10ad2bd62f7:/home# ls -l
total 8
-rw-r--r-- 1 root root 105 Nov 25 23:23 file1.txt
-rw-r--r-- 1 root root  59 Nov 25 23:22 file2.txt
root@d10ad2bd62f7:/home# diff file1.txt file2.txt3d2
<  Applying restart command also on containers 
root@d10ad2bd62f7:/home# 
====================>
Now, let me apply a stop command on this container and see as 
below by using exit to come out and stop:
=====================>
root@155f4b0764b1:/# 
root@155f4b0764b1:/# exit
exit
vskumar@ubuntu:~$ sudo docker images
REPOSITORY          TAG                 IMAGE ID            CREATED             SIZE
hello-world         latest              f2a91732366c        4 days ago          1.85kB
ubuntu              16.04               20c44cd7596f        8 days ago          123MB
ubuntu              latest              20c44cd7596f        8 days ago          123MB
busybox             latest              6ad733544a63        3 weeks ago         1.13MB
busybox             1.24                47bcc53f74dc        20 months ago       1.11MB
vskumar@ubuntu:~$ sudo docker stop  d10ad2bd62f7
d10ad2bd62f7
vskumar@ubuntu:~$ 
=============>
Now, I want to check the containers status using ps -a command as below:
==============>
vskumar@ubuntu:~$ sudo docker ps -a
CONTAINER ID        IMAGE               COMMAND                 CREATED             STATUS                     PORTS               NAMES
155f4b0764b1        ubuntu:16.04        "/bin/bash"             2 minutes ago       Exited (0) 2 minutes ago                       zen_volhard
cb1ff260d48e        ubuntu              "ls /usr/src"           10 hours ago        Exited (0) 10 hours ago                        wonderful_hawking
b20691fd8fb5        ubuntu              "ls /usr"               10 hours ago        Exited (0) 10 hours ago                        friendly_mirzakhani
431ba4c53028        ubuntu              "ls"                    10 hours ago        Exited (0) 10 hours ago                        affectionate_nobel
2c31684bb1f4        ubuntu              "ls -la"                10 hours ago        Exited (0) 10 hours ago                        zealous_meitner
fe2e3b449daf        ubuntu              "ls -la /home/."        10 hours ago        Exited (0) 10 hours ago                        dreamy_shirley
c44bdd05b94d        ubuntu              "ls -la home."          10 hours ago        Exited (2) 10 hours ago                        elastic_pasteur
8b8afa82859a        ubuntu              "ls -la"                10 hours ago        Exited (0) 10 hours ago                        festive_panini
2811eb37af61        ubuntu              "ls -la 604831dbce2a"   10 hours ago        Exited (2) 10 hours ago                        jolly_swartz
604831dbce2a        ubuntu:16.04        "/bin/bash"             10 hours ago        Exited (0) 10 hours ago                        vibrant_ride
718636415a7f        ubuntu:16.04        "/bin/bash"             11 hours ago        Exited (0) 10 hours ago                        reverent_noyce
53a7751d4673        ubuntu:16.04        "/bin/bash"             12 hours ago        Exited (0) 12 hours ago                        musing_chandrasekhar
32bc16b508d4        ubuntu              "bash"                  13 hours ago        Exited (0) 13 hours ago                        eager_goldberg
1dd55efde43f        hello-world         "/hello"                13 hours ago        Exited (0) 13 hours ago                        peaceful_pasteur
a744246ffb8e        hello-world         "/hello"                15 hours ago        Exited (0) 15 hours ago                        naughty_wing
1ba71598b7b8        hello-world         "/hello"                15 hours ago        Exited (0) 15 hours ago                        musing_kare
vskumar@ubuntu:~$ 
===================>
you can see the latest status of our container;
155f4b0764b1        ubuntu:16.04        "/bin/bash"             2 minutes ago       Exited (0) 2 minutes ago                       zen_volhard
It means Docker  maintains in the logs on the usage of containers also.
Now, I want to start the previously stopped container using the docker start subcommand 
by specifying the container ID as an argument, as follows:
$ sudo docker start 155f4b0764b1
===============>
vskumar@ubuntu:~$ sudo docker start 155f4b0764b1
155f4b0764b1
vskumar@ubuntu:~$ 
===============>
Let us check the images status also as below:
==================> Copied the 1st two lines only ----->
vskumar@ubuntu:~$ sudo docker ps -a |more
CONTAINER ID        IMAGE               COMMAND                 CREATED         
    STATUS                      PORTS               NAMES
155f4b0764b1        ubuntu:16.04        "/bin/bash"             10 minutes ago  
    Up About a minute                               zen_volhard
11e293722c64        ubuntu:16.04        "/bin/bash"             12 minutes ago  
    Exited (0) 12 minutes ago  
====================>
It means it shows the current status of the container id:155f4b0764b1 
We need to notice one thing here.

By default, the docker start subcommand will not attach to the container.

We can attach it to the container either using the -a option in the docker start subcommand or by explicitly using the docker attach subcommand.

Now let us try these options.

We will see attach command

$ sudo docker attach 155f4b0764b1
=================>
vskumar@ubuntu:~$ 
vskumar@ubuntu:~$ sudo docker attach 155f4b0764b1
root@155f4b0764b1:/# 
root@155f4b0764b1:/#
=================>
So the attach command brought the container into interactive mode.
Now let me exit it and try the -a option with docker start command:
==================>
root@155f4b0764b1:/home# 
root@155f4b0764b1:/home# exit
exit
===============>
with start -a option:
=============>
vskumar@ubuntu:~$ sudo docker start -a 155f4b0764b1
root@155f4b0764b1:/# 
=================>
After exit, I have tried ps command:
=====================>
vskumar@ubuntu:~$ sudo docker ps
CONTAINER ID        IMAGE               COMMAND             CREATED             STATUS              PORTS               NAMES
155f4b0764b1        ubuntu:16.04        "/bin/bash"         21 minutes ago      Up 3 minutes                            zen_volhard
vskumar@ubuntu:~$ 
======================>
From the above display you can see that its start and current status.
It means the container is active and running.
Now, I want to make another [below] container active.
1dd55efde43f        hello-world         "/hello"                13 hours ago Exited (0) 13 hours ago                        peaceful_pasteur
Let us see the ps command after these 2 containers are in active state.
I want to use the below command:
$ sudo docker start -a 1dd55efde43f
===================>
vskumar@ubuntu:~$ sudo docker start -a 1dd55efde43f

Hello from Docker!
This message shows that your installation appears to be working correctly.

To generate this message, Docker took the following steps:
 1. The Docker client contacted the Docker daemon.
 2. The Docker daemon pulled the "hello-world" image from the Docker Hub.
    (amd64)
 3. The Docker daemon created a new container from that image which runs the
    executable that produces the output you are currently reading.
 4. The Docker daemon streamed that output to the Docker client, which sent it
    to your terminal.

Let us  try something more ambitious, we can run an Ubuntu container with:
 $ docker run -it ubuntu bash

If you want to;
Share images, automate workflows, and more with a free Docker ID:
visit: https://cloud.docker.com/
For more examples and ideas, visit:
https://docs.docker.com/engine/userguide/

vskumar@ubuntu:~$ 
===================>
Please note the above container doesn't have a any os related process to 
keep running continuously. 
Just it displays the message only. Hence 
in the list it will not appear. 
Now, let me list the current processes using docker ps command:
===========>
vskumar@ubuntu:~$ sudo docker ps
CONTAINER ID        IMAGE               COMMAND             CREATED             STATUS              PORTS               NAMES
155f4b0764b1        ubuntu:16.04        "/bin/bash"         32 minutes ago      Up 14 minutes                           zen_volhard
vskumar@ubuntu:~$ 
==============>
So as on now one container is running.

The next set of container controlling subcommands are docker pause and docker unpause.

The docker pause subcommand will freeze the execution of all the processes within the container.

The docker unpause subcommand will unfreeze the execution of all the processes within the container and resume the execution from the point where it was frozen.

Let us try the below command 
$sudo docker pause 155f4b0764b1
========================>
vskumar@ubuntu:~$ 
vskumar@ubuntu:~$ sudo docker pause 155f4b0764b1
155f4b0764b1
vskumar@ubuntu:~$ sudo docker ps
CONTAINER ID        IMAGE               COMMAND             CREATED             STATUS                   PORTS               NAMES
155f4b0764b1        ubuntu:16.04        "/bin/bash"         About an hour ago   Up 30 minutes (Paused)                       zen_volhard
vskumar@ubuntu:~$ 
==========================>
You can see the current status as Paused.
Now let me try unpause command also.
$ sudo docker unpause 155f4b0764b1
You can see the total output of this container with pause and unpause statuses:
===================>
vskumar@ubuntu:~$ 
vskumar@ubuntu:~$ sudo docker pause 155f4b0764b1
155f4b0764b1
vskumar@ubuntu:~$ sudo docker ps
CONTAINER ID        IMAGE               COMMAND             CREATED             STATUS                   PORTS               NAMES
155f4b0764b1        ubuntu:16.04        "/bin/bash"         About an hour ago   Up 30 minutes (Paused)                       zen_volhard
vskumar@ubuntu:~$ ^C
vskumar@ubuntu:~$ sudo docker unpause 155f4b0764b1
155f4b0764b1
vskumar@ubuntu:~$ sudo docker ps
CONTAINER ID        IMAGE               COMMAND             CREATED             STATUS              PORTS               NAMES
155f4b0764b1        ubuntu:16.04        "/bin/bash"         About an hour ago   Up 32 minutes                           zen_volhard
vskumar@ubuntu:~$ 
======================>
Now, in this lab session finally we will use the stop command:

The container and the script running within it can be stopped using the docker stop subcommand, as shown below:

$ sudo docker stop 155f4b0764b1
=====================> 
vskumar@ubuntu:~$ sudo docker stop 155f4b0764b1
155f4b0764b1
vskumar@ubuntu:~$ sudo docker ps
CONTAINER ID        IMAGE               COMMAND             CREATED STATUS              PORTS               NAMES
=============== It shows there is no active container =============>
Now, let me try with -a and more options.
=========== Partial display is shown here upto the container ===========>
vskumar@ubuntu:~$ sudo docker ps -a |more
CONTAINER ID        IMAGE               COMMAND                 CREATED         
    STATUS                         PORTS               NAMES
f123dbd09116        ubuntu:16.04        "/bin/bash"             6 minutes ago   
    Exited (0) 5 minutes ago                           elastic_nightingale
3cfdea29ce6e        ubuntu              "bash"                  14 minutes ago  
    Exited (0) 14 minutes ago                          gallant_nobel
155f4b0764b1        ubuntu:16.04        "/bin/bash"             About an hour ag
o   Exited (0) 17 seconds ago  
================================>

So far in this lab session, we have seen the differences of different commands to operate and control the containers. I would like to break this session for now. In the next blog we will see on how to manage “Housekeeping containers“.

 Vcard-Shanthi Kumar V


7. DevOps: How to track changes in a container

Docker-logo

In  continuation of my previous blog on “6. DevOps: How to work with interactive docker containers”, in this blog I would like to show some lab practice “How to track changes in a container”.

Tracking changes inside containers:

Now, let us see the container operations and tracking them.

Let’s launch a container in interactive mode, as we have done in previous session, we can use the below command.

$ sudo docker run -i -t ubuntu:16.04 /bin/bash 
=================>
vskumar@ubuntu:/var/log$ sudo docker run -i -t ubuntu:16.04 /bin/bash  
root@718636415a7f:/# ps
   PID TTY          TIME CMD
     1 pts/0    00:00:00 bash
     9 pts/0    00:00:00 ps
root@718636415a7f:/# ps -ef
UID         PID   PPID  C STIME TTY          TIME CMD
root          1      0  0 12:39 pts/0    00:00:00 /bin/bash
root         10      1  0 12:53 pts/0    00:00:00 ps -ef
root@718636415a7f:/# ls
bin  boot  dev  etc  home  lib  lib64  media  mnt  opt  proc  root  run  sbin  srv  sys  tmp  usr  var
root@718636415a7f:/# 
======================>
Now, let us go to home directory:
========>
root@718636415a7f:/# pwd
/
root@718636415a7f:/# cd home
root@718636415a7f:/home# pwd
/home
root@718636415a7f:/home# ls
root@718636415a7f:/home# 
==============>
Now, as a standalone machine of this docker container, 
I want to create 4 text files using touch command as below:
==============>
root@718636415a7f:/home# ls
root@718636415a7f:/home# ls -l
total 0
root@718636415a7f:/home# touch {vsk1,vsk2,vsk3,vsk4}
root@718636415a7f:/home# ls -l
total 0
-rw-r--r-- 1 root root 0 Nov 25 12:57 vsk1
-rw-r--r-- 1 root root 0 Nov 25 12:57 vsk2
-rw-r--r-- 1 root root 0 Nov 25 12:57 vsk3
-rw-r--r-- 1 root root 0 Nov 25 12:57 vsk4
root@718636415a7f:/home# 
======================>

I am adding some text to each of them as below:

====================>

root@718636415a7f:/home# pwd

/home

root@718636415a7f:/home# echo ‘Testing vsk1’ > vsk1

root@718636415a7f:/home# ls -l

total 4

-rw-r–r– 1 root root 13 Nov 25 13:02 vsk1

-rw-r–r– 1 root root 0 Nov 25 12:57 vsk2

-rw-r–r– 1 root root 0 Nov 25 12:57 vsk3

-rw-r–r– 1 root root 0 Nov 25 12:57 vsk4

root@718636415a7f:/home# echo ‘Testing vsk2’ > vsk2

root@718636415a7f:/home# echo ‘Testing vsk3’ > vsk3

root@718636415a7f:/home# echo ‘NOT Testing vsk4’ > vsk4

root@718636415a7f:/home# ls -l

total 16

-rw-r–r– 1 root root 13 Nov 25 13:02 vsk1

-rw-r–r– 1 root root 13 Nov 25 13:02 vsk2

-rw-r–r– 1 root root 13 Nov 25 13:02 vsk3

-rw-r–r– 1 root root 17 Nov 25 13:02 vsk4

root@718636415a7f:/home#

=====================>

I have created 4 files and added some text into them.

Now, I want to execute a diff command on them:

==========================>

root@718636415a7f:/home# diff vsk1 vsk2

1c1

< Testing vsk1

> Testing vsk2

root@718636415a7f:/home# diff vsk2 vsk3

1c1

< Testing vsk2

> Testing vsk3

root@718636415a7f:/home# echo ‘NOT Testing vsk4’ > vsk1

root@718636415a7f:/home# diff vsk1 vsk4

root@718636415a7f:/home# diff vsk2 vsk4

1c1

< Testing vsk2

> NOT Testing vsk4

root@718636415a7f:/home#

===========================>

Now, I want to exit this container and go back to docker host.

I have detached it using exit.

And back to docker host.

Now, I want to use the diff command as below from host machine to the container:

===========================>

root@718636415a7f:/home# ls -l

total 16

-rw-r–r– 1 root root 17 Nov 25 13:05 vsk1

-rw-r–r– 1 root root 13 Nov 25 13:02 vsk2

-rw-r–r– 1 root root 13 Nov 25 13:02 vsk3

-rw-r–r– 1 root root 17 Nov 25 13:02 vsk4

root@718636415a7f:/home# exit

exit

vskumar@ubuntu:/var/log$ sudo docker diff 718636415a7f

[sudo] password for vskumar:

C /home

A /home/vsk1

A /home/vsk2

A /home/vsk3

A /home/vsk4

C /root

A /root/.bash_history

vskumar@ubuntu:/var/log$

=====================>

The 1st line ‘C /home’ shows; the home directory is modified by showing ‘C’ as changed.

The ‘A’ shows;  before each line denotes the file is added.

If you have a deleted file, it can show as ‘D’ before the file.

Also please let us note here on how docker engine picks up the image with the below priority;

When we work with an image and if we don’t specify that image name, then the latest image (recently generated) will be identified and used by the Docker Engine.

We can check the status of the containers as below using ps -a:

You can see a detailed output from this command from the below display:

==================================>

vskumar@ubuntu:/var/log$ ls

alternatives.log bootstrap.log dmesg fsck kern.log speech-dispatcher unattended-upgrades wtmp

apport.log btmp dpkg.log gpu-manager.log lastlog syslog upstart Xorg.0.log

apt cups faillog hp lightdm syslog.1 vmware Xorg.0.log.old

auth.log dist-upgrade fontconfig.log installer samba syslog.2.gz vmware-vmsvc.log

vskumar@ubuntu:/var/log$ sudo docker ps -a

CONTAINER ID IMAGE COMMAND CREATED STATUS PORTS NAMES

cb1ff260d48e ubuntu “ls /usr/src” 3 minutes ago Exited (0) 3 minutes ago wonderful_hawking

b20691fd8fb5 ubuntu “ls /usr” 3 minutes ago Exited (0) 3 minutes ago friendly_mirzakhani

431ba4c53028 ubuntu “ls” 3 minutes ago Exited (0) 3 minutes ago affectionate_nobel

2c31684bb1f4 ubuntu “ls -la” 3 minutes ago Exited (0) 3 minutes ago zealous_meitner

fe2e3b449daf ubuntu “ls -la /home/.” 4 minutes ago Exited (0) 4 minutes ago dreamy_shirley

c44bdd05b94d ubuntu “ls -la home.” 4 minutes ago Exited (2) 4 minutes ago elastic_pasteur

8b8afa82859a ubuntu “ls -la” 4 minutes ago Exited (0) 4 minutes ago festive_panini

2811eb37af61 ubuntu “ls -la 604831dbce2a” 4 minutes ago Exited (2) 4 minutes ago jolly_swartz

604831dbce2a ubuntu:16.04 “/bin/bash” 8 minutes ago Exited (0) 6 minutes ago vibrant_ride

718636415a7f ubuntu:16.04 “/bin/bash” 45 minutes ago Exited (0) 18 minutes ago reverent_noyce

53a7751d4673 ubuntu:16.04 “/bin/bash” 2 hours ago Exited (0) 2 hours ago musing_chandrasekhar

32bc16b508d4 ubuntu “bash” 3 hours ago Exited (0) 3 hours ago eager_goldberg

1dd55efde43f hello-world “/hello” 3 hours ago Exited (0) 3 hours ago peaceful_pasteur

a744246ffb8e hello-world “/hello” 5 hours ago Exited (0) 5 hours ago naughty_wing

1ba71598b7b8 hello-world “/hello” 5 hours ago Exited (0) 5 hours ago musing_kare

vskumar@ubuntu:/var/log$

============================>

I would like to terminate the session at this point. In the next blog I would like to present “How to control and operate docker containers”.

Vcard-Shanthi Kumar V-v3

6. DevOps: How to work with interactive Docker containers

Docker-logo

In  continuation of my previous blog on “5. DevOps: How to work with Docker Images”, in this blog I would like to show some lab practice on Interactive Docker containers.

Working with an interactive Docker container:

In the previous lab session, we worked with first Hello World container. And we came to know how the containerization works. Now, we are going to run a container in interactive mode.

What is docker run command ?:

The docker run subcommand takes an image as an input and launches it as a container.

What flags we need to use ?:

We have to pass the -t and -i flags to the docker run subcommand in order to make the container interactive.

The -i flag is the key driver, it makes the container interactive by grabbing the standard input (STDIN) of the container into the terminal.

The -t flag allocates a pseudo-TTY or a pseudo Terminal (Terminal emulator) and then assigns that to the container.

Note: Please note in the earlier session we have executed a container on unbuntu name.

But now, we will explore completely the interactive container operations.

In the below example, we are going to launch an interactive container using the ubuntu:16.04 image and /bin/bash as the command:

$ sudo docker run -i -t ubuntu:16.04 /bin/bash 

=========== Output ============>

vskumar@ubuntu:/var/log$ sudo docker run -i -t ubuntu:16.04 /bin/bash

Unable to find image ‘ubuntu:16.04’ locally

16.04: Pulling from library/ubuntu

Digest: sha256:7c67a2206d3c04703e5c23518707bdd4916c057562dd51c74b99b2ba26af0f79

Status: Downloaded newer image for ubuntu:16.04

root@53a7751d4673:/#

===================>

Why the error messages [Unable to find image] appear ?:

As the ubuntu 16.04 image is not downloaded yet, we get the above message and with the docker run command it will start pulling the ubuntu 16.04 image automatically with following message:

Unable to find image 'ubuntu:16.04' locally
16.04: Pulling from library/ubuntu

When the download is completed, the container will get launched along with the ubuntu:16.04 image.

It will also launch a Bash shell within the container, because we have specified /bin/bash as the command to be executed. This landed us in a Bash prompt, as shown below:

root@53a7751d4673:/#

What is ’53a7751d4673′?:

It is the hostname of the container. In Docker, the hostname is the same as the container ID.

Now, let us run a few commands interactively and confirm what we mentioned about the prompt is correct, as shown below:

To check the hostname below commands need to be executed:

root@53a7751d4673:/# hostname

root@53a7751d4673:/# id

root@53a7751d4673:/# echo $PS1

When we execute them, can see the below output:

==============>

root@53a7751d4673:/#

root@53a7751d4673:/# hostname

53a7751d4673

root@53a7751d4673:/# id

uid=0(root) gid=0(root) groups=0(root)

root@53a7751d4673:/# echo $PS1

\[\e]0;\u@\h: \w\a\]${debian_chroot:+($debian_chroot)}\u@\h:\w\$

root@53a7751d4673:/#

=====================>

So, we have seen the Host name as ’53a7751d4673′.

Id as ‘root ‘

Using ‘PS1’, —>Displays username, hostname and current working directory in the prompt.

PS1 in this example displays the following three information in the prompt:

\[\e]0;\u@\h: \w\a\]${debian_chroot:+($debian_chroot)}\u@\h:\w\$

  • \u – Username
  • \h – Hostname
  • \w – Full path of the current working directory

==============>

root@53a7751d4673:/# pwd

/

root@53a7751d4673:/#

==========>

Note, we are within the ubuntu 16.04 container and it works as Linux machine. So we can try some Linux commands also:

===============>

root@53a7751d4673:/# ps

PID TTY TIME CMD

1 pts/0 00:00:00 bash

26 pts/0 00:00:00 ps

root@53a7751d4673:/# ps -ef

UID PID PPID C STIME TTY TIME CMD

root 1 0 0 11:28 pts/0 00:00:00 /bin/bash

root 27 1 0 11:48 pts/0 00:00:00 ps -ef

root@53a7751d4673:/#

root@53a7751d4673:/# ls

bin boot dev etc home lib lib64 media mnt opt proc root run sbin srv sys tmp usr var

root@53a7751d4673:/# ls -l

total 64

drwxr-xr-x 2 root root 4096 Nov 14 13:49 bin

drwxr-xr-x 2 root root 4096 Apr 12 2016 boot

drwxr-xr-x 5 root root 360 Nov 25 11:28 dev

drwxr-xr-x 45 root root 4096 Nov 25 11:28 etc

drwxr-xr-x 2 root root 4096 Apr 12 2016 home

drwxr-xr-x 8 root root 4096 Sep 13 2015 lib

drwxr-xr-x 2 root root 4096 Nov 14 13:49 lib64

drwxr-xr-x 2 root root 4096 Nov 14 13:48 media

drwxr-xr-x 2 root root 4096 Nov 14 13:48 mnt

drwxr-xr-x 2 root root 4096 Nov 14 13:48 opt

dr-xr-xr-x 250 root root 0 Nov 25 11:28 proc

drwx—— 2 root root 4096 Nov 14 13:49 root

drwxr-xr-x 6 root root 4096 Nov 14 13:49 run

drwxr-xr-x 2 root root 4096 Nov 17 21:59 sbin

drwxr-xr-x 2 root root 4096 Nov 14 13:48 srv

dr-xr-xr-x 13 root root 0 Nov 25 11:28 sys

drwxrwxrwt 2 root root 4096 Nov 14 13:49 tmp

drwxr-xr-x 11 root root 4096 Nov 14 13:48 usr

drwxr-xr-x 13 root root 4096 Nov 14 13:49 var

root@53a7751d4673:/#

================>

So, ubuntu 16.04 container is nothing but a linux machine and we executed the above commands.

Now, I want to change the root permissions as below:

==============>

root@53a7751d4673:/# chmod +777 root

root@53a7751d4673:/# ls -l

total 64

drwxr-xr-x 2 root root 4096 Nov 14 13:49 bin

drwxr-xr-x 2 root root 4096 Apr 12 2016 boot

drwxr-xr-x 5 root root 360 Nov 25 11:28 dev

drwxr-xr-x 45 root root 4096 Nov 25 11:28 etc

drwxr-xr-x 2 root root 4096 Apr 12 2016 home

drwxr-xr-x 8 root root 4096 Sep 13 2015 lib

drwxr-xr-x 2 root root 4096 Nov 14 13:49 lib64

drwxr-xr-x 2 root root 4096 Nov 14 13:48 media

drwxr-xr-x 2 root root 4096 Nov 14 13:48 mnt

drwxr-xr-x 2 root root 4096 Nov 14 13:48 opt

dr-xr-xr-x 255 root root 0 Nov 25 11:28 proc

drwxrwxrwx 2 root root 4096 Nov 14 13:49 root

drwxr-xr-x 6 root root 4096 Nov 14 13:49 run

drwxr-xr-x 2 root root 4096 Nov 17 21:59 sbin

drwxr-xr-x 2 root root 4096 Nov 14 13:48 srv

dr-xr-xr-x 13 root root 0 Nov 25 11:48 sys

drwxrwxrwt 2 root root 4096 Nov 14 13:49 tmp

drwxr-xr-x 11 root root 4096 Nov 14 13:48 usr

drwxr-xr-x 13 root root 4096 Nov 14 13:49 var

root@53a7751d4673:/#

================>

Now, I want to exit from container and come back to host machine.

==================>

root@53a7751d4673:/#

root@53a7751d4673:/# exit

exit

vskumar@ubuntu:/var/log$

===============>

Whenever the Bash exit command is used in the interactive container, it will terminate the Bash shell process.

In turn it will stop the container and returns to the docker host machine.

As a result, we can see the Docker host’s prompt $


You can see the status of docker images as below when I used ‘sudo docker images’ :

==================>

vskumar@ubuntu:/var/log$

vskumar@ubuntu:/var/log$ sudo docker images

REPOSITORY TAG IMAGE ID CREATED SIZE

hello-world latest f2a91732366c 4 days ago 1.85kB

ubuntu 16.04 20c44cd7596f 7 days ago 123MB

ubuntu latest 20c44cd7596f 7 days ago 123MB

busybox latest 6ad733544a63 3 weeks ago 1.13MB

busybox 1.24 47bcc53f74dc 20 months ago 1.11MB

vskumar@ubuntu:/var/log$

=====================>

You can see whatever containers; we have have used in the past exercises.

At this point, I would like to stop this lab session. And in the next blog we can see on “How to track changes in a container?”.


Vcard-Shanthi Kumar V


5. DevOps: How to work with Docker Images

Docker-logo

In  continuation of my previous blog on “4. DevOps: How to work with Docker Containers”, in this blog I would like to give some lab practice on Docker Images.

How to pull the docker public images ?:
Docker portal will have numerous images available  under public.
Now, there is a need for us to know the usage of docker pull command, which is the defacto command to download Docker images.

Now, in this section, we will use the busybox image, one of the smallest but a very handy Docker image, to dive deep into Docker image handling:
$sudo docker pull busybox
============= Output ============>
vskumar@ubuntu:/var/tmp$ sudo docker pull busybox
Using default tag: latest
latest: Pulling from library/busybox
0ffadd58f2a6: Pull complete
Digest: sha256:bbc3a03235220b170ba48a157dd097dd1379299370e1ed99ce976df0355d24f0
Status: Downloaded newer image for busybox:latest
vskumar@ubuntu:/var/tmp$
=================>
Sometimes it might reject this request. We need to keep on trying to get it. I tried 4 times at different timings to connect to it.
Please note now, we have three images as below through all of our so far exercises:
===================>
vskumar@ubuntu:/var/log$ sudo docker images
REPOSITORY TAG IMAGE ID CREATED SIZE
hello-world latest f2a91732366c 4 days ago 1.85kB
ubuntu latest 20c44cd7596f 7 days ago 123MB
busybox latest 6ad733544a63 3 weeks ago 1.13MB
vskumar@ubuntu:/var/log$
===============>
Now, let us stop the docker services and check the status as below:
=================>
vskumar@ubuntu:/var/log$ sudo docker images
REPOSITORY TAG IMAGE ID CREATED SIZE
hello-world latest f2a91732366c 4 days ago 1.85kB
ubuntu latest 20c44cd7596f 7 days ago 123MB
busybox latest 6ad733544a63 3 weeks ago 1.13MB
vskumar@ubuntu:/var/log$ sudo service docker stop
vskumar@ubuntu:/var/log$ sudo service docker status
● docker.service – Docker Application Container Engine
Loaded: loaded (/lib/systemd/system/docker.service; enabled; vendor preset: e
Active: inactive (dead) since Sat 2017-11-25 02:52:25 PST; 8s ago
Docs: https://docs.docker.com
Process: 1224 ExecStart=/usr/bin/dockerd -H fd:// (code=exited, status=0/SUCCE
Main PID: 1224 (code=exited, status=0/SUCCESS)
Nov 25 02:21:42 ubuntu dockerd[1224]: time=”2017-11-25T02:21:42.863518710-08:00″
Nov 25 02:21:43 ubuntu dockerd[1224]: time=”2017-11-25T02:21:43-08:00″ level=inf
Nov 25 02:27:08 ubuntu dockerd[1224]: time=”2017-11-25T02:27:08.010096274-08:00″
Nov 25 02:27:08 ubuntu dockerd[1224]: time=”2017-11-25T02:27:08-08:00″ level=inf
Nov 25 02:27:08 ubuntu dockerd[1224]: time=”2017-11-25T02:27:08.199685599-08:00″
Nov 25 02:52:25 ubuntu dockerd[1224]: time=”2017-11-25T02:52:25.010875880-08:00″
Nov 25 02:52:25 ubuntu systemd[1]: Stopping Docker Application Container Engine.
Nov 25 02:52:25 ubuntu dockerd[1224]: time=”2017-11-25T02:52:25.081714537-08:00″
Nov 25 02:52:25 ubuntu systemd[1]: Stopped Docker Application Container Engine.
vskumar@ubuntu:/var/log$
====================>
You can see the inactive status of docker.
In such cases, restart the Docker service, as shown here:

$ sudo service docker restart
You can see the output as below:
==================>
vskumar@ubuntu:/var/log$ sudo service docker restart
vskumar@ubuntu:/var/log$ sudo service docker status 
docker.service - Docker Application Container Engine
   Loaded: loaded (/lib/systemd/system/docker.service; enabled; vendor preset: e
   Active: active (running) since Sat 2017-11-25 02:54:42 PST; 6s ago
     Docs: https://docs.docker.com
 Main PID: 3769 (dockerd)
    Tasks: 18
   Memory: 24.6M
      CPU: 989ms
   CGroup: /system.slice/docker.service
           ├─3769 /usr/bin/dockerd -H fd://
           └─3778 docker-containerd --config /var/run/docker/containerd/containe

Nov 25 02:54:41 ubuntu dockerd[3769]: time="2017-11-25T02:54:41.159062708-08:00"
Nov 25 02:54:41 ubuntu dockerd[3769]: time="2017-11-25T02:54:41.159806997-08:00"
Nov 25 02:54:41 ubuntu dockerd[3769]: time="2017-11-25T02:54:41.163503112-08:00"
Nov 25 02:54:41 ubuntu dockerd[3769]: time="2017-11-25T02:54:41.743276580-08:00"
Nov 25 02:54:41 ubuntu dockerd[3769]: time="2017-11-25T02:54:41.955217284-08:00"
Nov 25 02:54:41 ubuntu dockerd[3769]: time="2017-11-25T02:54:41.975961283-08:00"
Nov 25 02:54:42 ubuntu dockerd[3769]: time="2017-11-25T02:54:42.092220161-08:00"
Nov 25 02:54:42 ubuntu dockerd[3769]: time="2017-11-25T02:54:42.094334663-08:00"
Nov 25 02:54:42 ubuntu systemd[1]: Started Docker Application Container Engine.
Nov 25 02:54:42 ubuntu dockerd[3769]: time="2017-11-25T02:54:42.190194886-08:00"

vskumar@ubuntu:/var/log$ 

========================>

Now, let us reconfirm the existing docker images as below:
================>

vskumar@ubuntu:/var/log$ ^C
vskumar@ubuntu:/var/log$ sudo docker images
REPOSITORY          TAG                 IMAGE ID            CREATED             SIZE
hello-world         latest              f2a91732366c        4 days ago          1.85kB
ubuntu              latest              20c44cd7596f        7 days ago          123MB
busybox             latest              6ad733544a63        3 weeks ago         1.13MB
vskumar@ubuntu:/var/log$ 
=======================>

By default, Docker always uses the image that is tagged as latest.

Each image variant can be directly identified by qualifying it with an appropriate tag.

An image can be tag-qualified by adding a colon (:) between the tag and the repository name (<repository>:<tag>). For demonstration, we will pull the 1.24 tagged version of busybox as shown here:

Now, For lab demonstration, we will pull the 1.24 tagged version of busybox as shown here:

$ sudo docker pull busybox:1.24

Now. You can see the total output before and after executing the above command:

==============================>

vskumar@ubuntu:/var/log$ ^C

vskumar@ubuntu:/var/log$ sudo docker images

REPOSITORY TAG IMAGE ID CREATED SIZE

hello-world latest f2a91732366c 4 days ago 1.85kB

ubuntu latest 20c44cd7596f 7 days ago 123MB

busybox latest 6ad733544a63 3 weeks ago 1.13MB

vskumar@ubuntu:/var/log$ ^C

vskumar@ubuntu:/var/log$

vskumar@ubuntu:/var/log$

vskumar@ubuntu:/var/log$ sudo docker pull busybox:1.24

1.24: Pulling from library/busybox

385e281300cc: Pull complete

a3ed95caeb02: Pull complete

Digest: sha256:8ea3273d79b47a8b6d018be398c17590a4b5ec604515f416c5b797db9dde3ad8

Status: Downloaded newer image for busybox:1.24

vskumar@ubuntu:/var/log$ sudo docker images

REPOSITORY TAG IMAGE ID CREATED SIZE

hello-world latest f2a91732366c 4 days ago 1.85kB

ubuntu latest 20c44cd7596f 7 days ago 123MB

busybox latest 6ad733544a63 3 weeks ago 1.13MB

busybox 1.24 47bcc53f74dc 20 months ago 1.11MB

vskumar@ubuntu:/var/log$

==============================>

There are two busybox containers with different versions.

So, on the basis of TAG values the containers are being pulled.

How to Search Docker images:

So far we have pulled the known images from the docker-hub.

Let us identify some docker images by using a search option as below. We can search for Docker images in the Docker Hub Registry using the docker search subcommand, as shown in this example:

$ sudo docker search mysql

You can see the displayed output of mysql images from the Docker Hub Registry:

=============>

vskumar@ubuntu:/var/log$ sudo docker search mysql

NAME DESCRIPTION STARS OFFICIAL AUTOMATED

mysql MySQL is a widely used, open-source relation… 5278 [OK]

mariadb MariaDB is a community-developed fork of MyS… 1634 [OK]

mysql/mysql-server Optimized MySQL Server Docker images. Create… 368 [OK]

percona Percona Server is a fork of the MySQL relati… 303 [OK]

hypriot/rpi-mysql RPi-compatible Docker Image with Mysql 74

zabbix/zabbix-server-mysql Zabbix Server with MySQL database support 64 [OK]

centurylink/mysql Image containing mysql. Optimized to be link… 53 [OK]

sameersbn/mysql 48 [OK]

zabbix/zabbix-web-nginx-mysql Zabbix frontend based on Nginx web-server wi… 38 [OK]

tutum/mysql Base docker image to run a MySQL database se… 29

1and1internet/ubuntu-16-nginx-php-phpmyadmin-mysql-5 ubuntu-16-nginx-php-phpmyadmin-mysql-5 17 [OK]

schickling/mysql-backup-s3 Backup MySQL to S3 (supports periodic backup… 16 [OK]

centos/mysql-57-centos7 MySQL 5.7 SQL database server 15

linuxserver/mysql A Mysql container, brought to you by LinuxSe… 12

centos/mysql-56-centos7 MySQL 5.6 SQL database server 6

openshift/mysql-55-centos7 DEPRECATED: A Centos7 based MySQL v5.5 image… 6

frodenas/mysql A Docker Image for MySQL 3 [OK]

dsteinkopf/backup-all-mysql backup all DBs in a mysql server 3 [OK]

circleci/mysql MySQL is a widely used, open-source relation… 2

cloudfoundry/cf-mysql-ci Image used in CI of cf-mysql-release 0

cloudposse/mysql Improved `mysql` service with support for `m… 0 [OK]

ansibleplaybookbundle/rhscl-mysql-apb An APB which deploys RHSCL MySQL 0 [OK]

astronomerio/mysql-sink MySQL sink 0 [OK]

inferlink/landmark-mysql landmark-mysql 0 [OK]

astronomerio/mysql-source MySQL source 0 [OK]

vskumar@ubuntu:/var/log$ ^C

vskumar@ubuntu:/var/log$

====================>

You can get the top 5 images by suing head -5 linux command.

$sudo docker search mysql | head -5

=============>

vskumar@ubuntu:/var/log$ sudo docker search mysql | head -5

NAME DESCRIPTION STARS OFFICIAL AUTOMATED

mysql MySQL is a widely used, open-source relation… 5278 [OK]

mariadb MariaDB is a community-developed fork of MyS… 1634 [OK]

mysql/mysql-server Optimized MySQL Server Docker images. Create… 368 [OK]

percona Percona Server is a fork of the MySQL relati… 303 [OK]

vskumar@ubuntu:/var/log$

===============>

If you see the above list, The mysql image curated and hosted by Docker Inc has a 5278 star rating, which is indicated as this is the most popular mysql image and aslo as Official image to use it. For security reasons we should use the official and highly rated images only.

As we planned, in this blog we have worked with the Docker images.

At this point we can stop this session and in the next blog we can see on “How to work with interactive containers”.

Vcard-Shanthi Kumar V-v3

Feel free to Contact me :


3. DevOps – Jenkins[2.9]: How to create and build the job ?

jenkins

In continuation of my previous blog on Jenkins 2.9 installation [https://vskumar.blog/2017/11/25/1-devops-jenkins2-9-installation-with-java-9-on-windows-10], We have installed and retested it. In this blog we can see a simple job creation and running it in a build.

Now, Let us do some exercise:

Let us create a new job using Jenkins.

As you are aware of; with Jenkins any kind of manual tasks can be done.

For example:

  1. I want to compile a java program and run it.
  2. To do this 1st let us identify the manual steps.
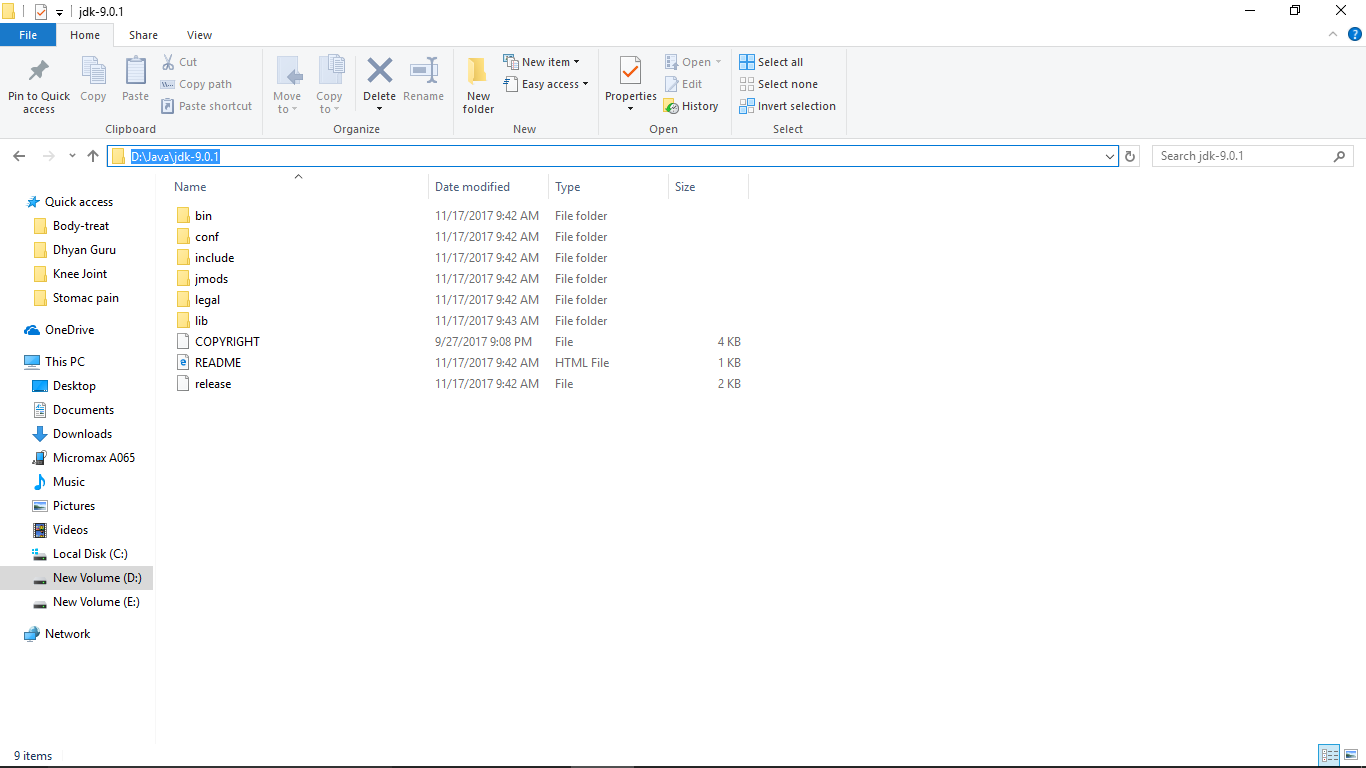
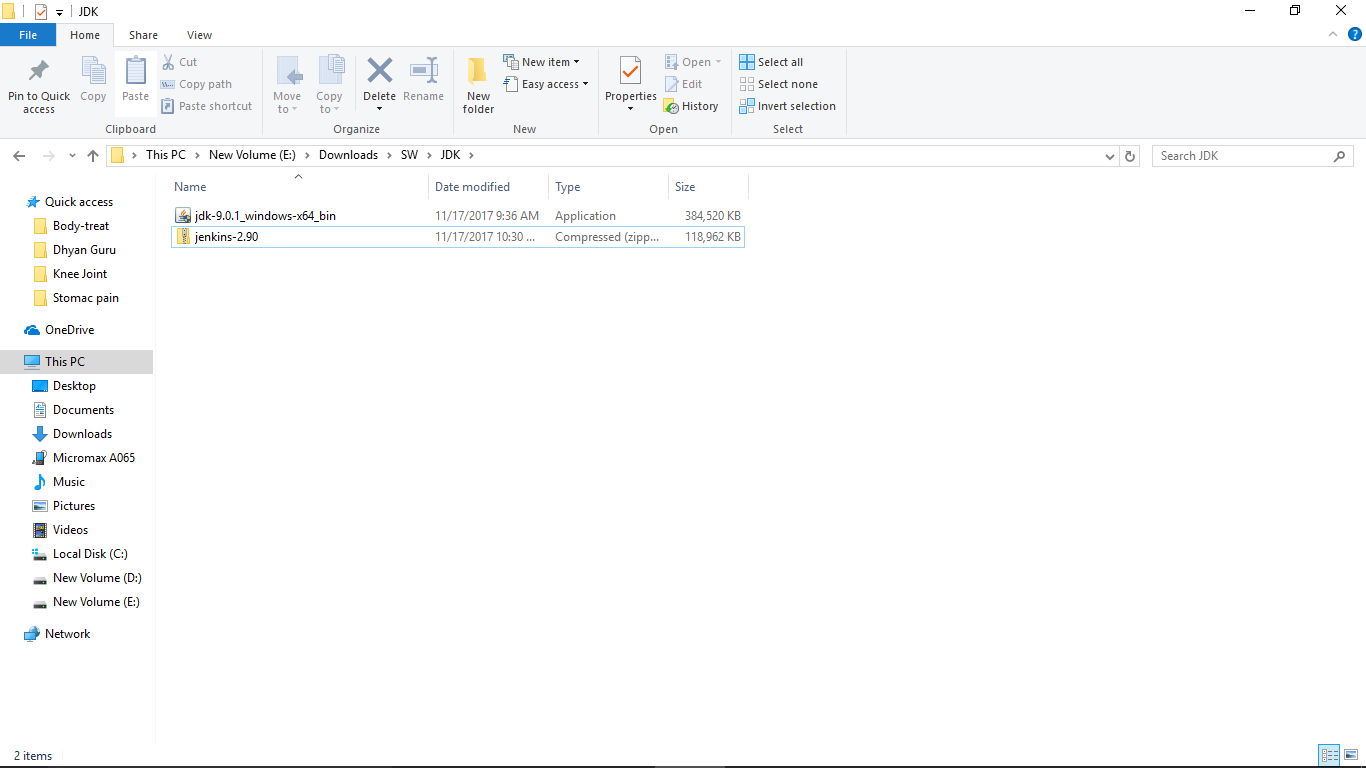
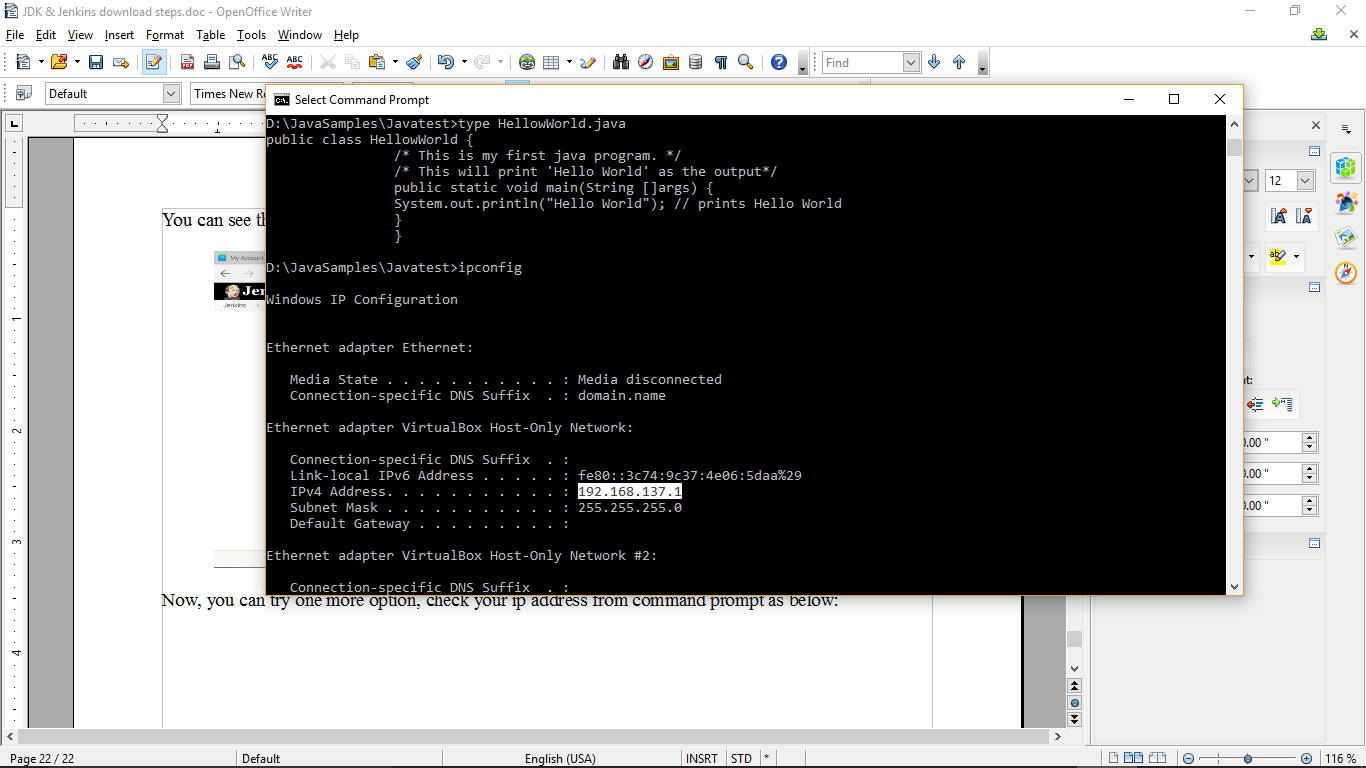
  3. I need to go to the below directory: D:\JavaSamples\Javatest , where my java programs are available.
  4. I need to use the below command:

CD [to know the current directory.]

Assume, I am in the below dir:

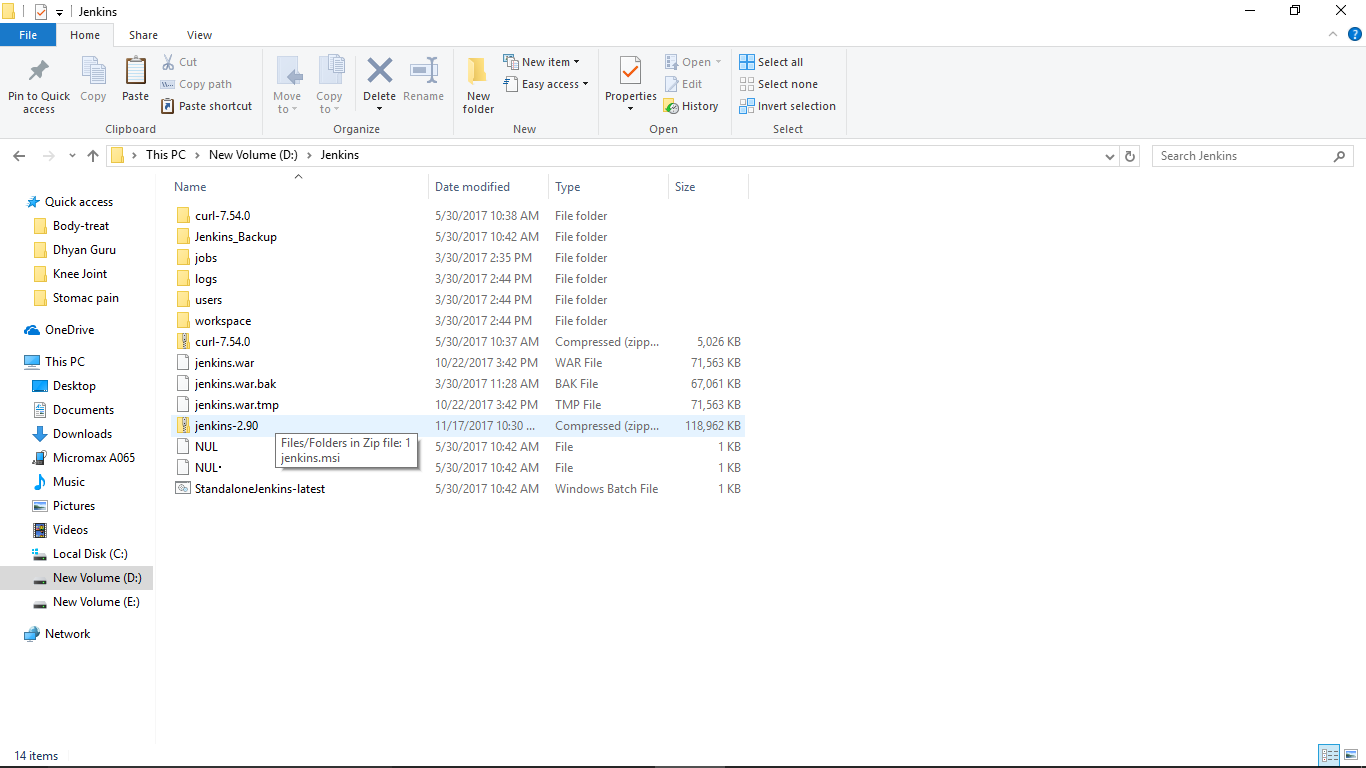
D:\Jenkins\jenkins-2.90>cd

D:\Jenkins\jenkins-2.90

Then , I need to use cd \JavaSamples\Javatest

Now I need to check my current path using cd

Then see the hello*.java using

dir command.

Then I need to compile it using ‘javac HellowWorld.java’ command.

Then I need to check the files on hello*.* name

There should be one file as ‘HellowWorld.class’

It means my program has been compiled correctly without errors.

Now, I need to run the program using java command.

Now, I need to run this file as java HellowWorld

It should display the output.

I have executed all the steps in a command window to compile and test the program.

You can see the executed commands and the  output also from the below screen:

HelloWorld-compile&amp;execute-CMD

As we know these are the manual tasks we need to do repetetively to select a program, compile it and run it. Why don’t we use Jenkins to create a job which has these set of tasks.

Now, let us learn how to create a job in Jenkins?:

Now assuming you are on the below screen:

Jenkins-New Job Creation

Click on “create new jobs”

You will get the below screen:

Jenkins job creation-enter an item name scrn.png

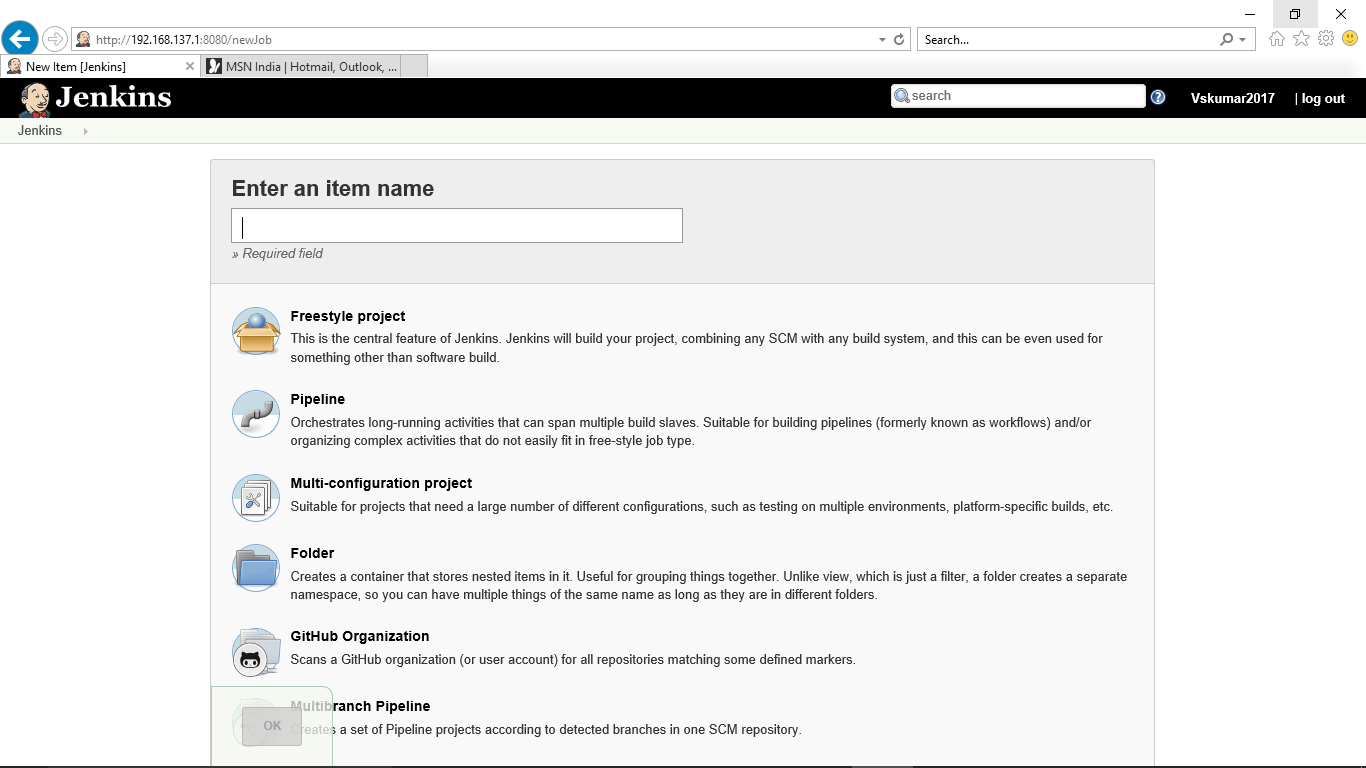
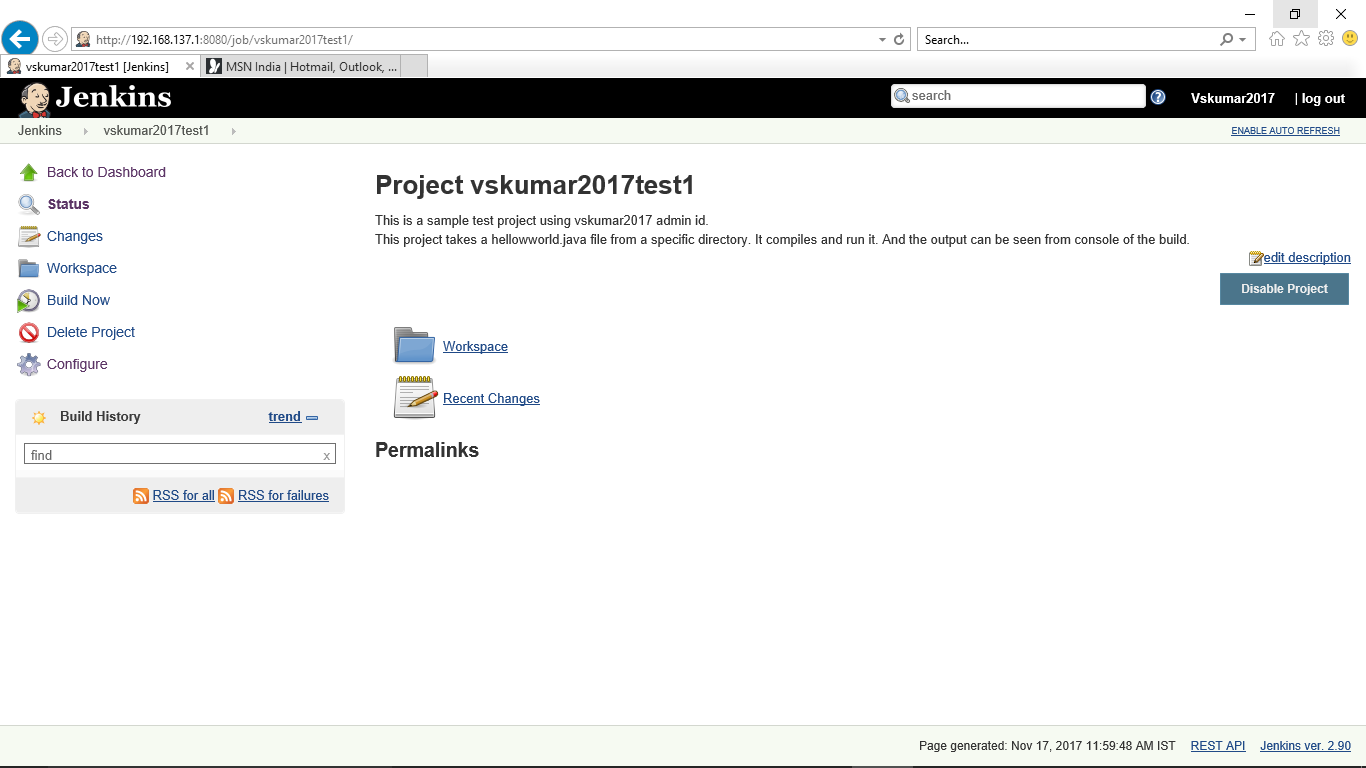
I want to create a job with the name of “vskumar2017test1”.

Jenkins-Freestyle project-creation

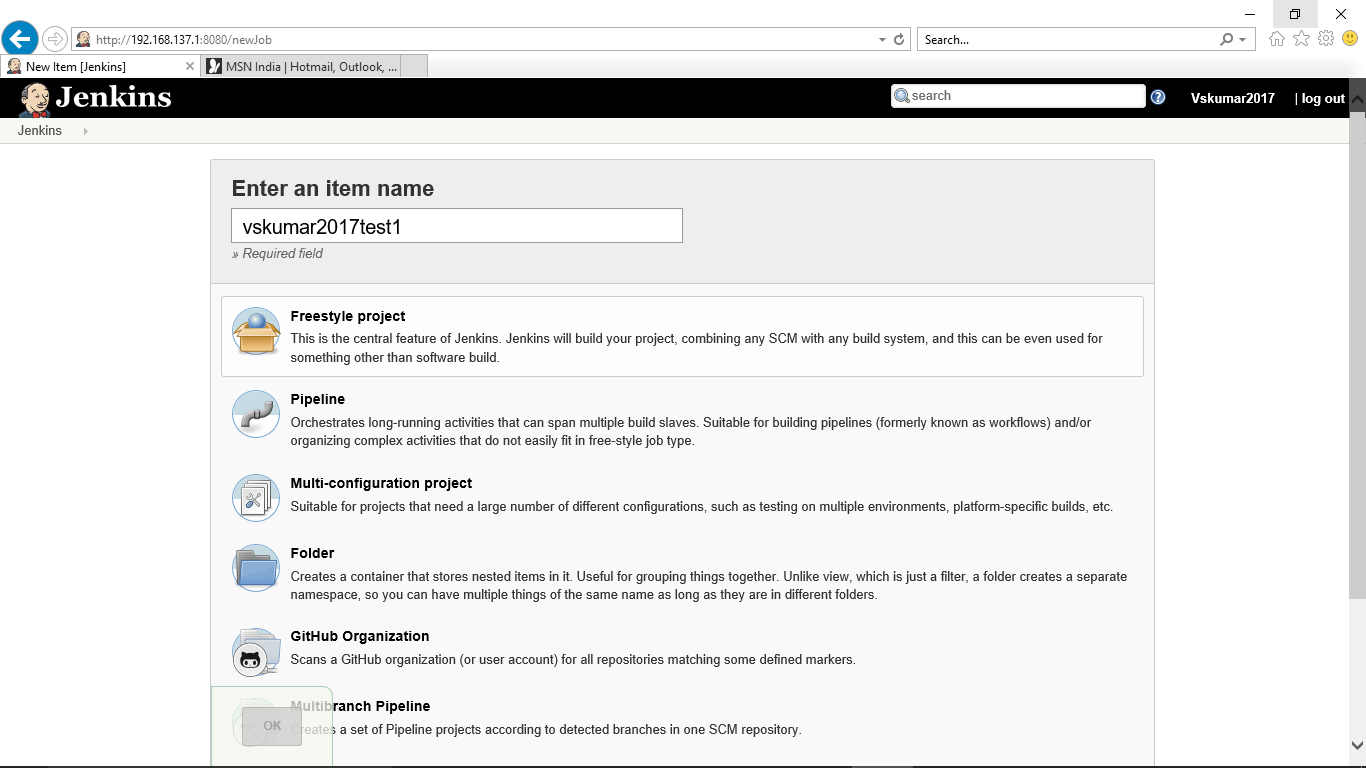
I want to create a Freestyle project, as I do not work with any of the plugins for now.
Hence I need to select on the 1st option “ Freestyle project”. When I click on “OK” button, we can see the below screen:

Jenkins-Freestyle project-creation2

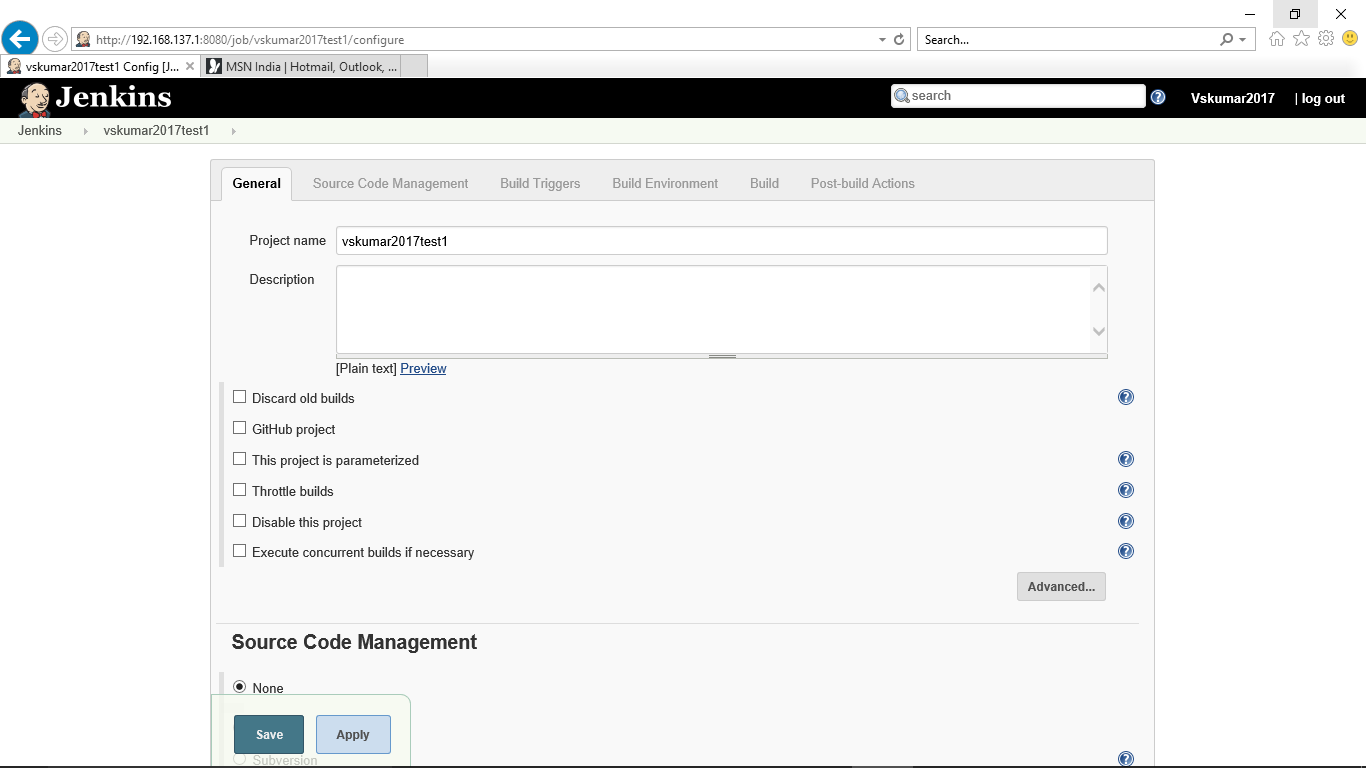
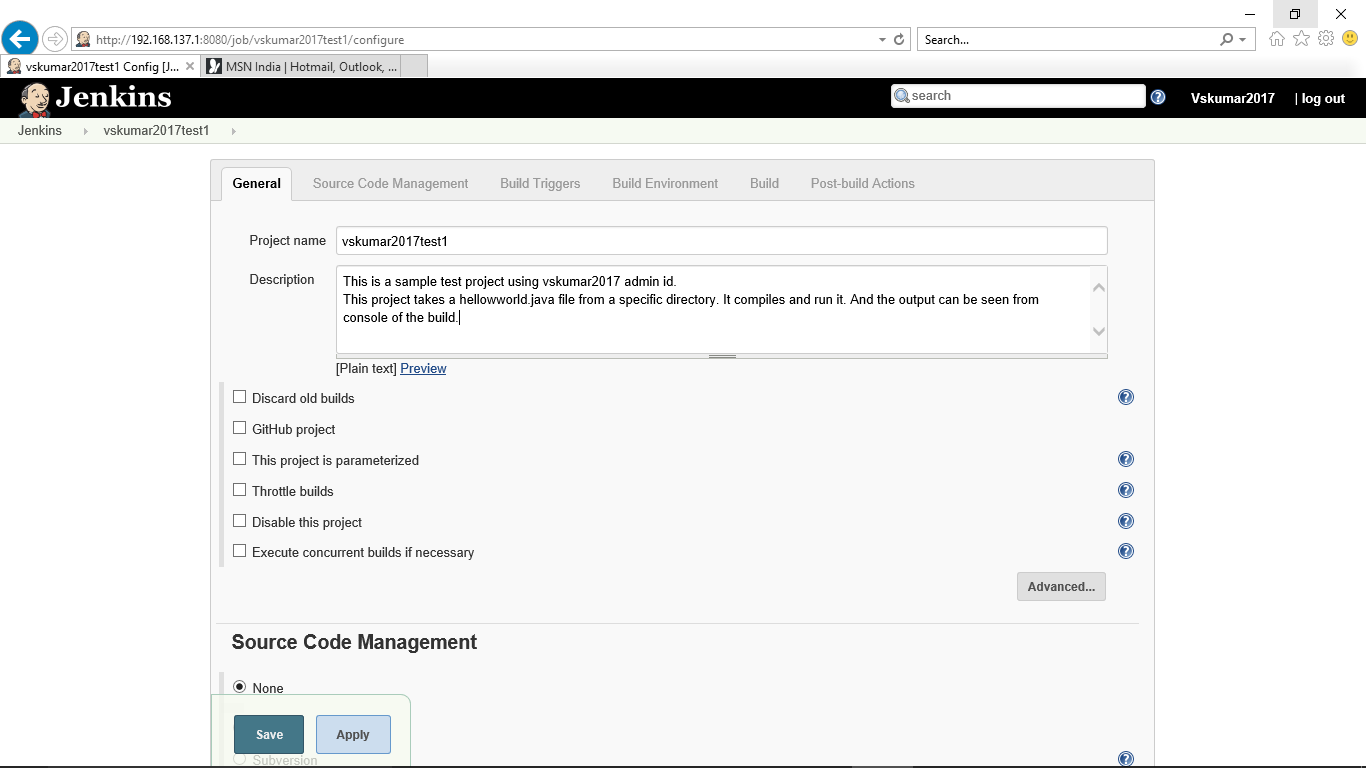
I have entered the project description as below, as per our activity plan:

Jenkins-Freestyle project-description

As you are aware we are using Jenkins for simple task in this exercise,

Now click on build options. You will get the below screen:

Jenkins-Freestyle project-Build.png

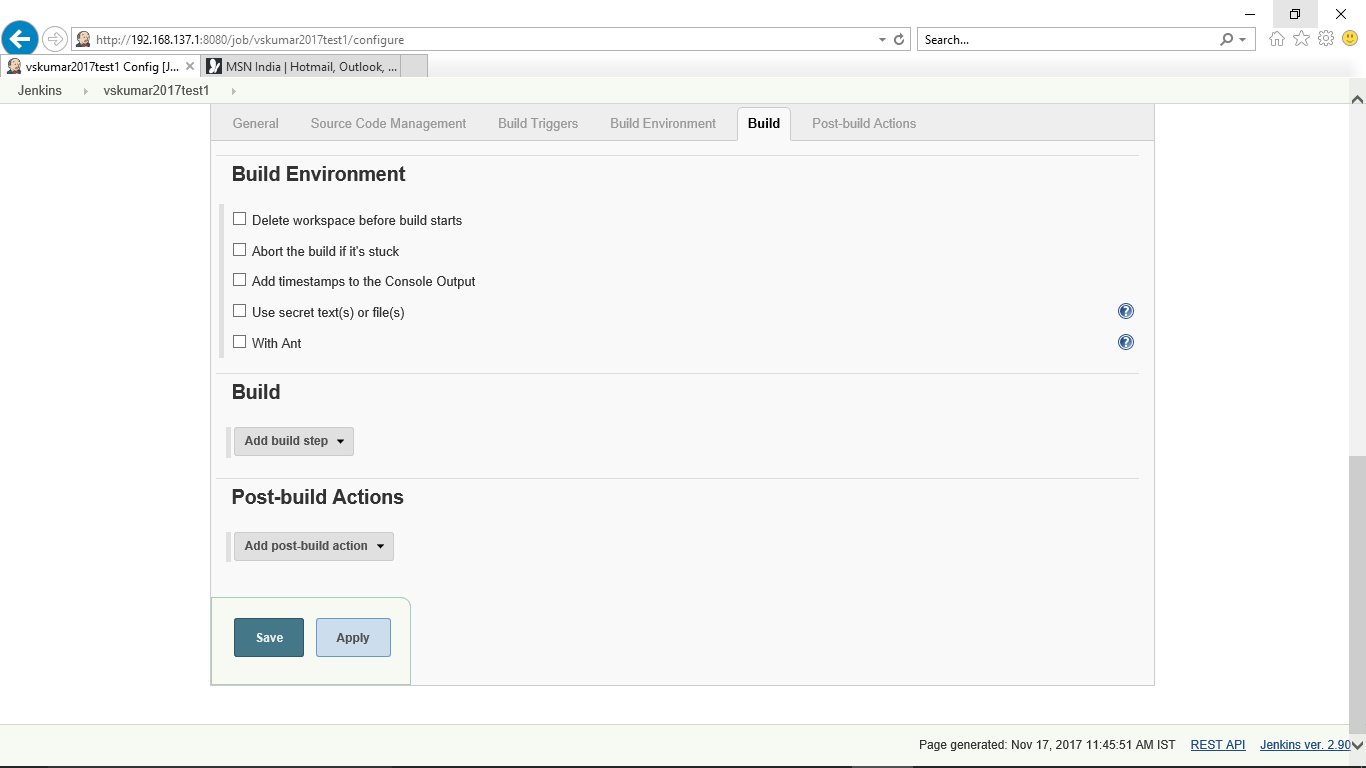
In this screen we need to use build option. So click on add build steps. Using this option, we will get the below features to use the command window and the commands:

Jenkins-Freestyle project-Build-Add build step

There are two different options we can see to use the commands execution. 1. Execute Windows batch command , 2. Execute shell. Currently e are working with windows only. Hence 1st option need to be selected.

You can see the below screen:

Jenkins-New Job-Build-window commands1

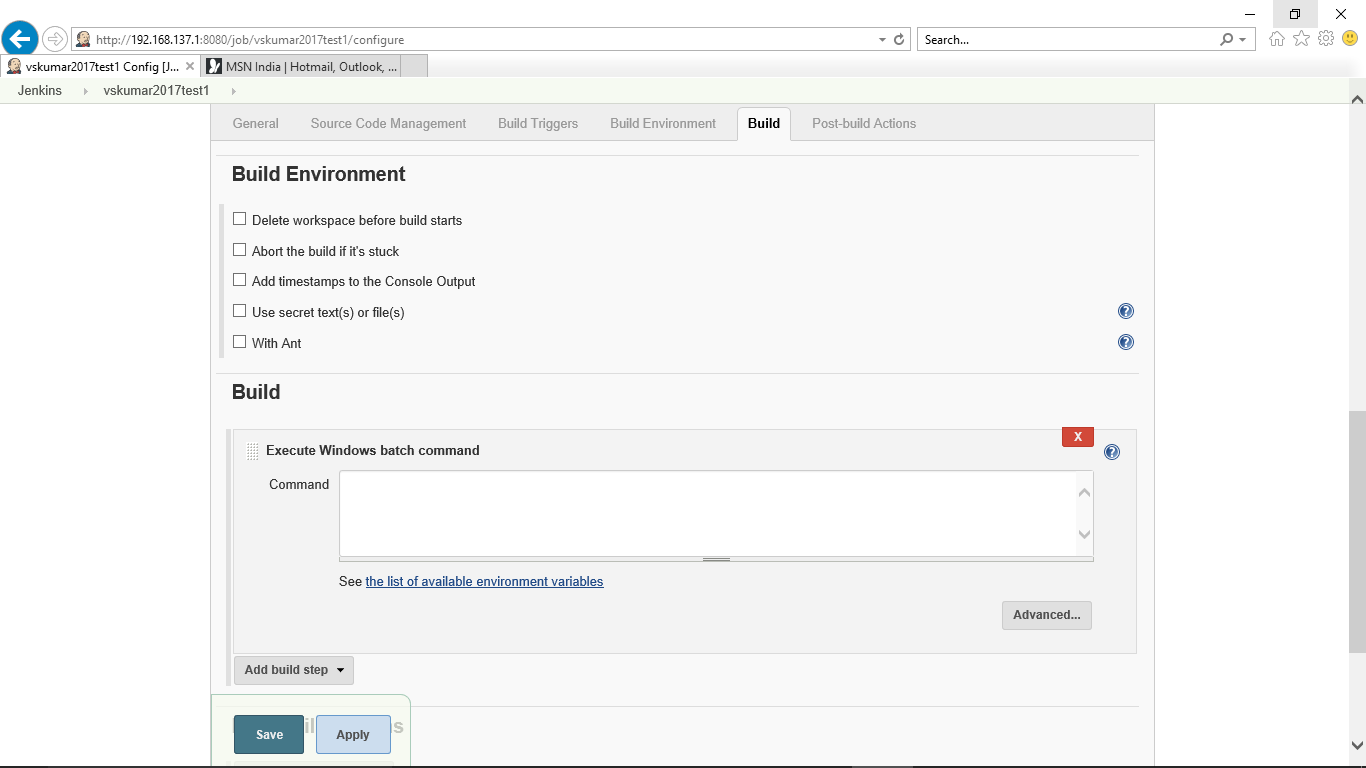
Now, whatever commands we tried using command prompt we need to enter those.

For example I used as below:

cd

cd \JavaSamples\Javatest

dir hellow*.java

javac HellowWorld.java

dir HellowWorld.*

java HellowWorld

Now, I am copying these commands into the window. You can see the partially displayed commands in the window. In reality it has all the commands.

Jenkins-Build-Windows-batch commands-entry1

Now, let us save this job.
We will get the below screen on the created job name:

Jenkins-Project-vskumar2017test1.png

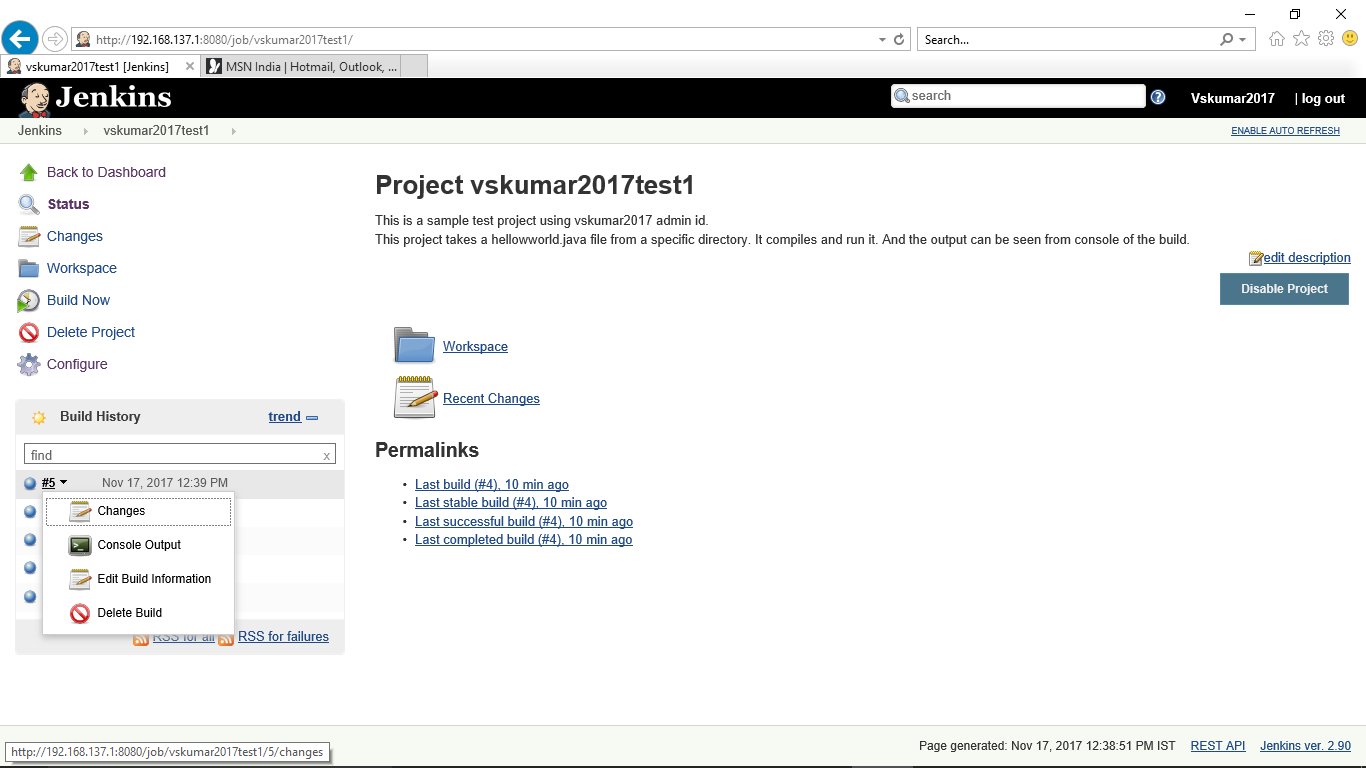
How to run the created project ?:

We need to run the created project using the option “Build now”.

You can see the build history as the job running, Under build#1.

Now, How to see the executed job output ?:
To see the output we need to click on the down arrow mark ate the job#.
It displays the below:

We need to select the console output, It displays the output as below:

Jenkins-Project-vskumar2017test1-running-build1-consoleOuputIf we scroll down we can see the job status message:

Jenkins-Project-vskumar2017test1-running-build1-consoleOuput

It shows all the output for our commands along with the job status.

Now let us review and analyze the display messages and commands as below.

Started by user Vskumar2017
Building in workspace D:\Jenkins\Jenkins 2.9\workspace\vskumar2017test1
[vskumar2017test1] $ cmd /c call C:\WINDOWS\TEMP\jenkins5234154176626743505.bat

The above commands shows, Jenkins started the job with user id vskumar2017.N

And it displays the current path of the job where it is created.

And it invokes a .bat file to execute the command prompt commands what we entered. It means it stored the batch commands into a file and it is opened by a cmd command from a shell prompt.

Now, let us see the below commands:

D:\Jenkins\Jenkins 2.9\workspace\vskumar2017test1>cd
D:\Jenkins\Jenkins 2.9\workspace\vskumar2017test1

It denotes its current job/project directory. And executed the cd to show the path.

Through the below:

D:\Jenkins\Jenkins 2.9\workspace\vskumar2017test1>cd  \JavaSamples\Javatest 

D:\JavaSamples\Javatest>dir hellow*.java 
 Volume in drive D is New Volume
 Volume Serial Number is 5C67-6F04

 Directory of D:\JavaSamples\Javatest

04/16/2017  03:52 PM               234 HellowWorld.java
04/16/2017  03:53 PM               570 HellowWorld10.java
               2 File(s)            804 bytes
               0 Dir(s)  22,762,598,400 bytes free

It changed the directory where the java program is there.

And displayed the files.

Let us see the next output:

D:\JavaSamples\Javatest>javac HellowWorld.java 
'javac' is not recognized as an internal or external command,
operable program or batch file.

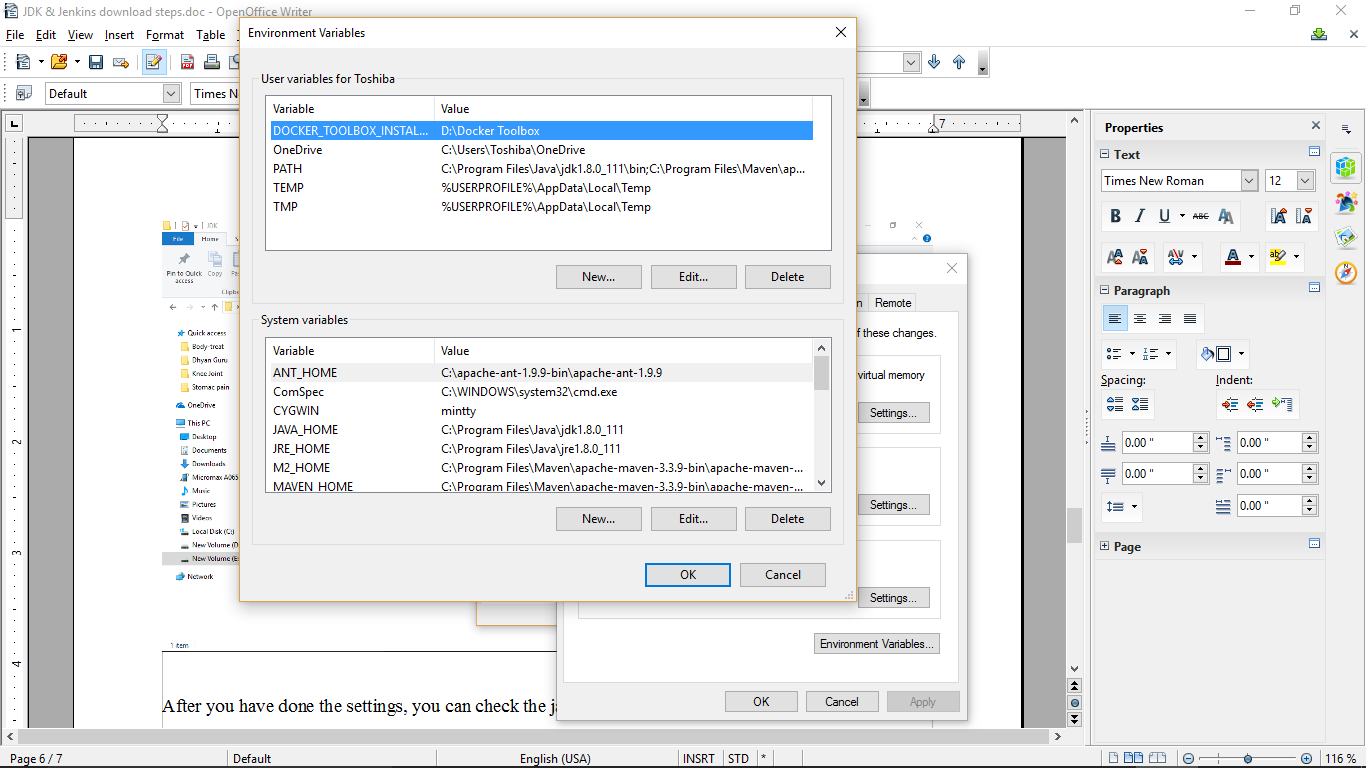
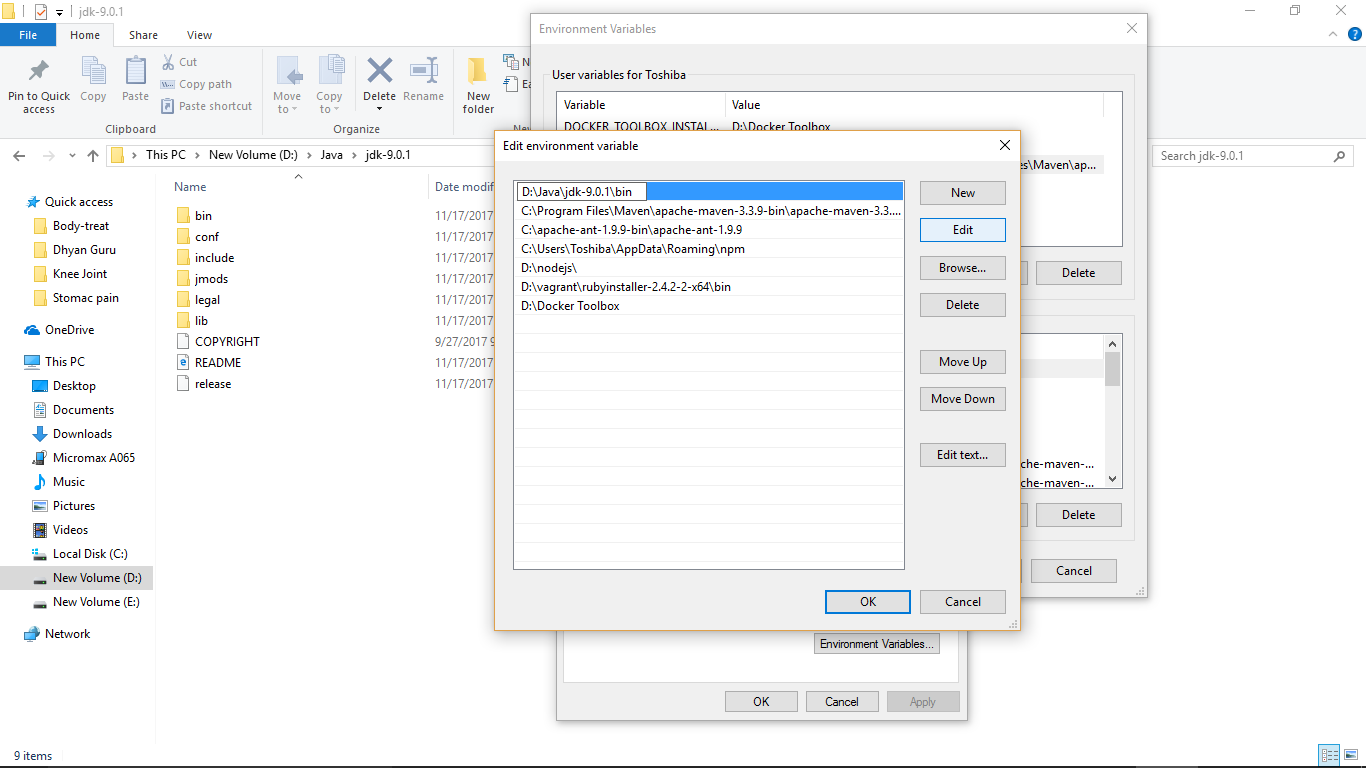
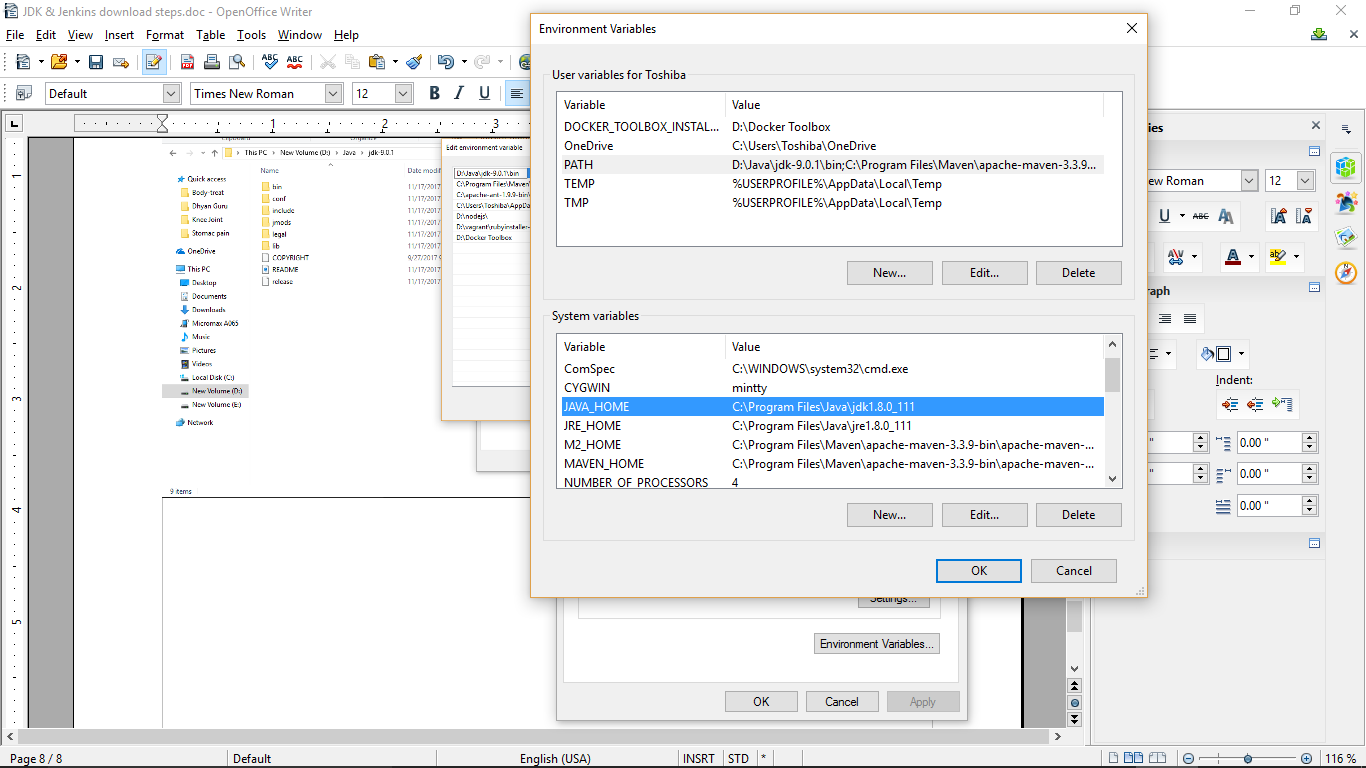
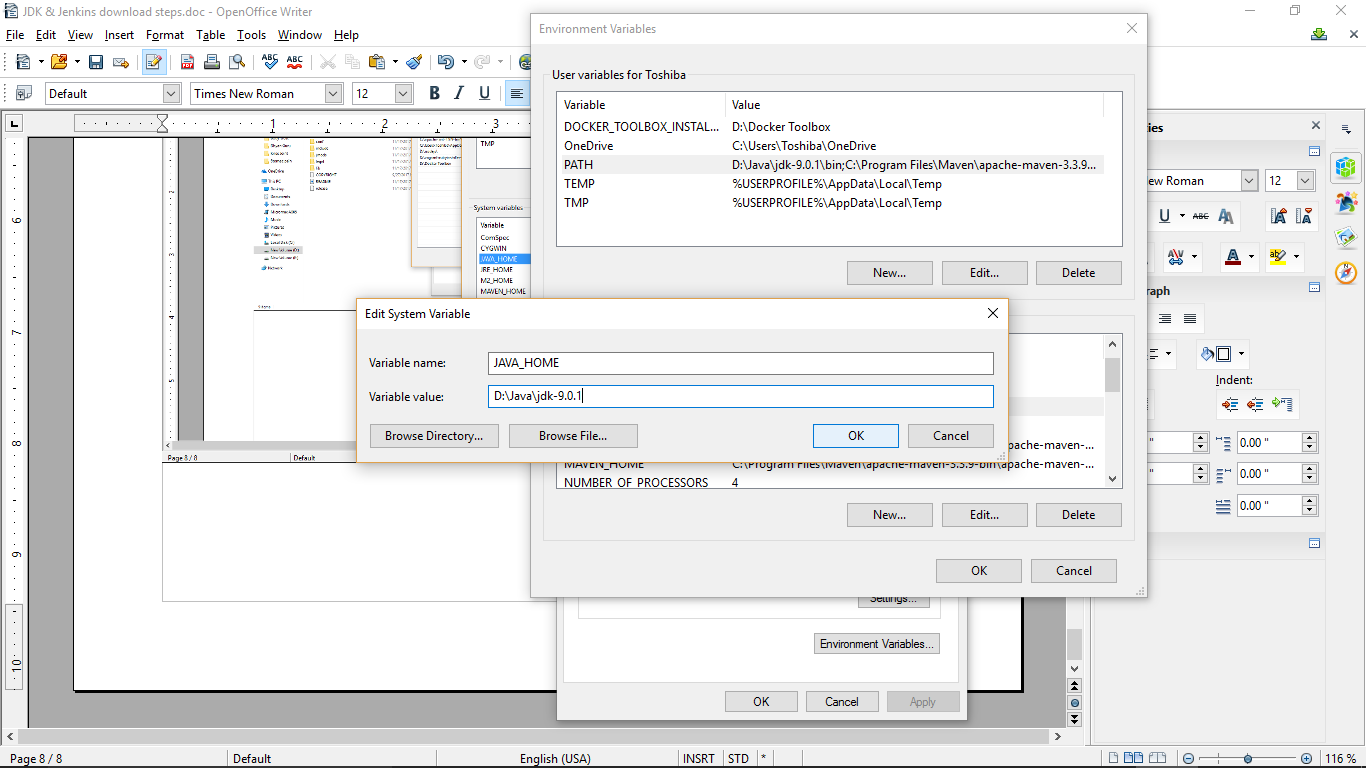
It shows error for java path. Jenkins is not recognizing the path. The javac [compiler application is in the below path: D:\Java\jdk-9.0.1\bin ]

Javac-path.png

Now, this need to be corrected in the project.
To correct this we need to goto option: “Configure”.

Open it into project window to update some more commands.

I have updated the command window with the below commands:
cd \JavaSamples\Javatest
dir hellow*.java
del HellowWorld.class
dir hellow*.java
D:\Java\jdk-9.0.1\bin\javac HellowWorld.java
dir HellowWorld.*
java HellowWorld

Now, let me run the job by using “Build now option”.

For debugging purpose, I have executed this job some more times. Hence history shows multiple builds on it.

Our current build is #5. And let us open it and see the console output:

Jenkins-Project-vskumar2017test1-buildsNow#5

The console output shows as below:

Jenkins-Project-vskumar2017test1-console#5

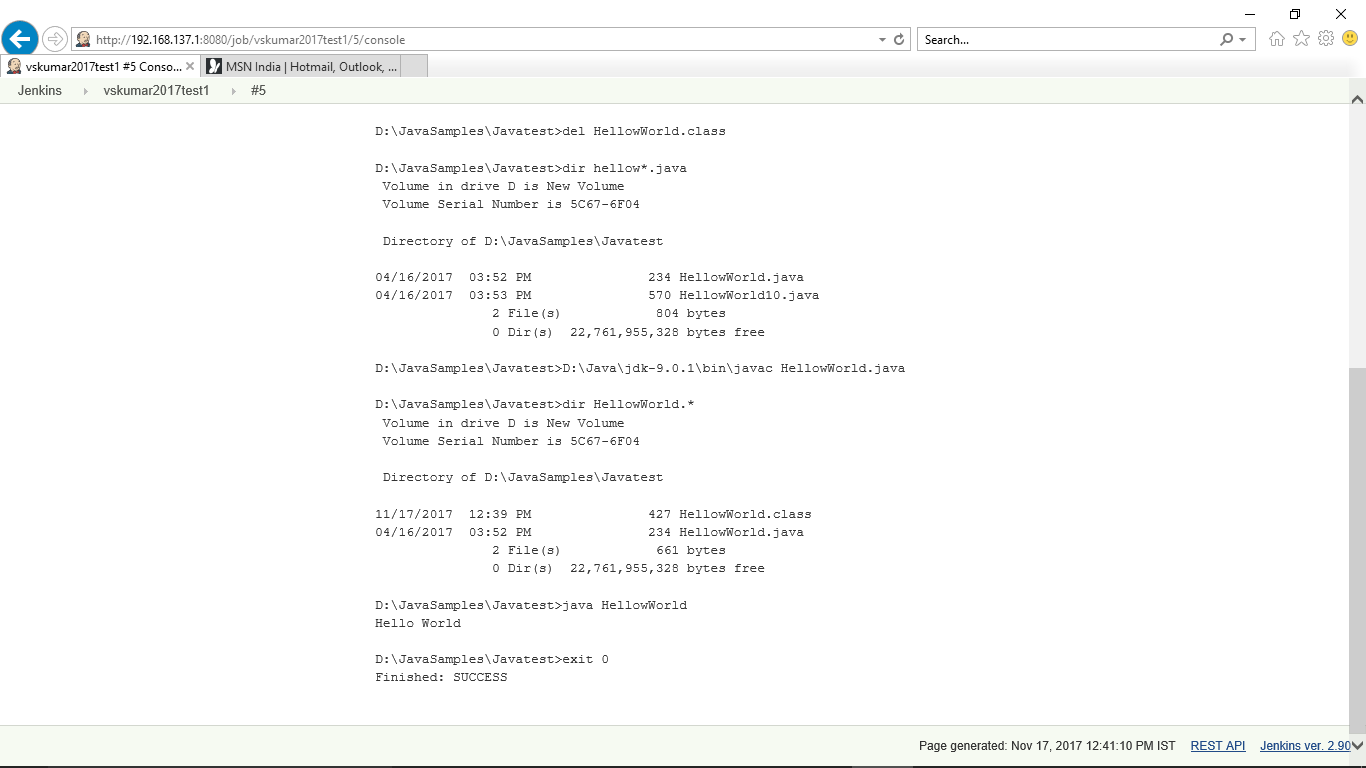
Now you can see the whole console output as below in text format:

Console Output
Started by user Vskumar2017
Building in workspace D:\Jenkins\Jenkins 2.9\workspace\vskumar2017test1
[vskumar2017test1] $ cmd /c call C:\WINDOWS\TEMP\jenkins1398066858541735603.bat

D:\Jenkins\Jenkins 2.9\workspace\vskumar2017test1>cd
D:\Jenkins\Jenkins 2.9\workspace\vskumar2017test1

D:\Jenkins\Jenkins 2.9\workspace\vskumar2017test1>cd \JavaSamples\Javatest

D:\JavaSamples\Javatest>dir hellow*.java
Volume in drive D is New Volume
Volume Serial Number is 5C67-6F04

Directory of D:\JavaSamples\Javatest

04/16/2017 03:52 PM 234 HellowWorld.java
04/16/2017 03:53 PM 570 HellowWorld10.java
2 File(s) 804 bytes
0 Dir(s) 22,761,955,328 bytes free

D:\JavaSamples\Javatest>del HellowWorld.class

D:\JavaSamples\Javatest>dir hellow*.java
Volume in drive D is New Volume
Volume Serial Number is 5C67-6F04

Directory of D:\JavaSamples\Javatest

04/16/2017 03:52 PM 234 HellowWorld.java
04/16/2017 03:53 PM 570 HellowWorld10.java
2 File(s) 804 bytes
0 Dir(s) 22,761,955,328 bytes free

D:\JavaSamples\Javatest>D:\Java\jdk-9.0.1\bin\javac HellowWorld.java

D:\JavaSamples\Javatest>dir HellowWorld.*
Volume in drive D is New Volume
Volume Serial Number is 5C67-6F04

Directory of D:\JavaSamples\Javatest

11/17/2017 12:3

9 PM 427 HellowWorld.class
04/16/2017 03:52 PM 234 HellowWorld.java
2 File(s) 661 bytes
0 Dir(s) 22,761,955,328 bytes free

D:\JavaSamples\Javatest>java HellowWorld
Hello World

D:\JavaSamples\Javatest>exit 0
Finished: SUCCESS

=======================>
Observe there was no error displayed as we have given the correct javac application path.

Now I have updated the commands as below to remove the existing HellowWorld.class file.
cd
cd \JavaSamples\Javatest
dir hellow*.*
echo ‘Assuming .class file is already there..”
del HellowWorld.class
dir hellow*.java
D:\Java\jdk-9.0.1\bin\javac HellowWorld.java
dir HellowWorld.*
java HellowWorld
=======================>
You can see the output under build#7:
========================>

Console Output
Started by user Vskumar2017
Building in workspace D:\Jenkins\Jenkins 2.9\workspace\vskumar2017test1
[vskumar2017test1] $ cmd /c call C:\WINDOWS\TEMP\jenkins7100481173282587024.bat

D:\Jenkins\Jenkins 2.9\workspace\vskumar2017test1>cd
D:\Jenkins\Jenkins 2.9\workspace\vskumar2017test1

D:\Jenkins\Jenkins 2.9\workspace\vskumar2017test1>cd \JavaSamples\Javatest

D:\JavaSamples\Javatest>dir hellow*.*
Volume in drive D is New Volume
Volume Serial Number is 5C67-6F04

Directory of D:\JavaSamples\Javatest

11/17/2017 12:45 PM 427 HellowWorld.class
04/16/2017 03:52 PM 234 HellowWorld.java
04/16/2017 03:53 PM 570 HellowWorld10.java
3 File(s) 1,231 bytes
0 Dir(s) 22,760,976,384 bytes free

D:\JavaSamples\Javatest>echo ‘Assuming .class file is already there..”
‘Assuming .class file is already there..”

D:\JavaSamples\Javatest>del HellowWorld.class

D:\JavaSamples\Javatest>dir hellow*.java
Volume in drive D is New Volume
Volume Serial Number is 5C67-6F04

Directory of D:\JavaSamples\Javatest

04/16/2017 03:52 PM 234 HellowWorld.java
04/16/2017 03:53 PM 570 HellowWorld10.java
2 File(s) 804 bytes
0 Dir(s) 22,760,976,384 bytes free

D:\JavaSamples\Javatest>D:\Java\jdk-9.0.1\bin\javac HellowWorld.java

D:\JavaSamples\Javatest>dir HellowWorld.*
Volume in drive D is New Volume
Volume Serial Number is 5C67-6F04

Directory of D:\JavaSamples\Javatest

11/17/2017 12:47 PM 427 HellowWorld.class
04/16/2017 03:52 PM 234 HellowWorld.java
2 File(s) 661 bytes
0 Dir(s) 22,760,976,384 bytes free

D:\JavaSamples\Javatest>java HellowWorld
Hello World

D:\JavaSamples\Javatest>exit 0
Finished: SUCCESS
=================================>
Now, you can see message display from echo command.
And the old class file is removed and the new file time stamp can be seen differently.

Now, how to make failure a job ?:

Please see the screen display with a failed job:

Jenkins-vskumar2017-success1

Now, let us see the console output:

Console-output-vskumar2017-3.png

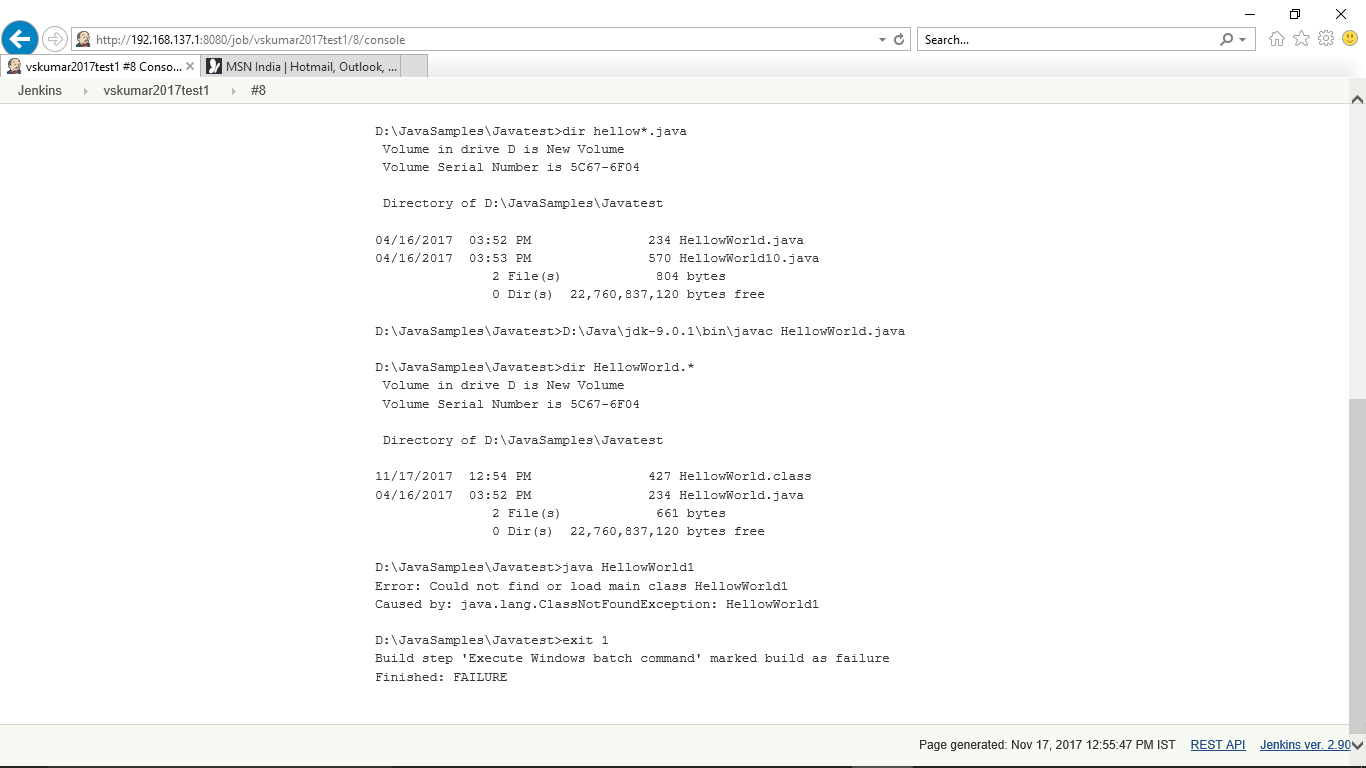
In this example I have given a wrong file name to execute. Hence it is failed.
It checks the last commands results. You can change them and cross check as an exercise.
The failure error flag also it shows as “1”.
When the job was success the flag showed as “0”.

Hope you understand the difference between failure and success of Jenkins build.
So, we need to make sure the commands/script mentioned in the command window should be a debugged one. Then the jobs success can be seen.

Please note;
If it is not a recognized command as an internal or external command,
operable program or batch file. Jenkins will not count it as a failure.

Exercise:
Take a new Java program and create a job to compile and run it.

How to use My views:
You can see the build history in graphical format as below with My views option:

Jenkins-Job-Views


At this point with this blog I want to close now, with the above scenarios.

You can also see:

https://www.youtube.com/edit?o=U&video_id=lciTHyxCgfE


Feel free to contact for any support:

Vcard-Shanthi Kumar V-v3

1. DevOps – Jenkins[2.9] Installation with Java 9 on Windows 10


jenkins

I am publishing  series of blogs on DevOps tools  practice. The interested people can keep watching this site or you can subscribe/follow.

In this blog we will see what are the pre-requisites for Jenkins 2.9 to install and how to install Jenkins.

 =====================================>

Visit my current running facebook groups for IT Professionals with my valuable discussions/videos/blogs posted:

 DevOps Practices Group:

https://www.facebook.com/groups/1911594275816833/about/

Cloud Practices Group:

https://www.facebook.com/groups/585147288612549/about/

Build Cloud Solution Architects [With some videos of the live students classes/feedback]

https://www.facebook.com/vskumarcloud/

 =====================================>


MicroServices and Docker [For learning concepts of Microservices and Docker containers]

https://www.facebook.com/MicroServices-and-Docker-328906801086961/

To setup Jenkins, you need to have Java 9 in your local machine.

Hence in the Step1 to setup Java, you need to follow the below steps:

STEP1: How to download and install JDK SE Development kit 9.0.1 ?:

go to URL:

http://www.oracle.com/technetwork/java/javase/downloads/jdk9-downloads-3848520.html

You will see the below page [as on today’s display]

Java Kit SE 9 download

From this web page, Click on Windows file jdk-9.0.1_windows-x64_bin

It will download.

Double click on the file.

You will see the series of screens, while it is doing installation. I have copied some of them here.Java SE 9 install scrn-2.png

Java SE 9 install scrn-1

Java SE 9 install scrn-3.png


Java SE 9 install scrn-4.png

You can change the directory if you want, in the above screen.


Java SE 9 install scrn-4-Oracle 3 billion.png


Finally you should get the below screen as installed it successfully.

Java SE 9 install scrn-5-complete

Now, you need to set the Java environment and path variable in Windows setting.

Java SE 9 install scrn-7-windows env setup2Java SE 9 install scrn-8-windows env setup3


My Java directory path is:

Java SE 9 install scrn-9-windows env setup4


Java SE 9 install scrn-10-windows env setup5.png

You  need to edit the below path variables also for the latest path:

Java SE 9 install scrn-11-windows env setup6Java SE 9 install scrn-12-windows env setup7.png

After you have done the settings, you can check the java version as below in a command prompt:

Java SE 9 install scrn-13-CMD-1

You should get the same version.

Now, You need a simple java program to run and check your compiler and runtime environment.

Please goto google search and check for “Java Hello wordl program”.

Follow the below URL:
https://en.wikiversity.org/wiki/Java_Tutorial/Hello_World!

Copy the program into a text file named as hellowworld.java

Then compile and run the program as below:

Java SE 9 install scrn-14-CMD-Javacompile&run-1.png

If you are getting the above, then your installed java software is working fine.

You need to remember the below:
To compile this program you need to use the below command in command prompt of that program directory:

D:\JavaSamples\Javatest>javac HellowWorld.java

To run the java program you need to use the below command:

D:\JavaSamples\Javatest>java HellowWorld
Hello World

Now, you can plan for setting up Jenkins.

STEP2: How to setup Jenkins on Windows ?:

Follow the below link to download Jenkins for Windows-x64
https://jenkins.io/download/thank-you-downloading-windows-installer/

It downloads the installer as below:
You can see the downloaded installer file for Jenkins.

Jenkins-installer-file1.png


How to install Jenkins?:
Now you can copy this file into a new directory as Jenkins.

I have copied into the below directory.

Jenkins-installer-file-copy1.png

You need to unzip this file.

Jenkins-installer-file-unzip1.png

You can see the new directory is created with its unzipped files:


Jenkins-installer-file-unziped-new Dir

You can double click on it and can see the below screen:


Jenkins-installer-file-double-click.png

I have changed the path as below:

Jenkins-installer-file-path.png

Click on install and say “Yes” in windows confirmation screen.


Jenkins-installer-file-path-install.png

You can see the below screen:

Jenkins-installer-install-complete1.png

Once you click on finish, it will take you to a browser:

Jenkins-initial browser1.png

Jenkins will have a default user id as “admin” and the password.
The password is available from the given path.

Jenkins-admin-initial-pwd-file

You can open this file in notepad as below:

Jenkins-admin-initial-pwd-file-open-notepad

Now, copy this password as below into windows clipboard.

Now you goto the Jenkins browser and paste this password.

Close your notepad.

Now, on browser press continue.

You can see the Jenkins initial  screen as below for plugins selection:


Jenkins-initial screen for plugins

Jenkins will have 100s of plugins. But there are default plugins those can be used initially to save you disk space and time. Hence now, you click on “Install suggested plugins”.

It will show the below screen as it is working for this activity:

Jenkins-default-plugins-install-screen1.png

You can see in the right side window the tasks what Jenkins is doing:Jenkins-initial screen for plugins-tasks1.png

You can also watch as it is doing one by one the plugins installation and the tasks on right side.
It might take more than 30 mts depends on your internet speed and the RAM.

I am copying some of the screens as it is moving on …


Jenkins-initial screen for plugins-tasks2.png

Once the plugins are installed, you can see the 1st screen to setup your 1st admin user id and password as below:

Jenkins-create-first-UID &amp; PWD

You can enter the details and click on “Save and Finish” button.

Now, it shows the below screen with Jenkins readyness to use:

Jenkins-is-Ready.png

When you click on “Start using Jenkins” button,
You can see the below screen as in the beginning of the Jenkins usage:

Jenkins-welcome-1st time.png

Please observe the right corner and verify your created user id.

Now, let us do some login and logout operations to make sure it is working.

When you logout you can see the below screen:

Jenkins-initial-logout-test

Now let us understand the url of Jenkins server which we are using:

When we install Jenkins in any machine either Windows or Linux.
By default its url should be : http://localhost:8080/
Your local host is your current machine Ip address.
You can see the screen now with the above url:

Jenkins-URL-test

Now, you can try one more option, check your ip address from command prompt as below:

Check-IPs-CMD.png

You can pickup the 1st IP address which displays from the command prompt screen.

And key-inn the below url in your browser:
http://192.168.137.1:8080/login?from=%2F

Your ip need to be used in place of 192.168.137.1

Now, let us see What is 8080?:
Every server software creates a port address to access its web pages from the installed machine. In our case Jenkins has been configured on 8080 port as default. The 8080 is a default port for Jenkins. Similarly other server softwares also will have their specific ports.

Now, I have used a different browser using the above url to access Jenkins web page as below:

Jenkins-using-IP & 8080-Port.png

Using the login screen I am logging into my admin user id: vskumar2017 , which was created earlier.

Login-UID-vskumar2017.png

You can also check in your windows services on Jenkins running status.
Please note on this setup, you have made a standalone Jenkins by using your PC or Laptop.

Now, you can restart your windows machine. You need to start Jenkins as fresh service.

To start Jenkins from command line
  1. Open command prompt.
  2. Go to the directory where your war file is placed and run the following command: java -jar jenkins.war
  3. OR One more  option is; go to your Jenkins directory in CMD window and execute: jenkins.exe start


Restart-Jenkins-CMD

Open browser and Use you can check the Jenkins access. It should be showing the login page.

How to remove Jenkins from your system?:

If you want to remove Jenkins from your system, you can find the  Jenkins Windows installer file from the Jenkins directory and double click on it. You can see the below window to choose your action:

Remove-repair-Jenkins.png

So far we have seen the installation of Java 9 and Jenkins.

Some times, you might need to configure other servers [Ex:Tomcat, etc,]. They might also use 8080 port. Hence there will be conflict. We need to change the port# in that case.

Now, How to change your 8080 port to other port#?:

Please find Jenkins.xml in Jenkins dir:

Ex:

In my system I have the URL:D:\Jenkins\Jenkins 2.9

You need to replace 8080 with the  required port# in the below line:

<arguments>-Xrs -Xmx256m -Dhudson.lifecycle=hudson.lifecycle.WindowsServiceLifecycle -jar “%BASE%\jenkins.war” –httpPort=8080 –webroot=”%BASE%\war”</arguments>

In the next blog we can see some simple exercise with Jenkins by creating and running the project into different builds.

https://vskumar.blog/2017/11/26/2-devops-jenkins2-9-how-to-create-and-build-the-job/


https://vskumar.blog/2018/02/26/15-devops-how-to-setup-jenkins-2-9-on-ubuntu-16-04-with-jdk8/

Note to the reader/user of this blog:

If you are not a student of my class, and looking for it please contact me by mail with your LinkedIn identity. And send a connection request with a message on your need. You can use the below contacts. Please note; I teach globally.

Vcard-Shanthi Kumar V-v3

If you want to learn for Ubuntu installation you can visit:

https://vskumar.blog/2018/02/26/15-devops-how-to-setup-jenkins-2-9-on-ubuntu-16-04-with-jdk8/