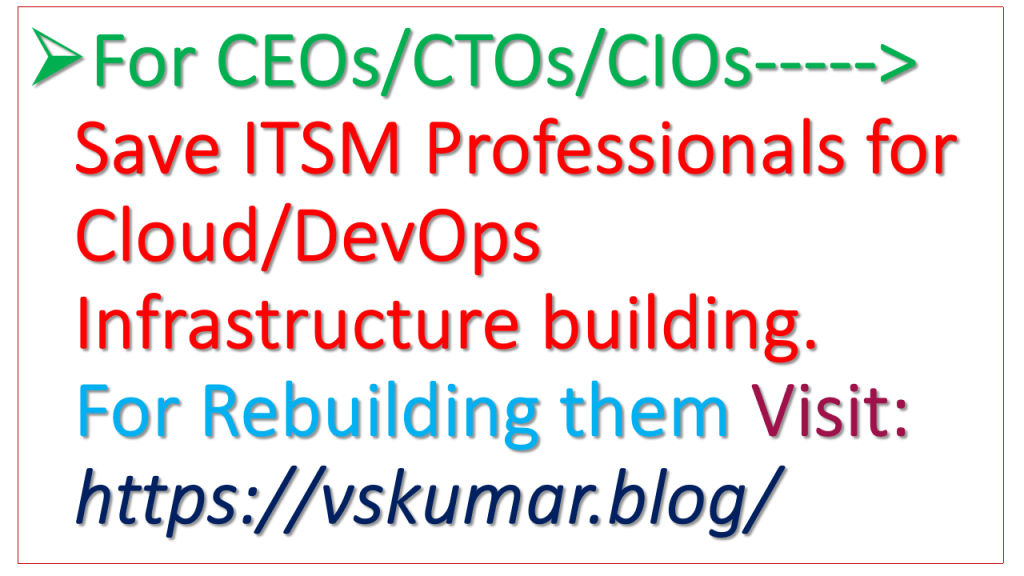
Rebuild ITSM for Cloud/DevOps:Adapting to the Changing IT Landscape: How ITSM Professionals Can Stay Relevant with Cloud and DevOps
Before going through this blog; you should be aware of the demand of this coaching in the Global IT JOB market from URL:
In recent years, the IT industry has undergone significant changes due to the rise of cloud computing and DevOps. As a result, many traditional ITSM (IT Service Management) professionals are finding themselves in a challenging situation. They must either adapt to these new methodologies and tools or risk becoming obsolete. In this blog post, we will discuss how traditional ITSM professionals can convert into Cloud/DevOps roles and the skills they need to be groomed to make this transition.
First, let’s understand the difference between ITSM, Cloud, and DevOps. ITSM is a set of best practices for managing and delivering IT services to meet business needs. Cloud computing is the delivery of on-demand computing resources such as servers, storage, and applications over the internet. DevOps is a methodology that focuses on collaboration between development and operations teams to deliver software faster and more reliably.
Now, to move from ITSM to Cloud/DevOps, traditional ITSM professionals must learn the relevant tools and methodologies. Cloud and DevOps are all about automation, scalability, and flexibility. Therefore, professionals need to have a good understanding of cloud infrastructure, virtualization, and automation tools like AWS, Azure, Puppet, Chef, and Ansible.
Apart from technical skills, professionals need to develop their soft skills, such as collaboration, communication, and problem-solving skills. These skills are essential for working effectively in a DevOps team where communication and collaboration are critical.
To learn these skills, professionals can attend training programs, read relevant books and articles, and participate in online communities. Many online courses and certifications are available, such as AWS Certified DevOps Engineer, Azure DevOps Engineer Expert, and Google Cloud DevOps Engineer.
Moreover, professionals need to gain hands-on experience by working on projects that involve cloud infrastructure and automation tools. They can start by participating in hackathons, contributing to open-source projects, or building their projects to gain practical knowledge.
In conclusion, traditional ITSM professionals must adapt to the changing IT landscape and acquire new skills to stay relevant. They must be willing to learn and embrace new methodologies and tools to succeed in their careers. COEs (Centers of Excellence) can play a significant role in providing training and support for professionals to make this transition. By doing so, IT companies can retain their knowledgeable employees and stay competitive in the market. At the same time, individuals must take responsibility for their careers and seek expert coaching to make this transition smoothly.
Your effort in practicing tools is required here.
Also be aware on the below points [Published in a blog also] :
I feel; For every DevOps Professional learning Infra building activity is mandatory. See the issues, what you are facing within them. Atleast one of them you are facing from your end as mentioned in the below slide/video. Then there is a gap in your implementation practice with lack of learning in a right method with best practices. So think on your actions after the below videos watching!
The new Internship programme is made for the working IT Professionals, AS PART TIME. WHICH IS ONGOING.
Please see the below blog for details and also watch the discussion with a new participant on the size of the POCs during the coaching:
https://vskumar.blog/2020/10/26/aws-devops-part-time-internships-for-it-professionals-interviews/
You can also see the below blog/videos towards ITSM professionals exp usage for Cloud/DevOps Architect:
https://vskumar.blog/2020/02/15/do-you-want-to-become-cloud-cum-devops-architect-in-one-go/
What IT roles can vanish with Cloud transition ?
If you are in the below roles, in the current recession you will be targeted for pinkslip among the IT professionals as 1st exit group. What you need to do on your career replan. Please see/follow the blog/videos with patience.
As per my observation and practice with the trending technology [Cloud], all the Cloud services vendors have inbuilt serverless computing for many services. The following roles are going to be vanished or reskilled. But if they are kept under recession staff cut, these professionals need to take care of their career.
1. DBA:–>The DBA tasks are embedded as part of these services. So the DBAs used to sit hours together in the past to perform many mundane tasks. Now these all are automated.
2. Similarly, many other tasks are related to infra roles; Network admin/Sys-Admin are also automated through Cloud services.
3. As a consolidation all these 3 roles are clubbed into one role of Cloud Engineer. This role’s major task is to automate all the Cloud setup related activities under IAC[Infrastructure As Code]. In future only the IAC will sustain to save the cost to IT by automating the cloud setup creation activity.
4. If any professional need to compete with this role means; they need to understand the Infra needs and the past roles tasks in depth. Along with the multiple Infra related architecture scenarios, with in-depth knowledge on Cloud technology. Then only they can analyze the IAC requirements clearly to write the code and test it. This is the domain analysis and design activity they need to consider apart from the Cloud technology learning.
5. We can also see the Storage engineer role. All the Cloud vendors have the Cloud Storage services. With them mundane tasks creation/maintenance is vanished. Hence this role also will not exist.
The below video has the discussion on: A) What IT Roles can vanish after migrating to Cloud? B) How the roles/tasks are being transformed to Cloud through serverless computing technology ? C) Why anybody can learn and do the past Infra roles with Cloud ? D) What all they need to learn ? E) How the organizations can demand an employee to convert into modern technology before taking a decision for a pink slip serving ?
Finally, what are the following roles and their tasks:
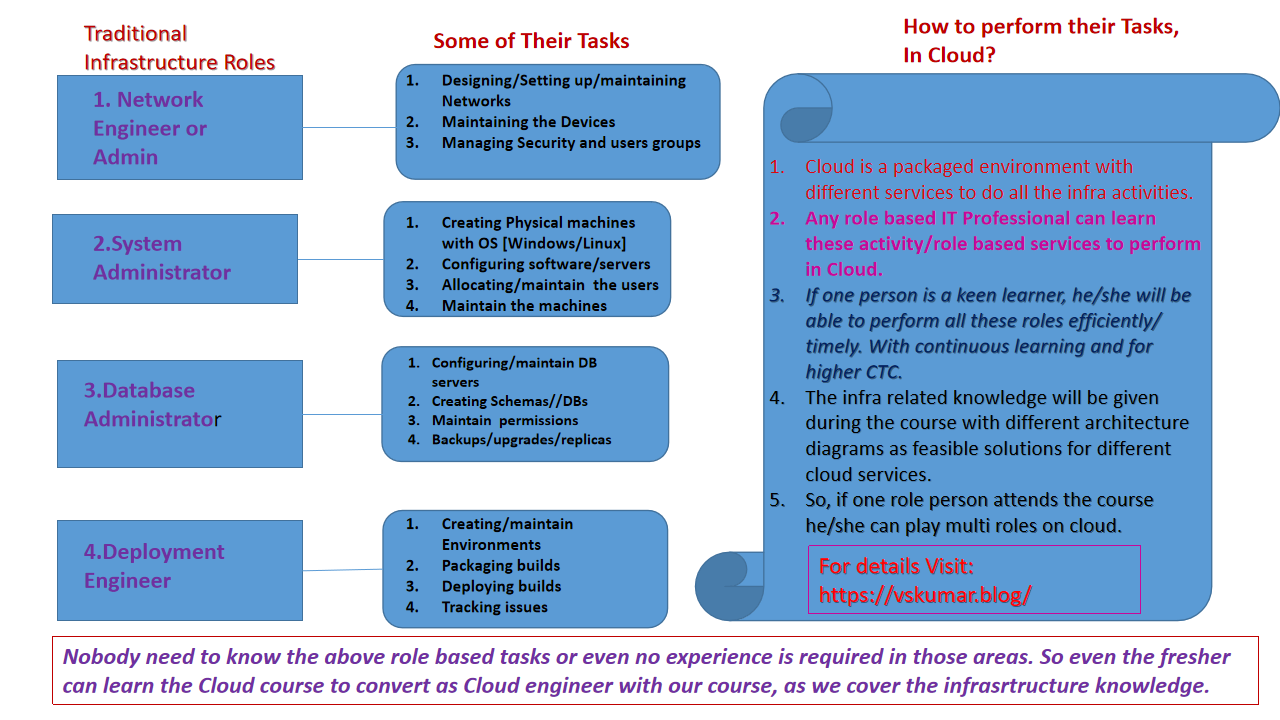
Traditional Infrastructure building roles:
1.Network Admin/Engineer
2.System Administrator
3.Database Administrator
4. Deployment Engineer
5. Storage Engineer — There is a separate video done for this role education:
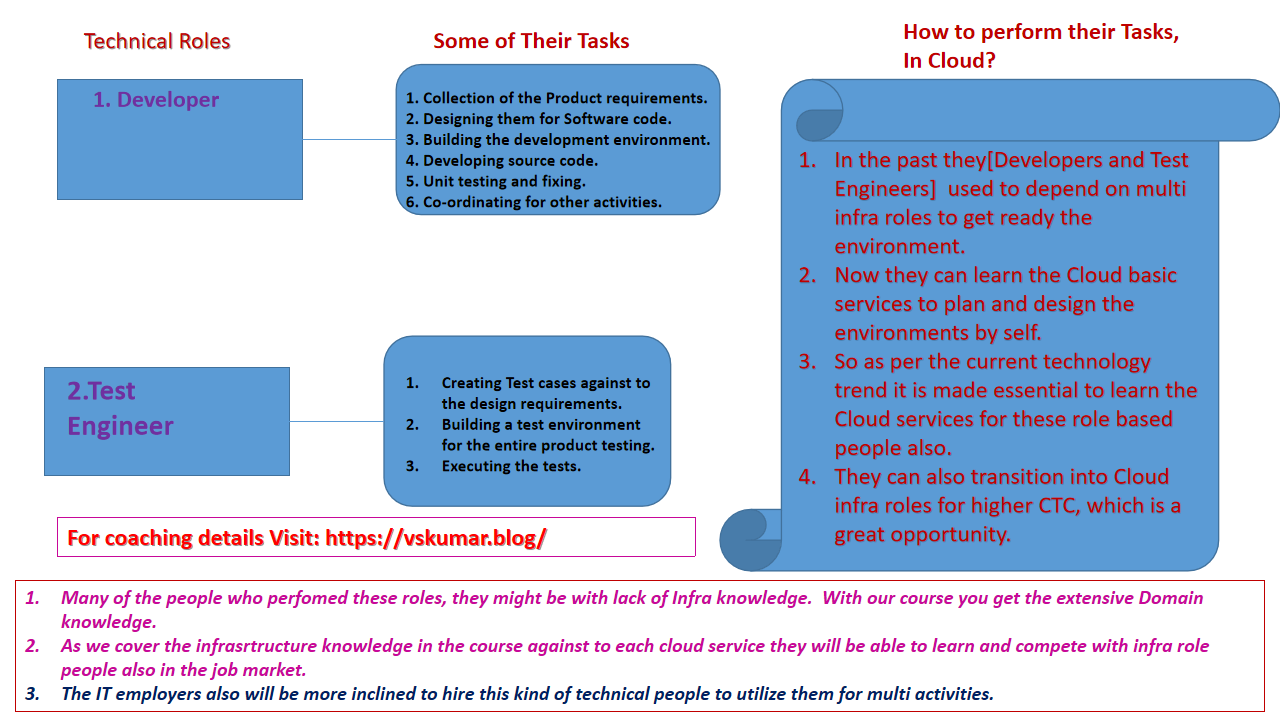
Technical Roles:
1.Developer
2.Test Engineer/Analyst
F) Among the above which role can pickup faster the Cloud/DevOps Automation technology ?
G) Then How these roles can perform in Cloud with faster deployment ?
H) Why and how the manpower reduction happen after Cloud implementation ?
I) Why do you need to learn from the experienced IT mentors to transform into modern technology ?
K) Some people say, they can learn by self. How much they can learn and cope-up with the current market needs on various technologies to settle in modern technology ? [refer to point#5 in this blog].
L) Why do you need to spend/invest more money to re-settle in the modern technology ?
Note: Along with this video, there are multiple blogs I have published with Videos links to make awareness to the IT Professionals. You see those blogs from this site itself.
For further understanding please read the below text:
In the current IT World Cloud computing became regular practice for any IT Professional. Any cloud services we use, we need to know the current/traditional infrastructure setup. But every IT professional may not have that background/knowledge to understand. Because in this industry each of us played different roles.
The Infra activities handled IT Professional only will come to know this knowledge and will have experience. But the industry needs every IT employee need to know this knowledge apart from the Cloud service provider [Ex: AWS, Azure, GC, etc..] products operations. [Eventhough, if you are a certified Solutions architect with that Cloud service provider.]
Then only whoever the professionals are certified they will be able to use these products/services and implement them under cloud setup. Hence the Infra domain knowledge or experience is mandated for every IT professional who is working for Cloud services or in that infra setup. I have been hearing during Cloud professionals recruitment the interviewers are keeping some questions on this area also. If one understand the Network domain setup then only they will be able to design the Cloud architecture. Hence more employers are worried to have this domain knowledge with the Certified and recruited Cloud professionals.
I have started a Cloud Practices group to educate/share the IT professionals with this domain knowledge. The below link can be used to join/apply:
https://www.facebook.com/groups/585147288612549/about/
Note:
- I also have special coaching with this domain knowledge coverage using AWS.
- This kind of coaching you may not find everywhere. You can see the detail/discussion: https://vskumar.blog/2020/02/15/do-you-want-to-become-cloud-cum-devops-architect-in-one-go/
- Visit the discussion points from the above site to know the level of the coaching.
- Also, visit the blog for course details: https://vskumar.blog/2020/01/20/aws-devops-stage1-stage2-course-for-modern-tech-professional

 Why do you need to learn from Infra domain knowledge as certified Cloud Professional ?